How to Automate Marketing Emails
Contents
Setting up automated marketing emails is the best way to create effective marketing and retention strategies with minimal effort. We’re going to walk you through how to do this. But first, let’s review the tools you’ll be using:
Playbook CRM: This is a list of all of your subscribers’ (new and old) email addresses, located in the Admin Panel.
Klaviyo: This is the tool you will use to build your email lists and marketing flows. You will need to pay for a subscription to use it.
Zapier: This is the tool you will use to automate. It’s the middleman to connect your list in the CRM to the emails you want to send in Klaviyo. You will need to pay for a subscription to use this.
Think of it this way: When a new contact gets added into the CRM, Zapier picks up on that and adds it to the appropriate email list in Klaviyo. Then Klaviyo sends automated emails. Let’s set it up!
Step 1: Create Accounts
You need accounts for both Klaviyo and Zapier.
Klaviyo: Purchase a plan based on the amount of email subscribers you have and the functionality you’re looking for.
Zapier: Purchase a plan that coincides with the amount of emails you will automate. Start smaller if needed and adjust once you get a better idea.
How many automated emails should I set up?
How many automated email campaigns you decide to run are up to you. At a minimum, we recommend creating a welcome campaign for new subscribers and a win-back campaign for canceled subscribers. Here are all of the options available to you:
New subscriber (welcome campaign)
New trial (welcome campaign)
Subscription renewal (notification of renewal)
Subscription cancel (notification of cancellation + win-back campaign)
Subscription upgrade (thank/acknowledge monthly to annual upgrade)
Subscription resumed (welcome back)
For each campaign you choose to run we recommend researching best practices to see how many emails you should send in each campaign and to get ideas of content for each email — there’s so much helpful info online just by doing a simple Google search (i.e. best win-back campaign strategy)!
Step 2: Create an Email List in Klaviyo
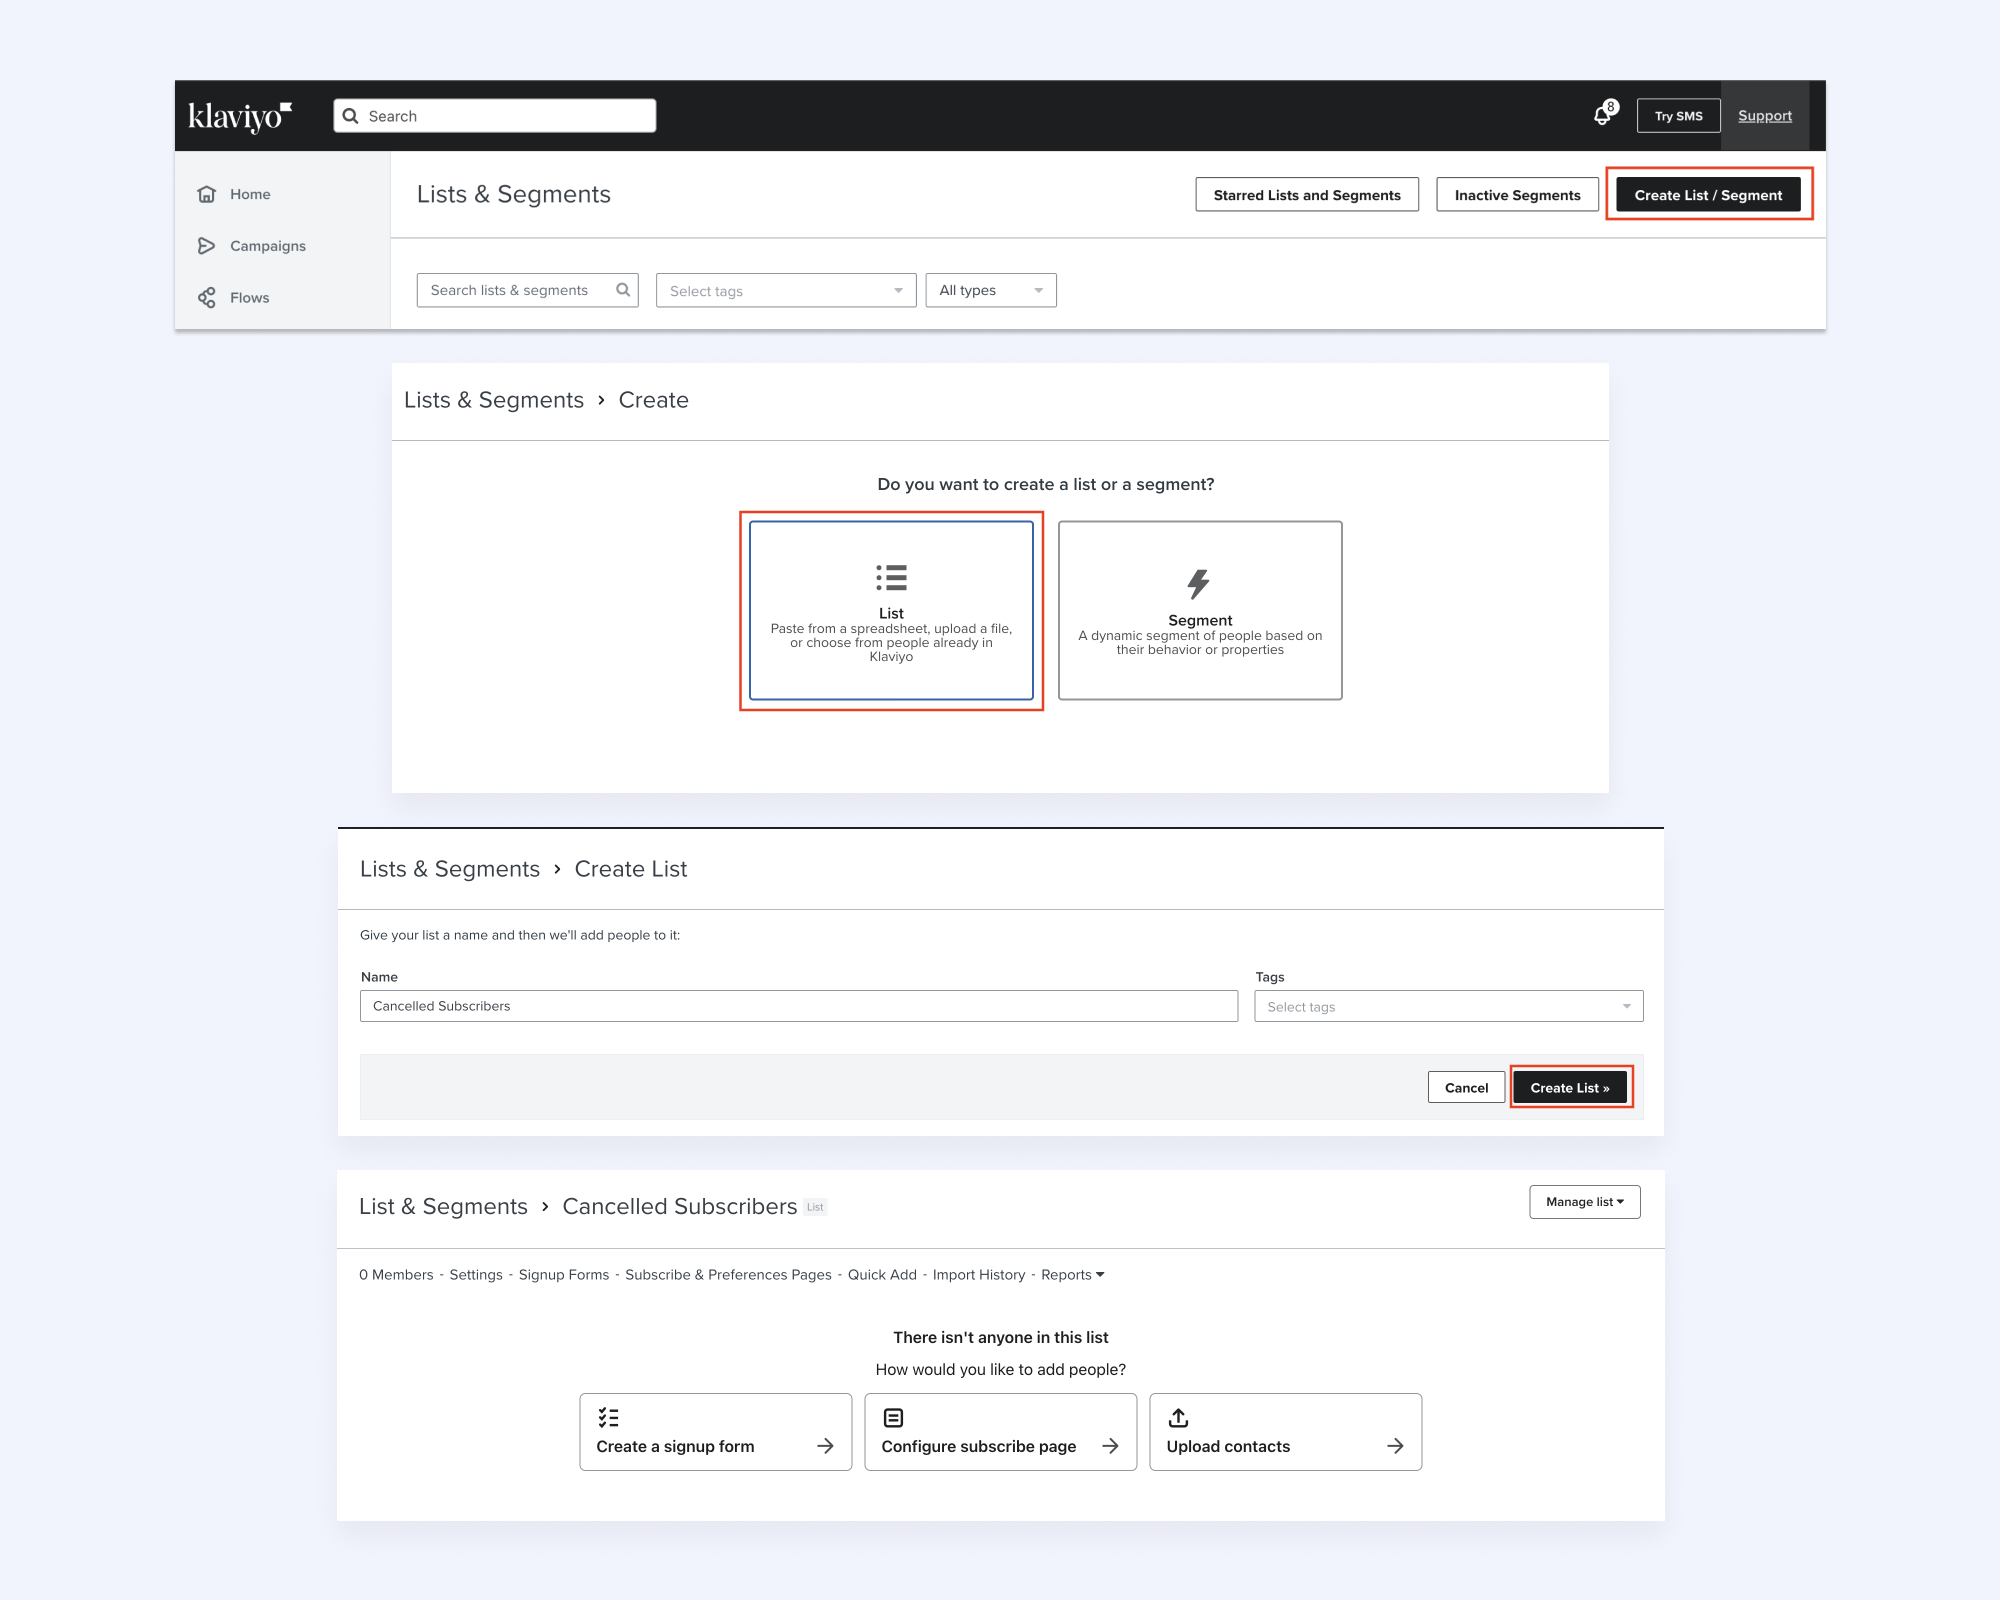
1. Select “Audience” from the left-hand menu bar and then “Lists & segments”. Click on the button in the upper right hand corner “Create List/Segment”. Select “List” and input a name (i.e. Canceled subscribers) and then click “Create List”. This list will be empty for now, but this is where new canceled subscribers will automatically be added.

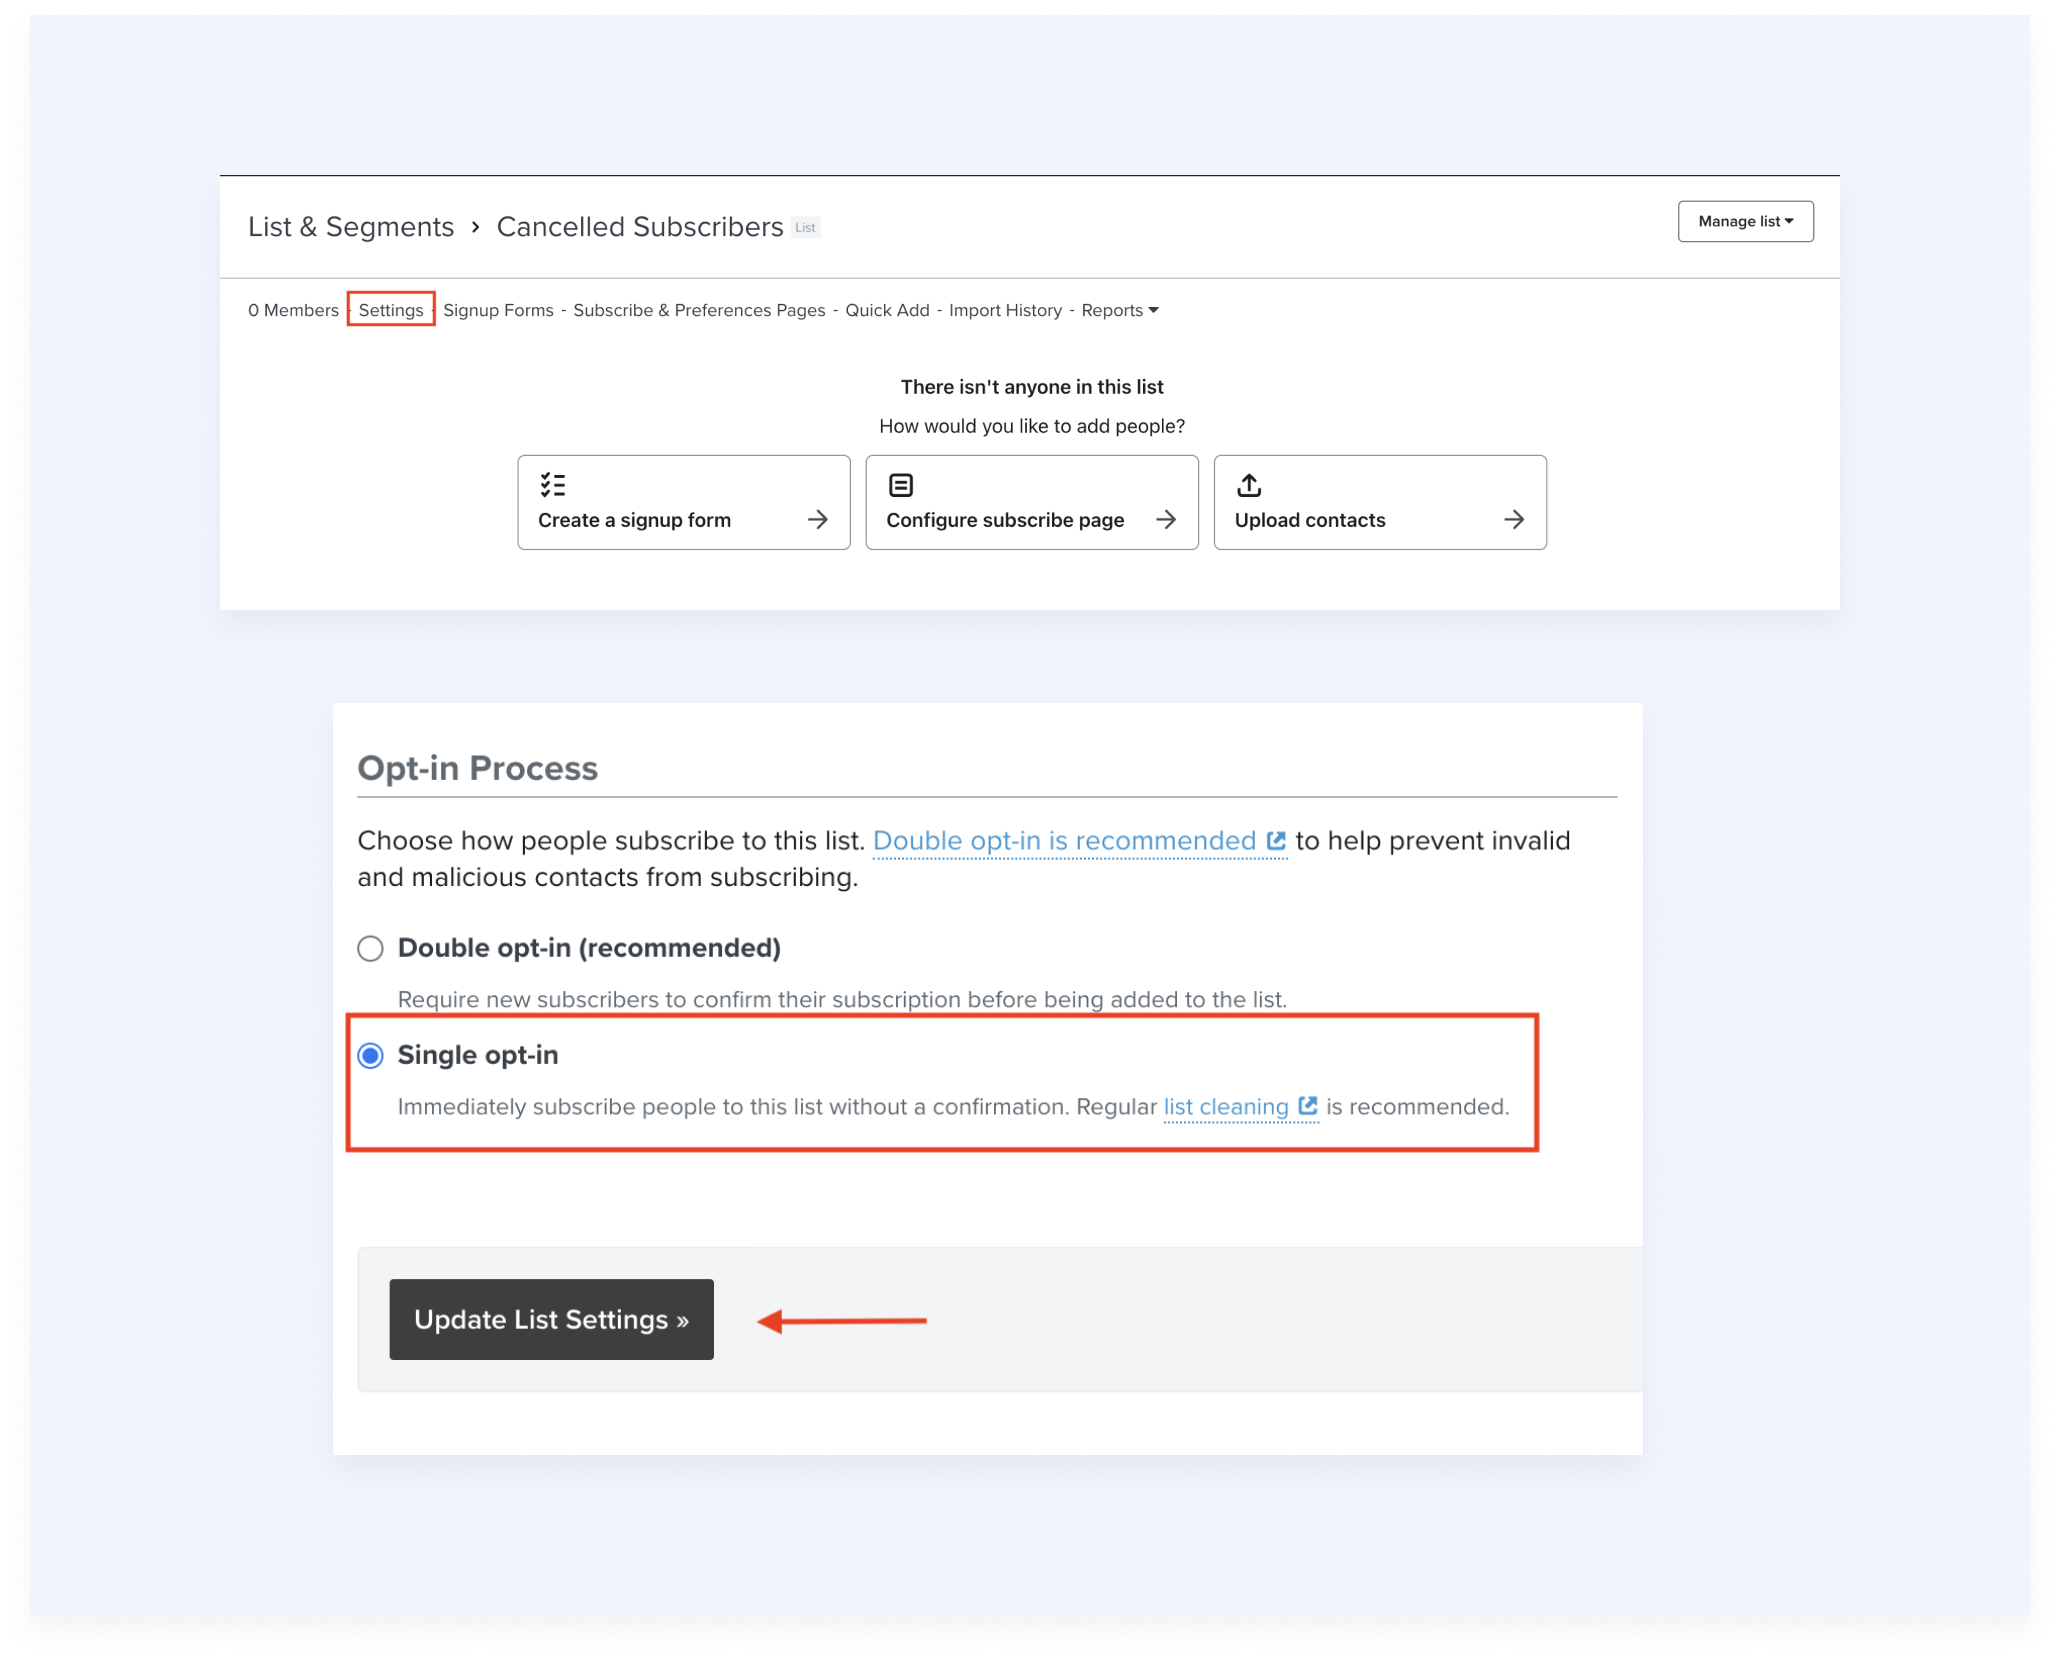
2. Click on the “Settings” option in the newly created list. Elect “Single opt-in” and then click “Update List Settings”. Since users have already opted in to marketing via Playbook when they purchased a subscription this can be turned off.
Step 3: Connect Zapier to the CRM
You will need to connect Zapier to the CRM using webhooks. A webhook is an automated message sent in between apps when something happens. So, in the canceled users example we need to build a webhook that links the canceled users in the CRM to Zapier — this will enable all new canceled users recorded by the CRM to be updated in Zapier too. Read more about webhooks here.
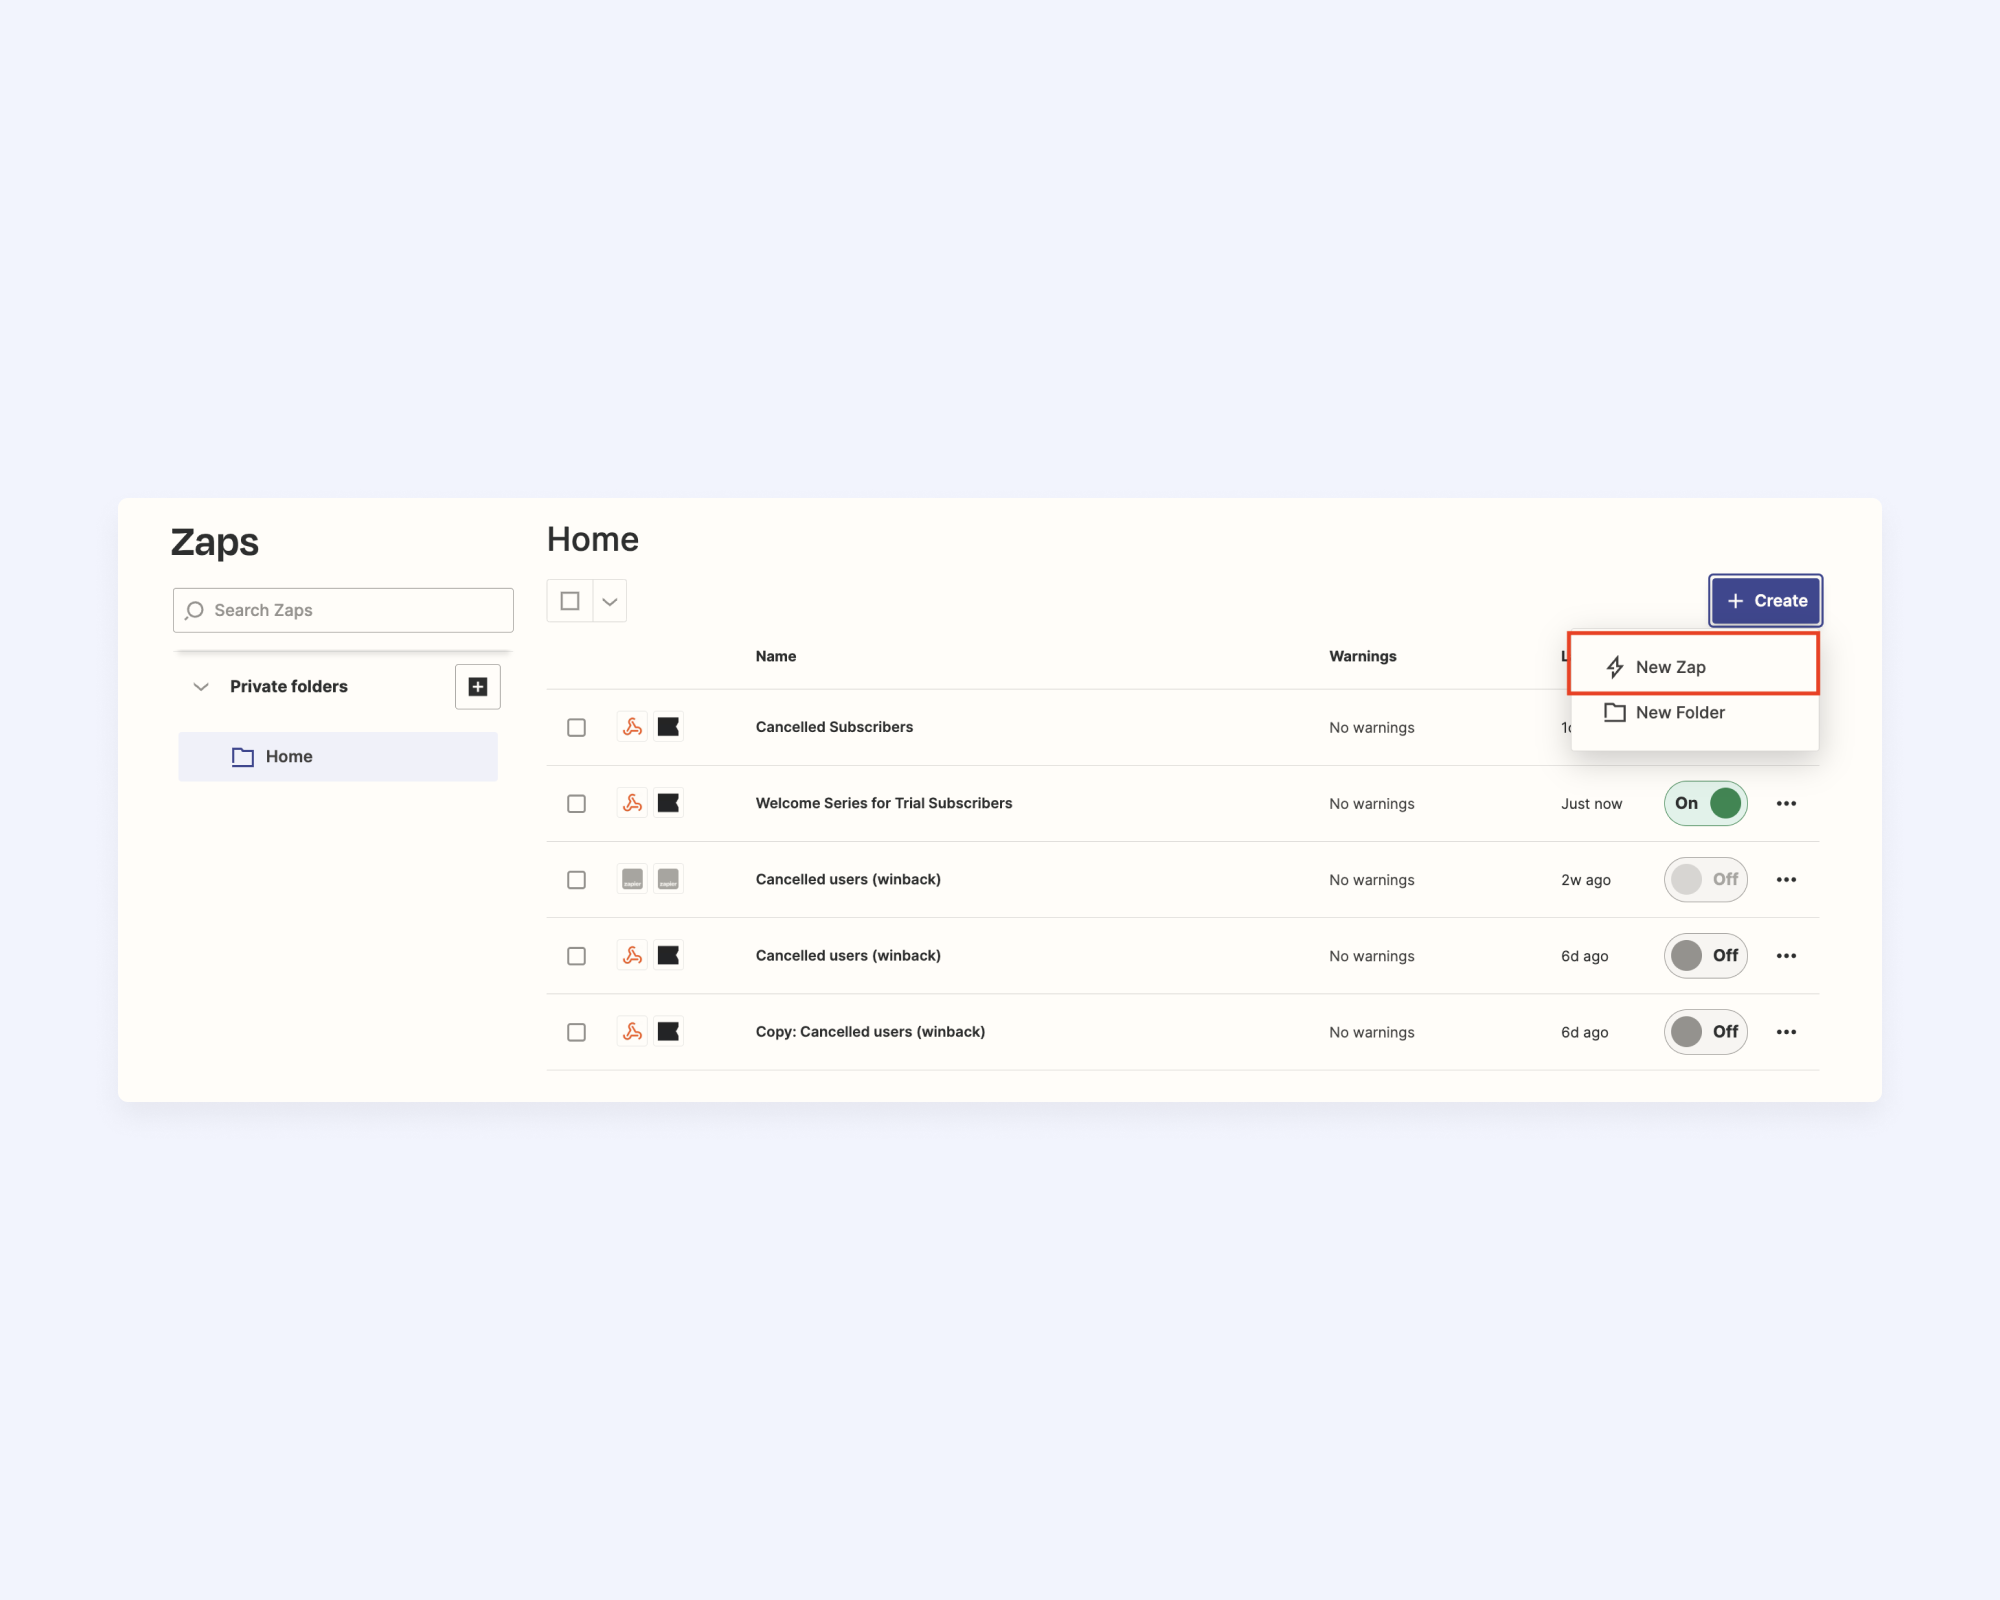
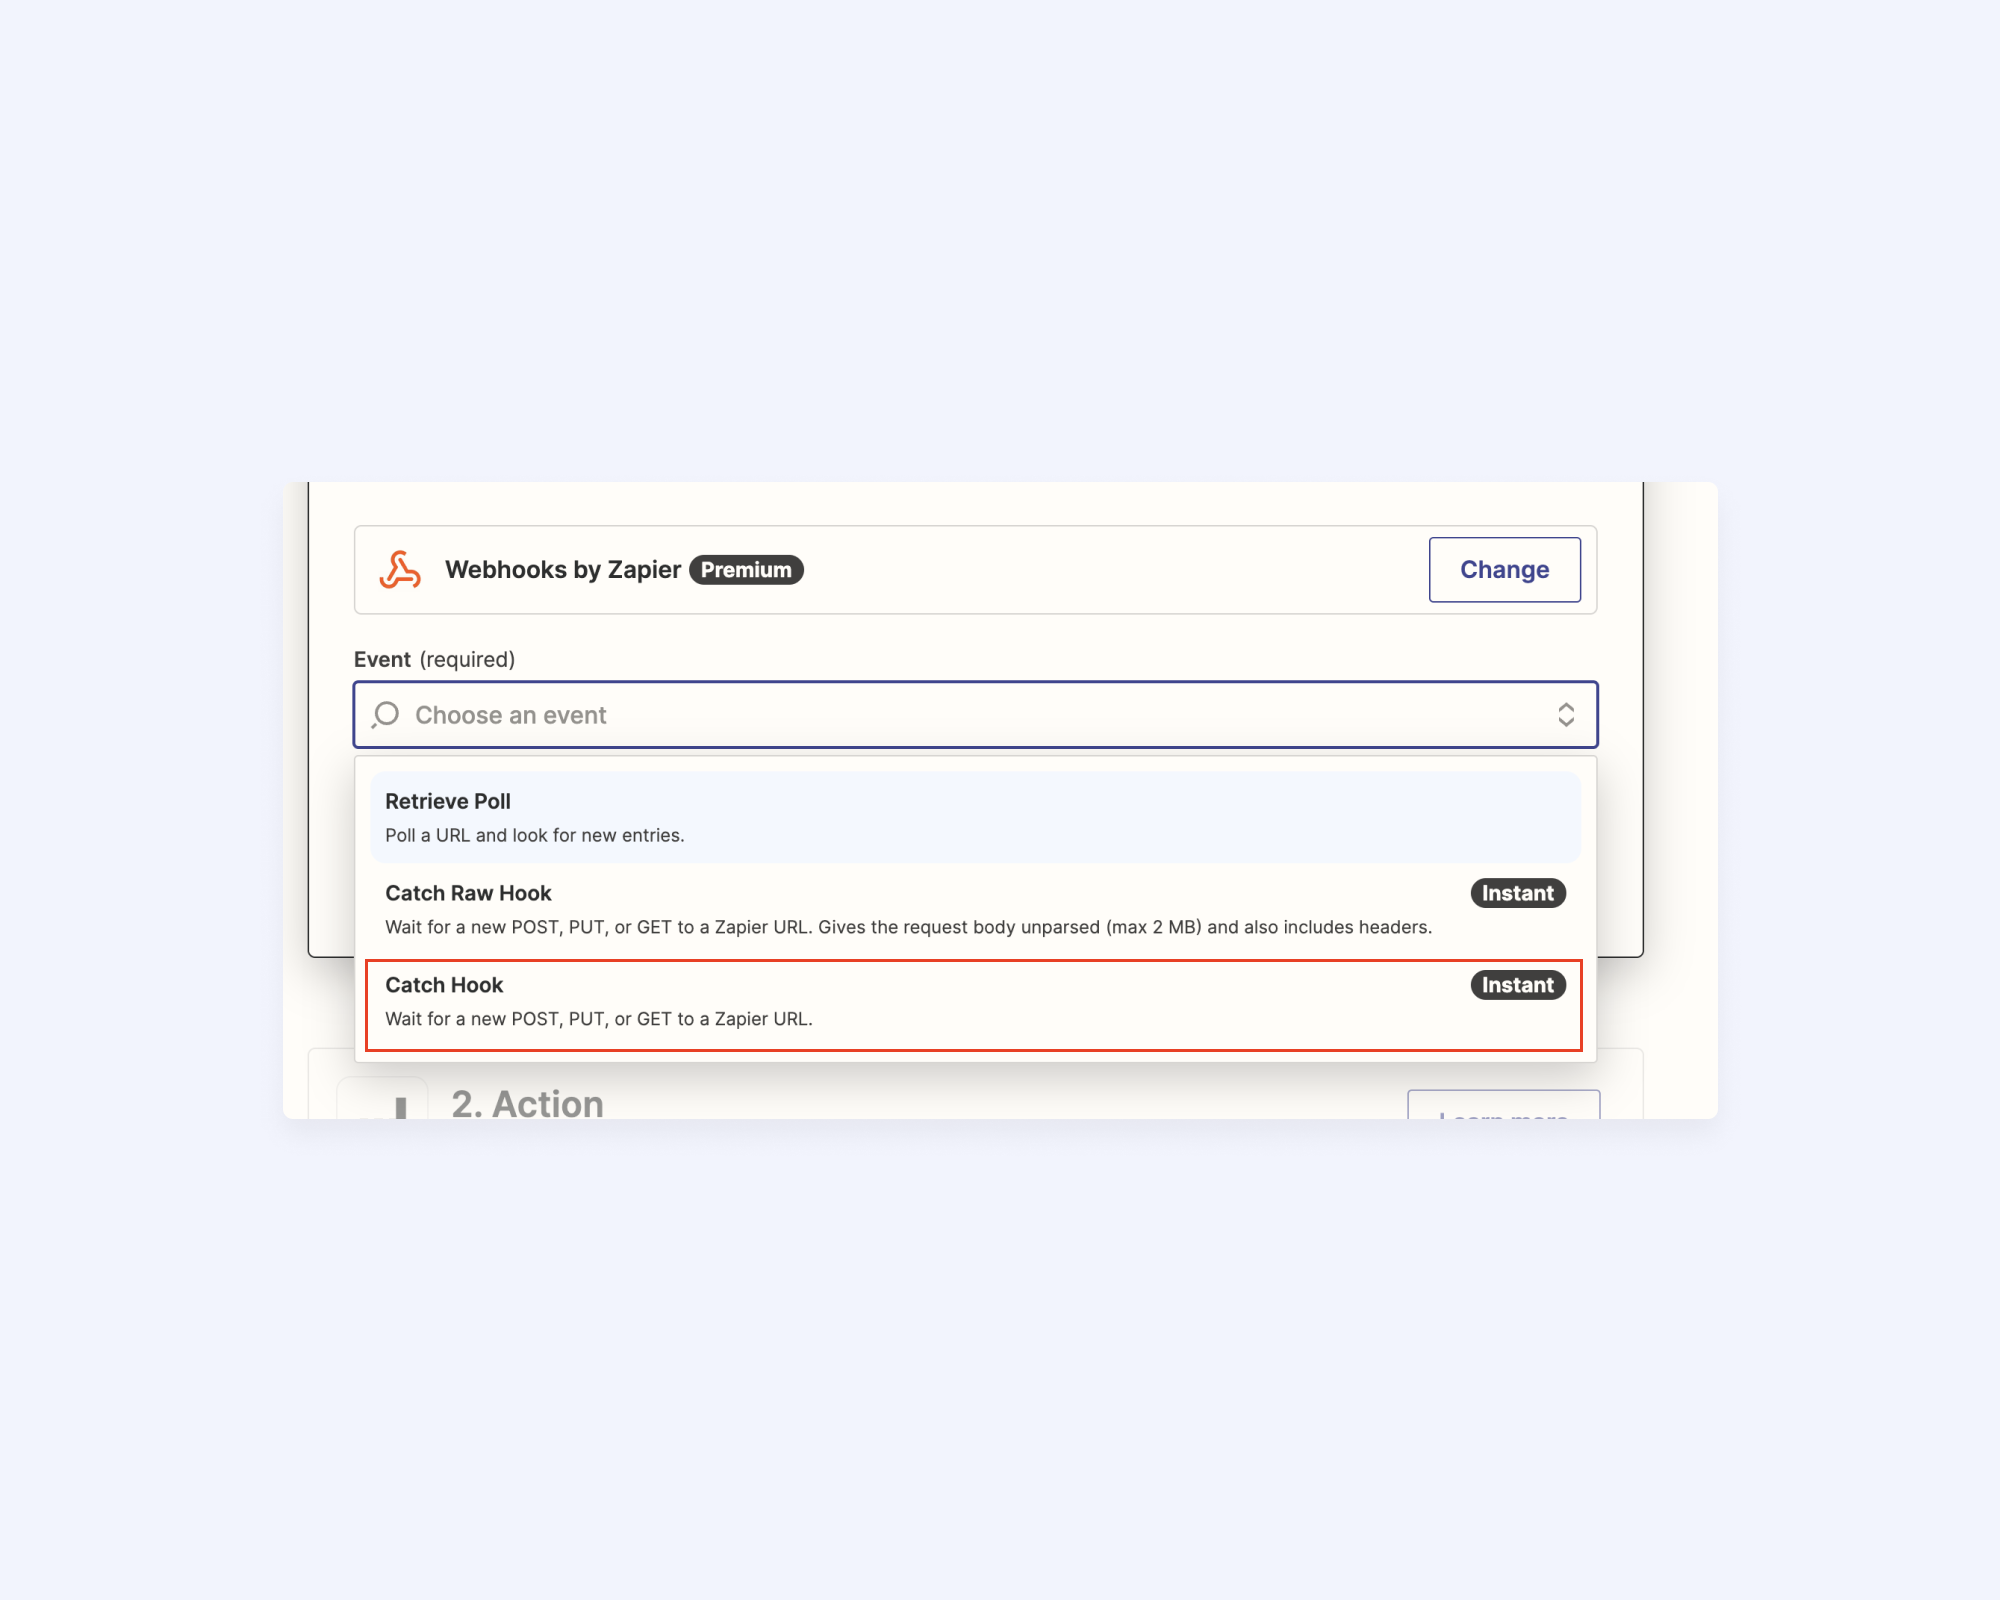
1. In Zapier, click “+Create” in the upper right hand corner and then “New Zap”. Then, Click “Webhooks by Zapier”.
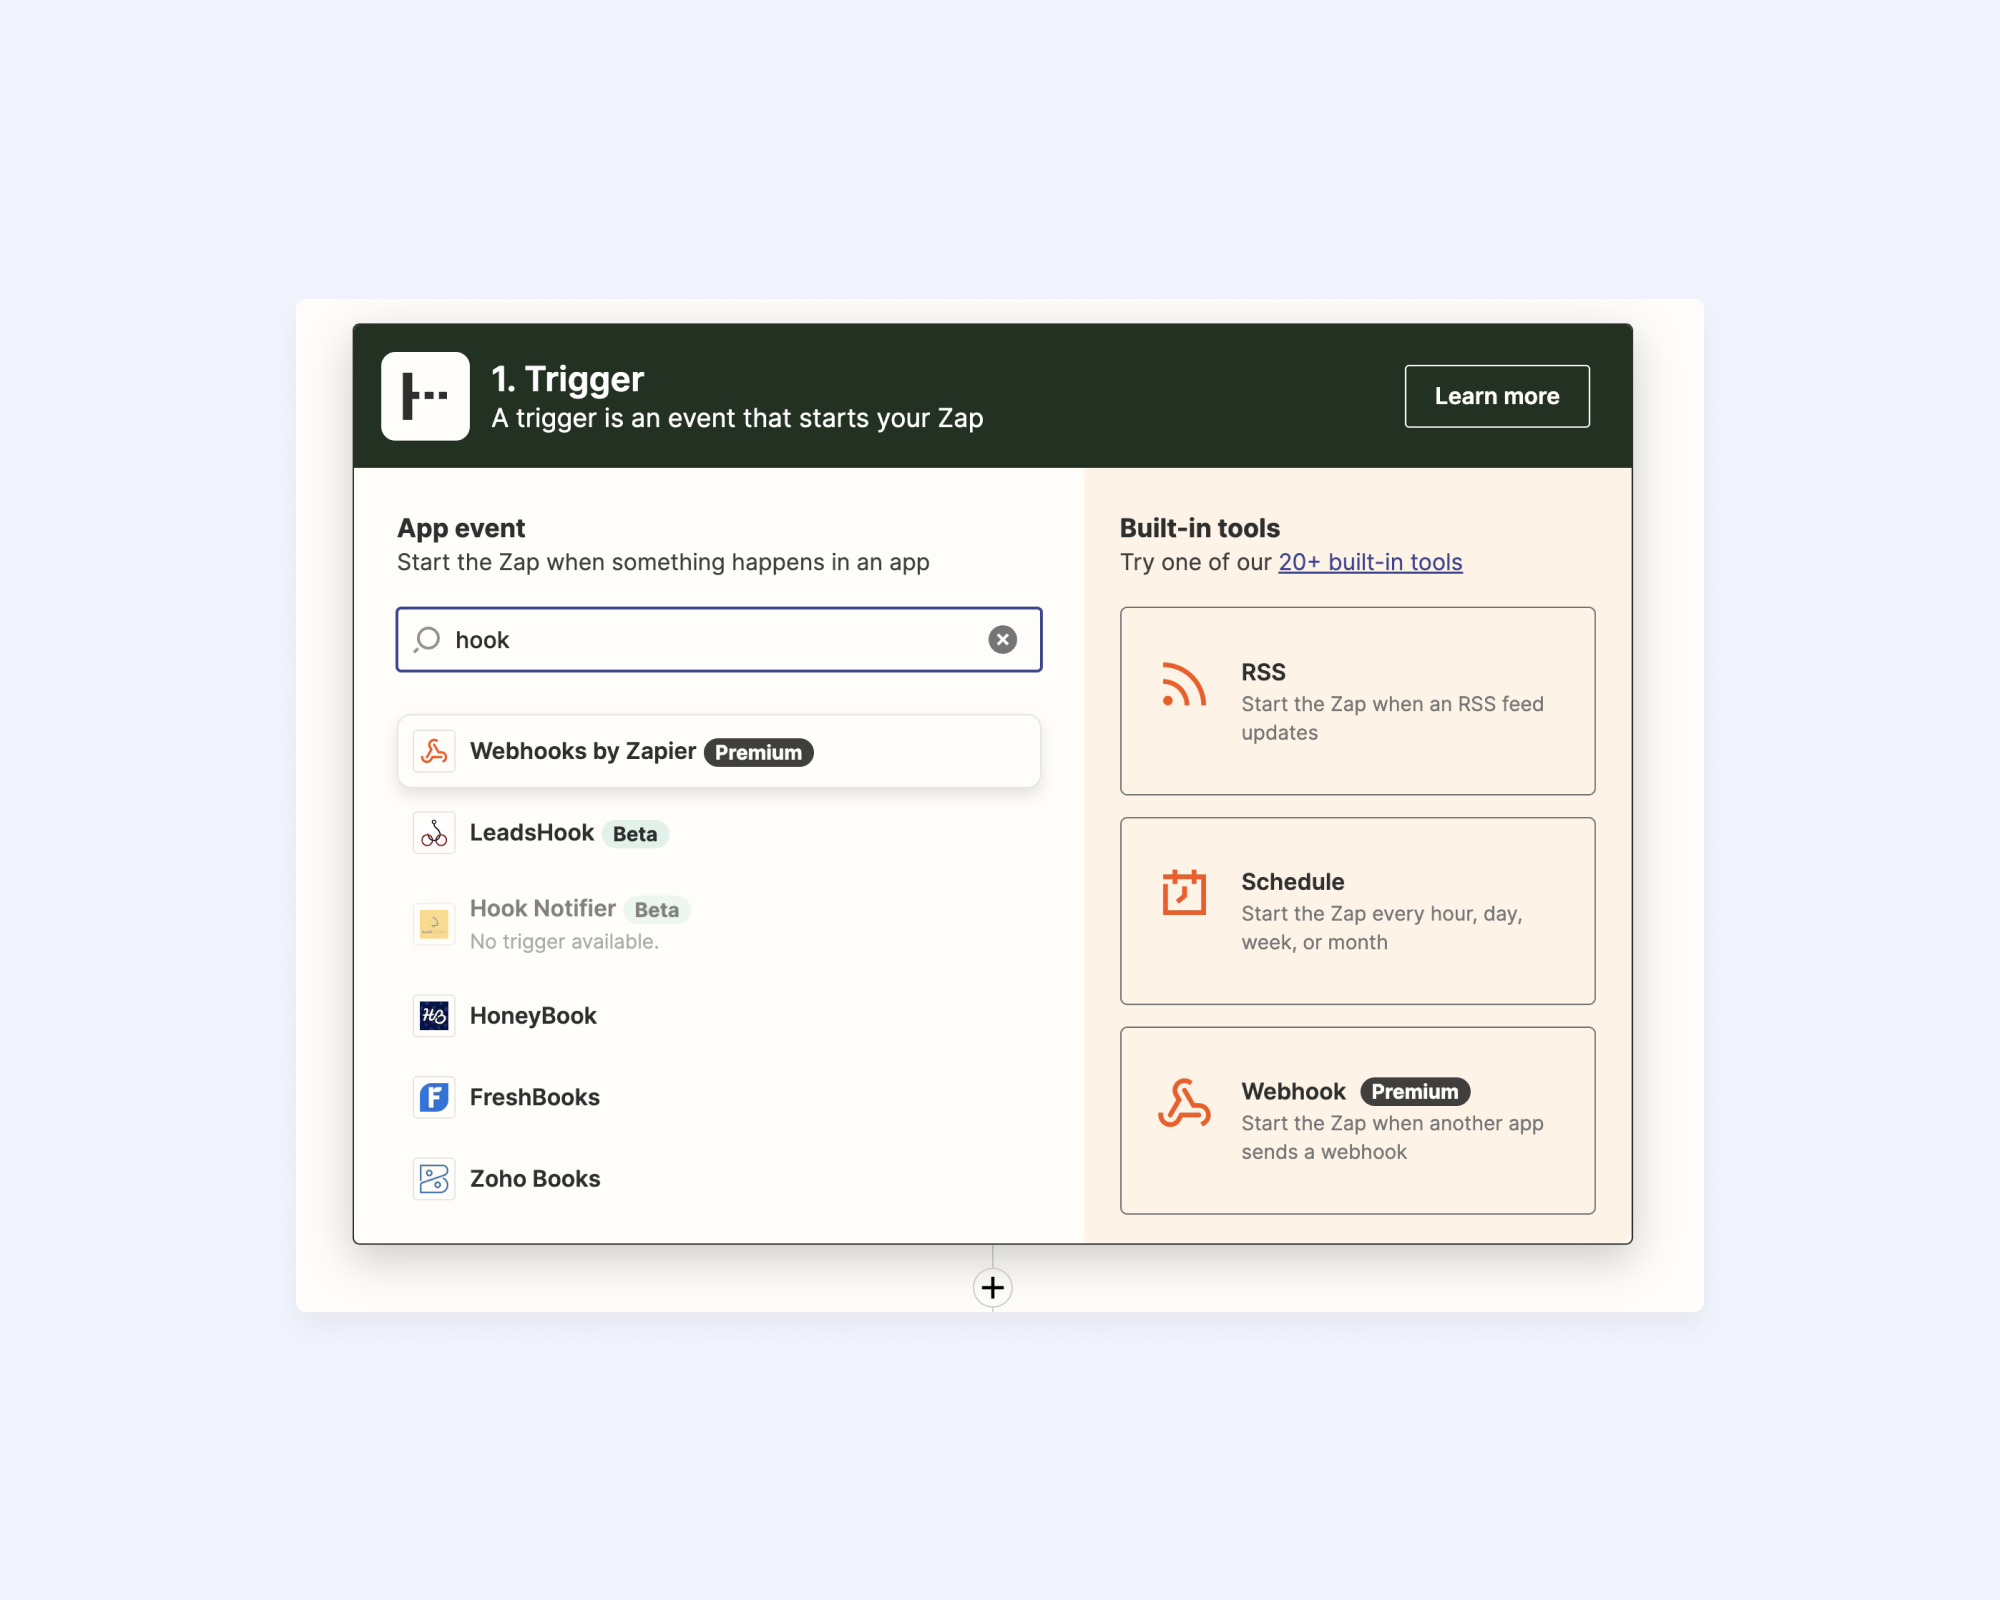
2. In the “Event” dropdown menu select “Catch Hook”.
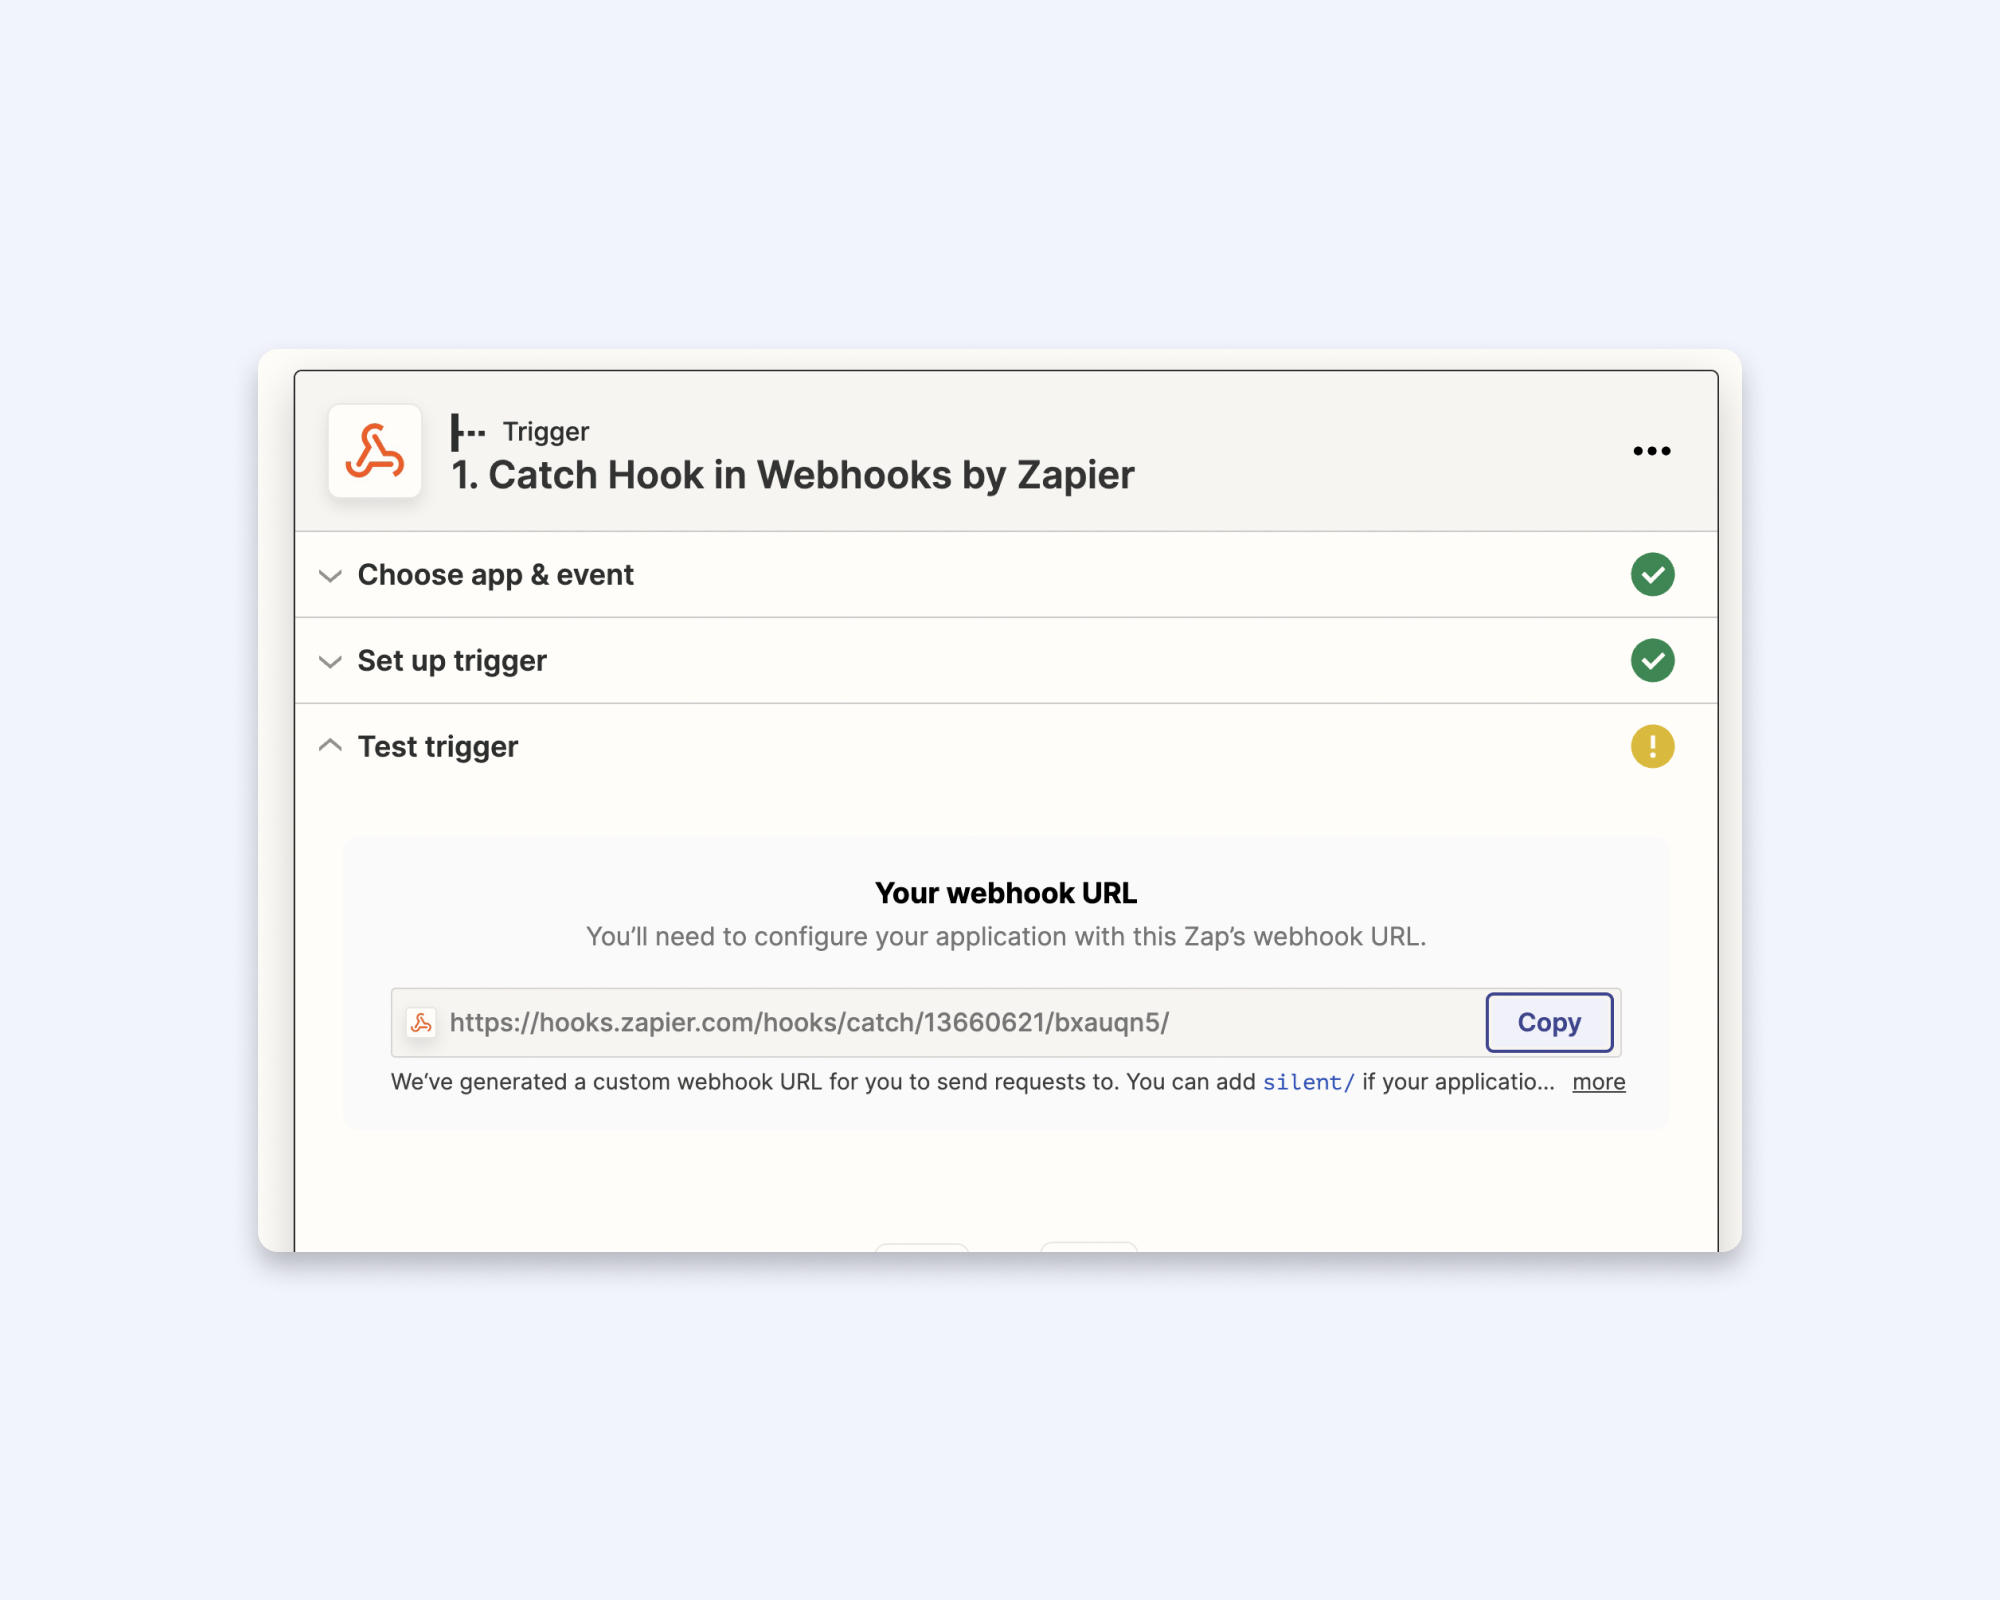
3. Select “Test trigger” and then copy the URL you see there.
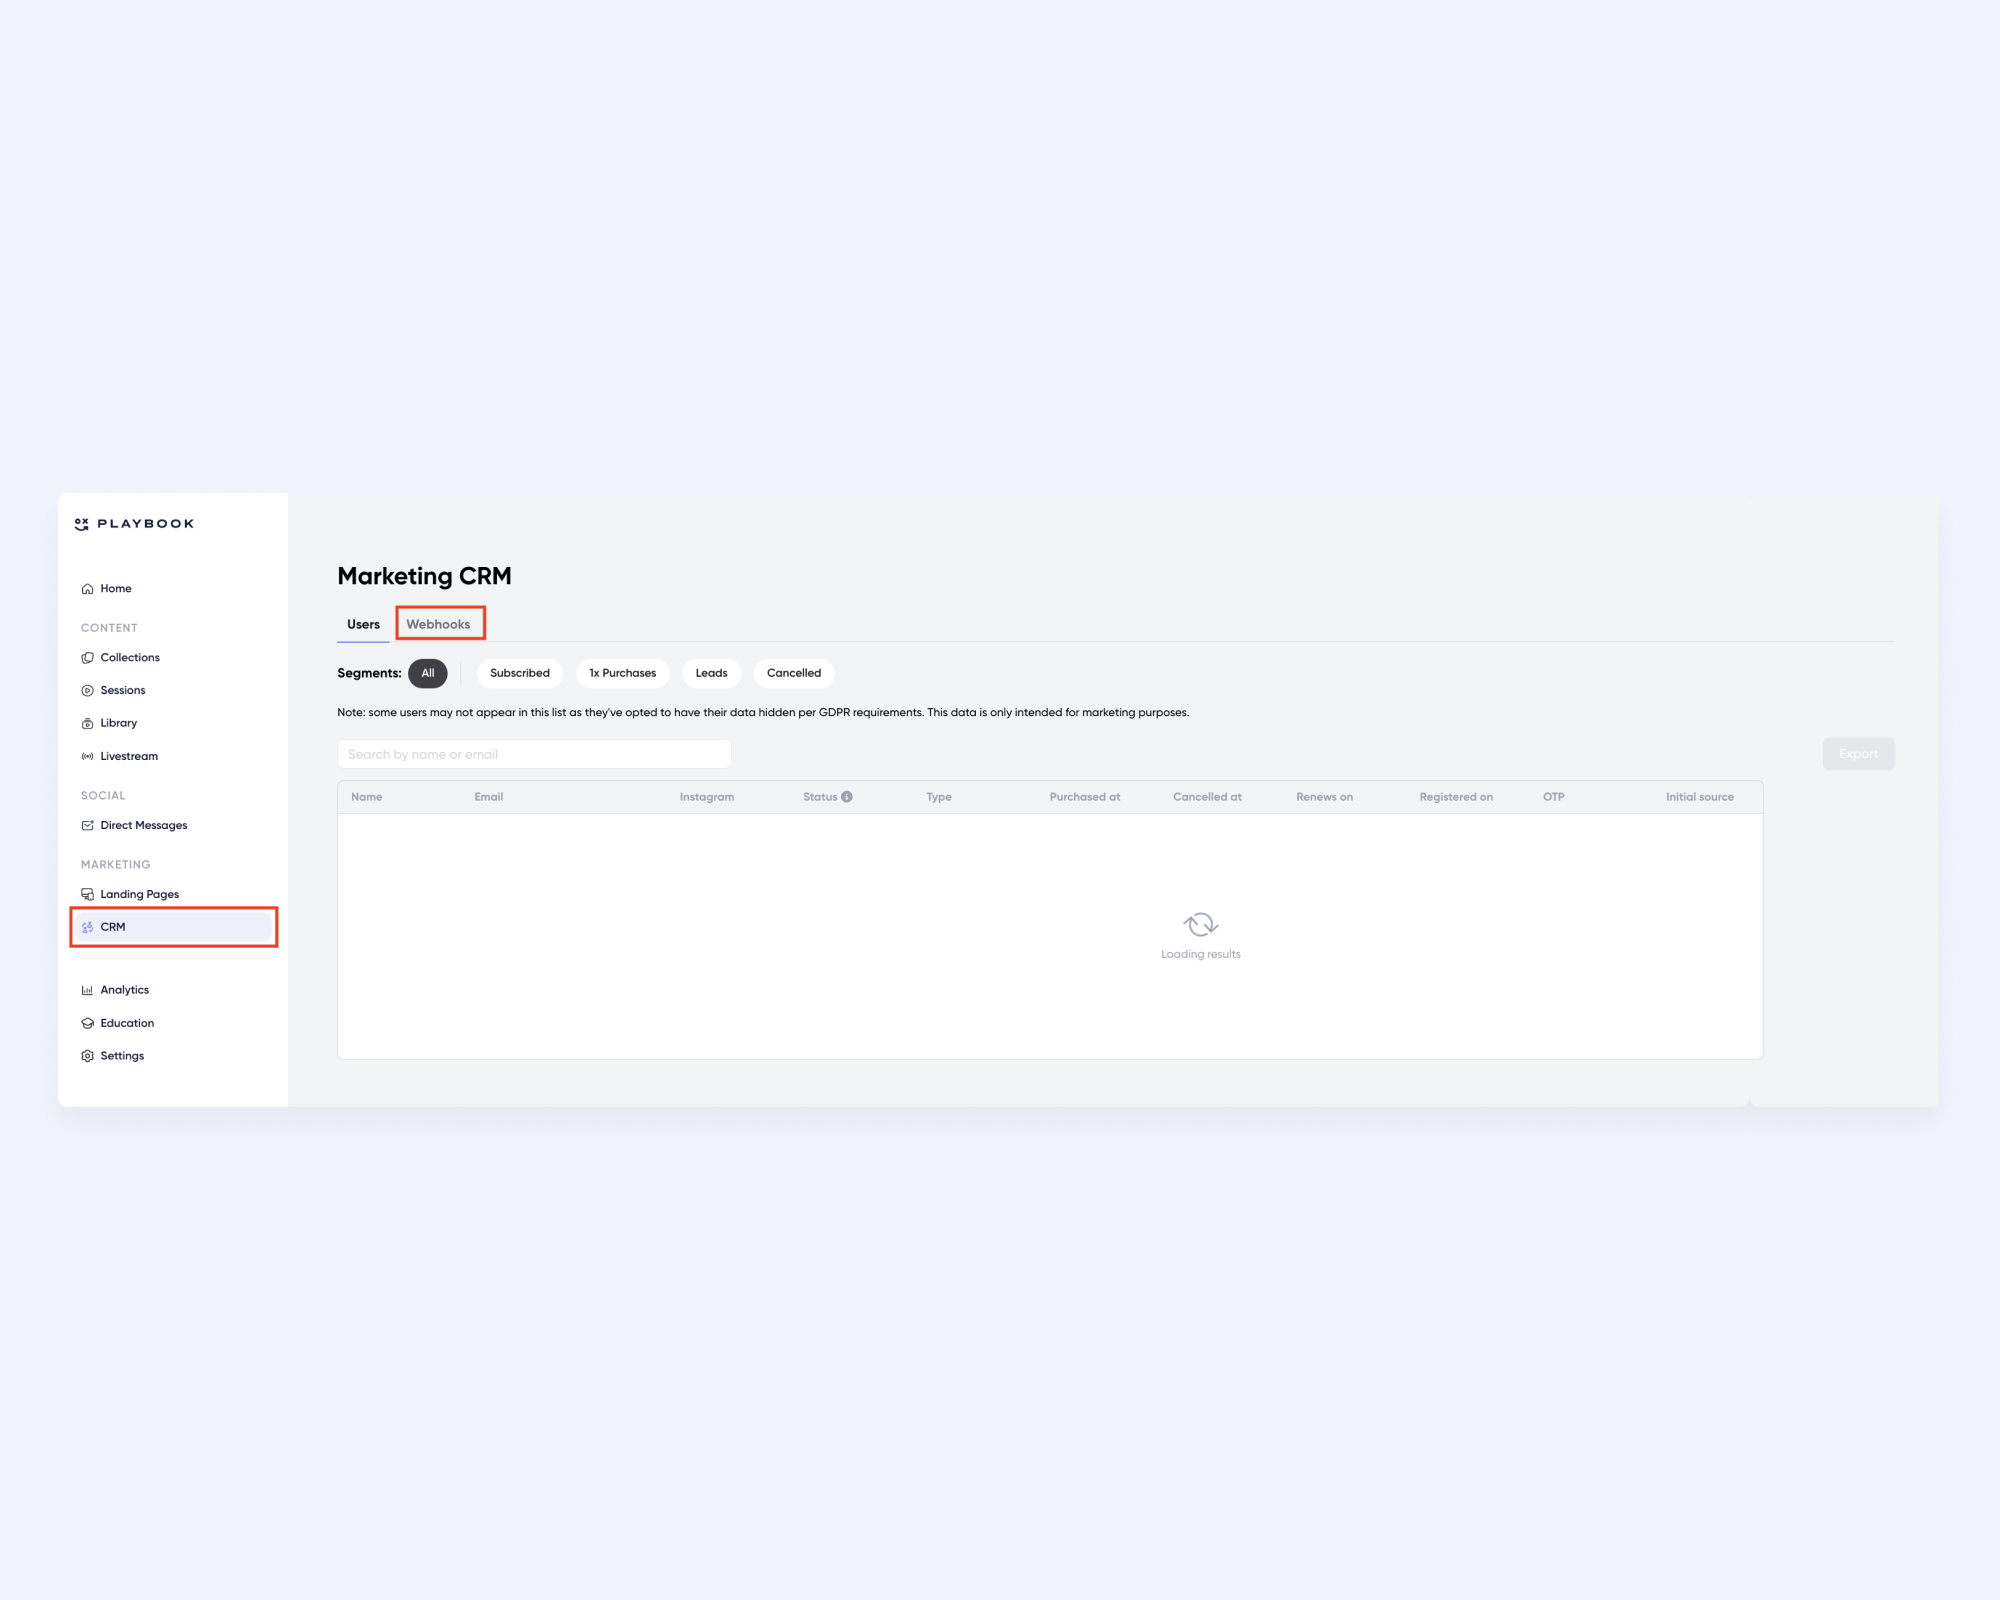
4. In a separate window, open the Admin Panel and click on the CRM. Then click “Webhooks”.
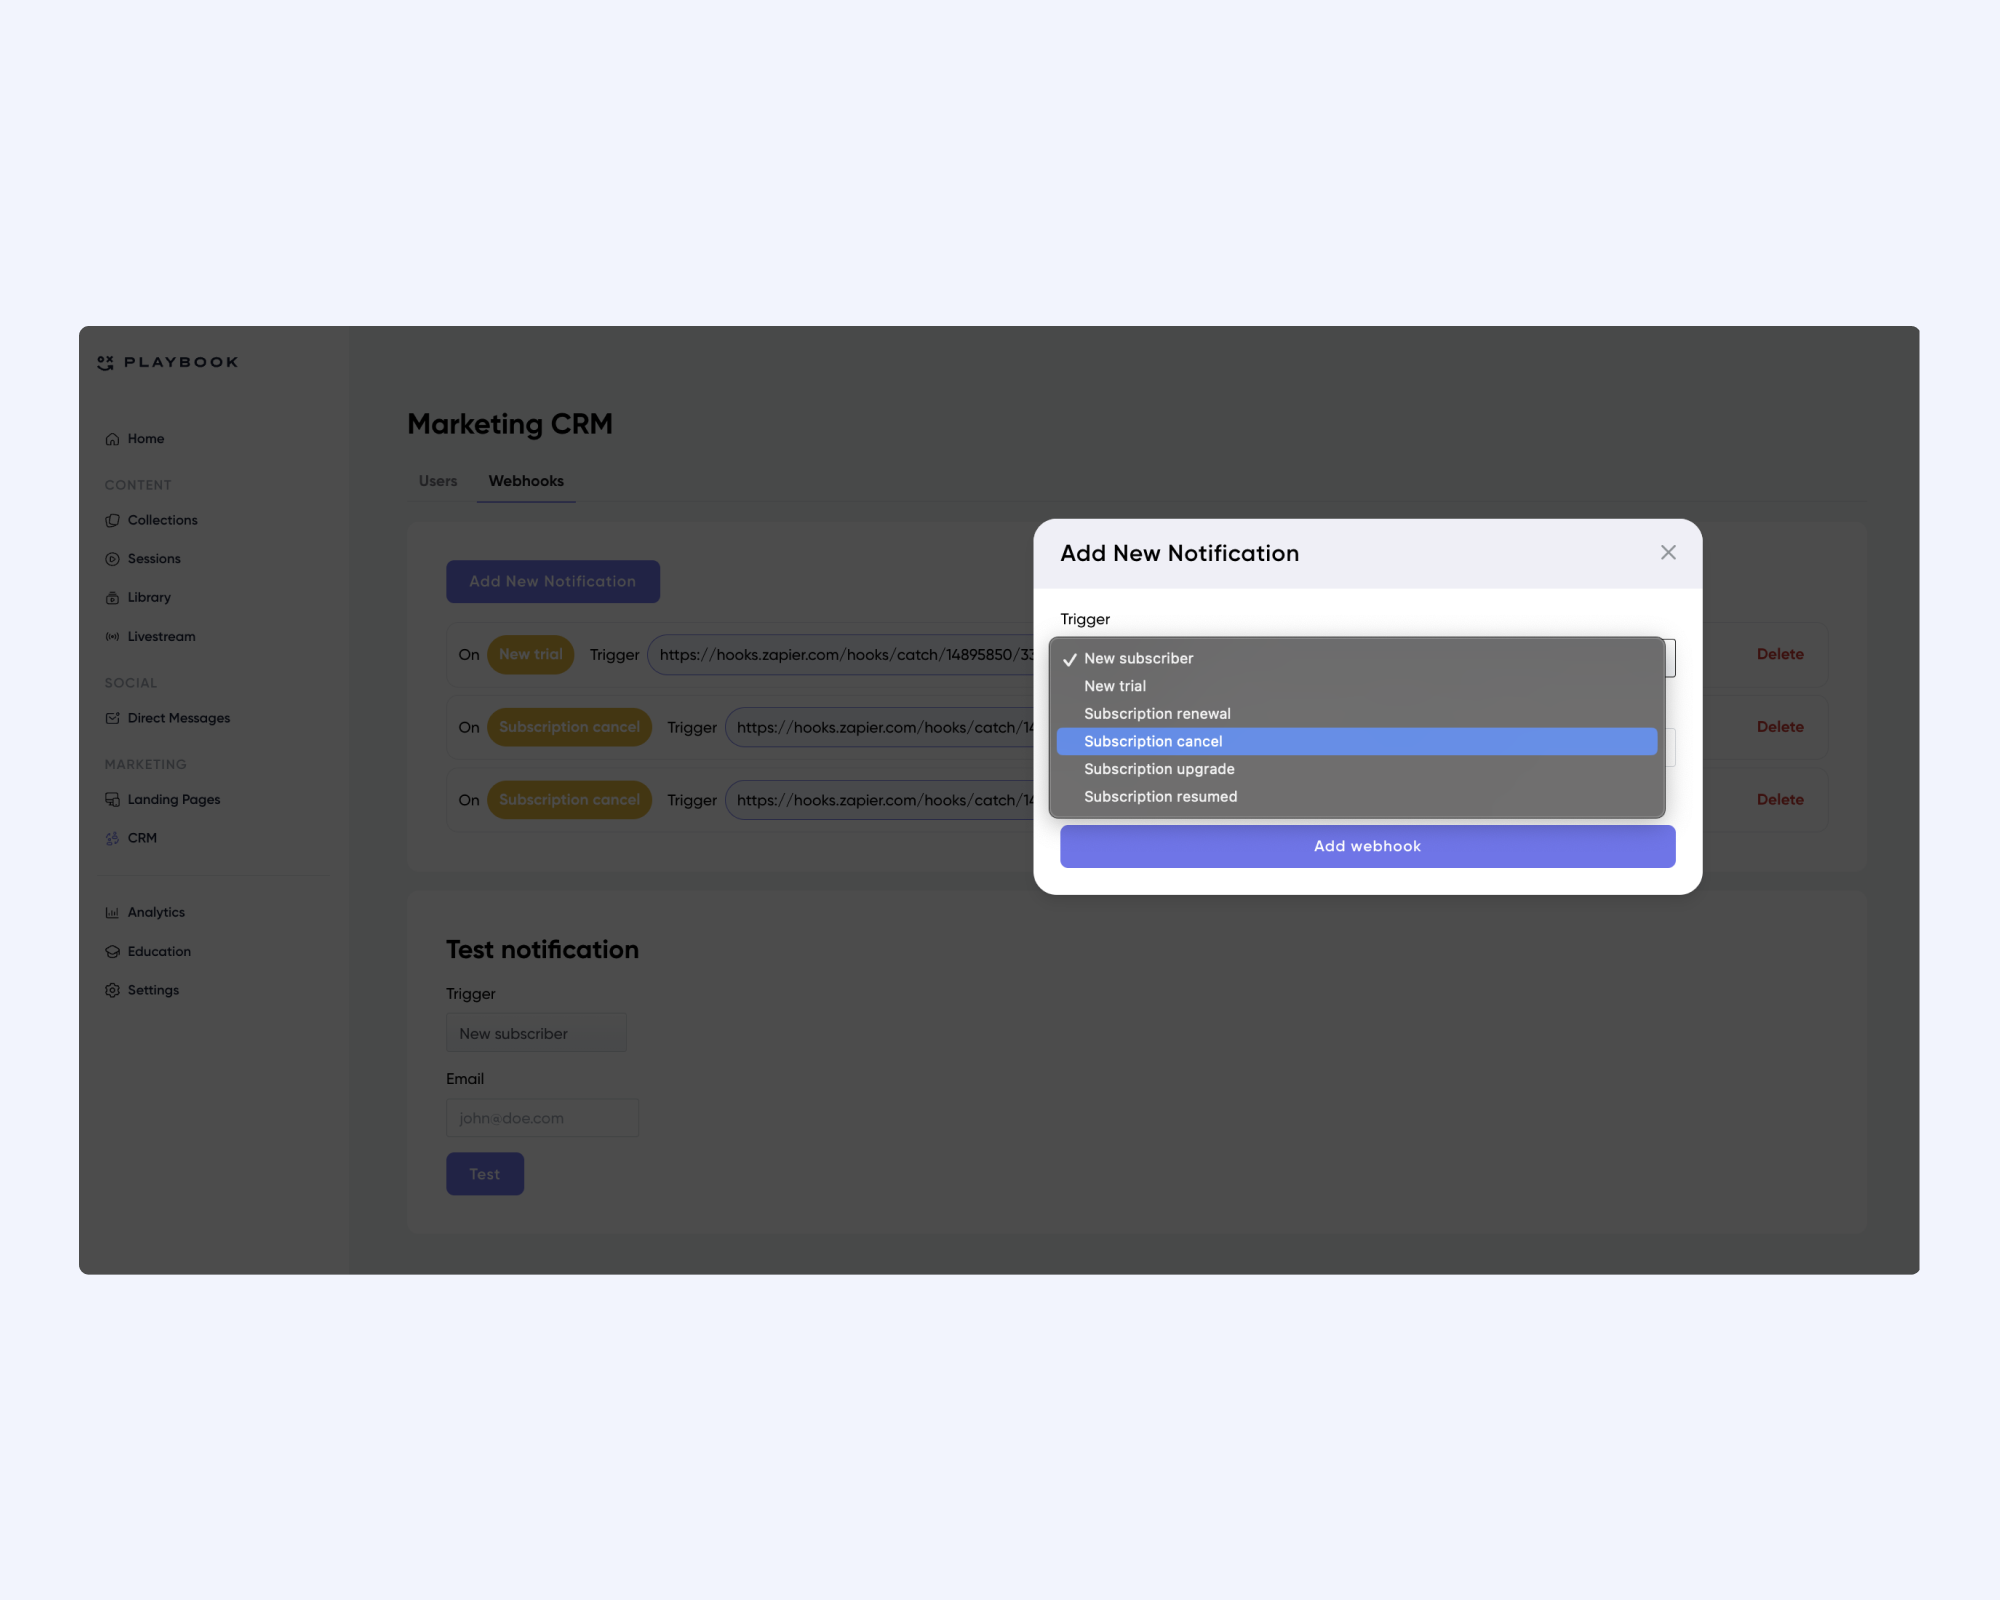
5. Click “Add New Notification”.
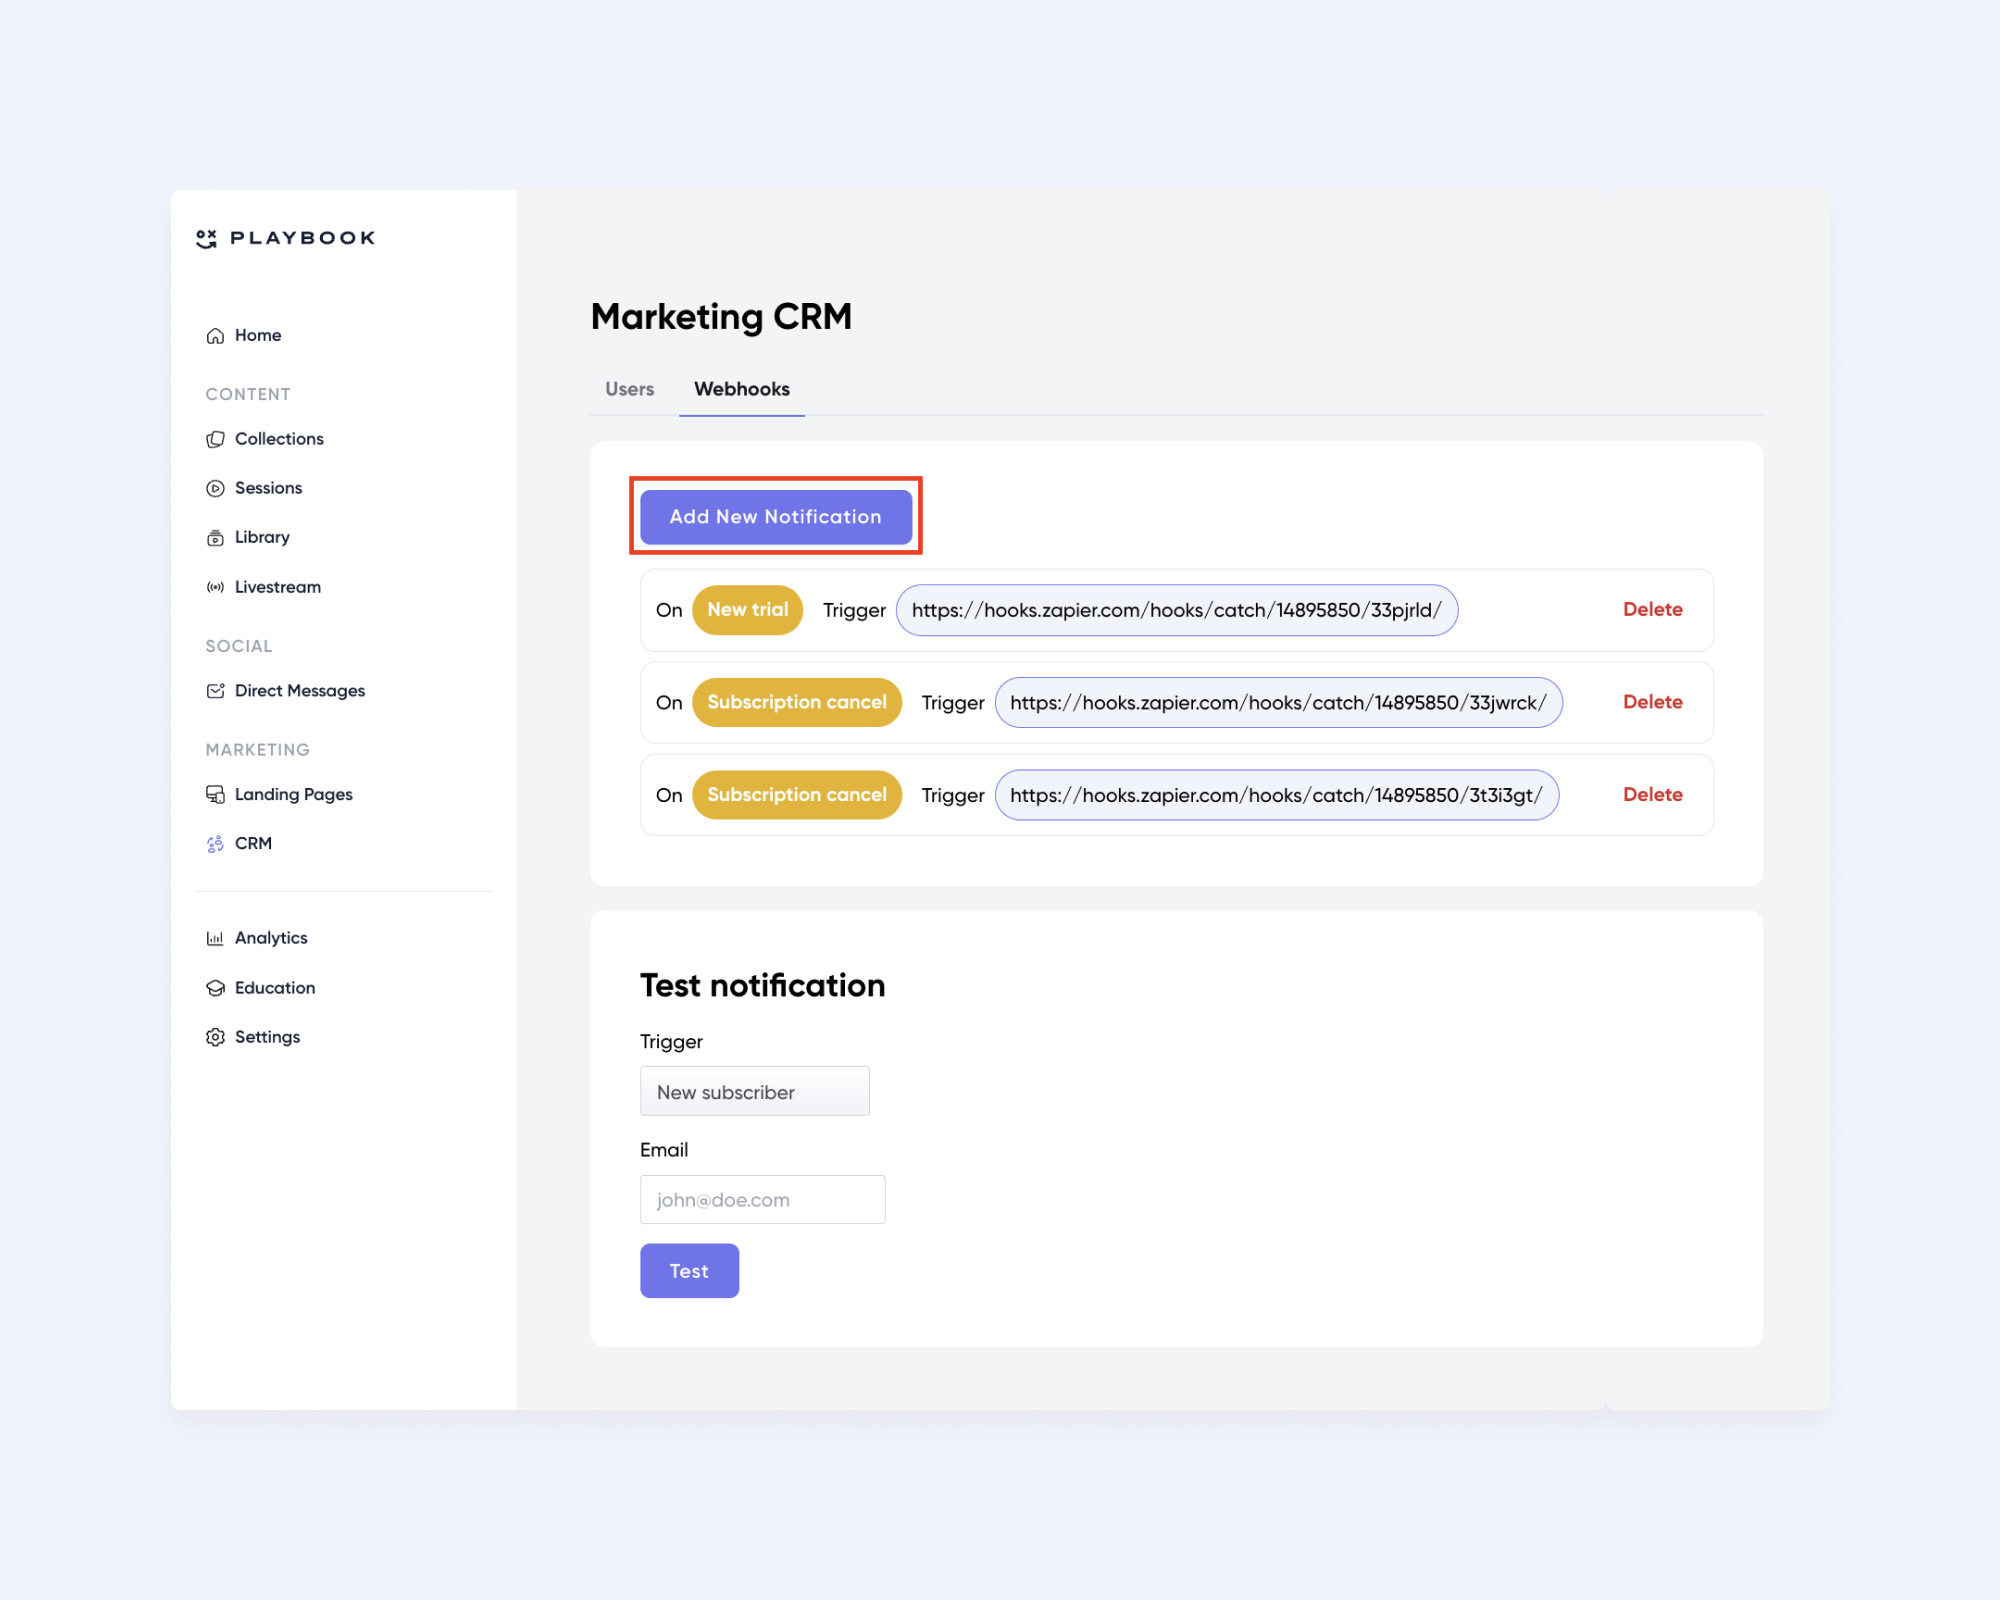
6. Select the appropriate trigger (Subscription cancel, in this case). Copy and paste the webhook from Zapier. Click “Add webhook” button.
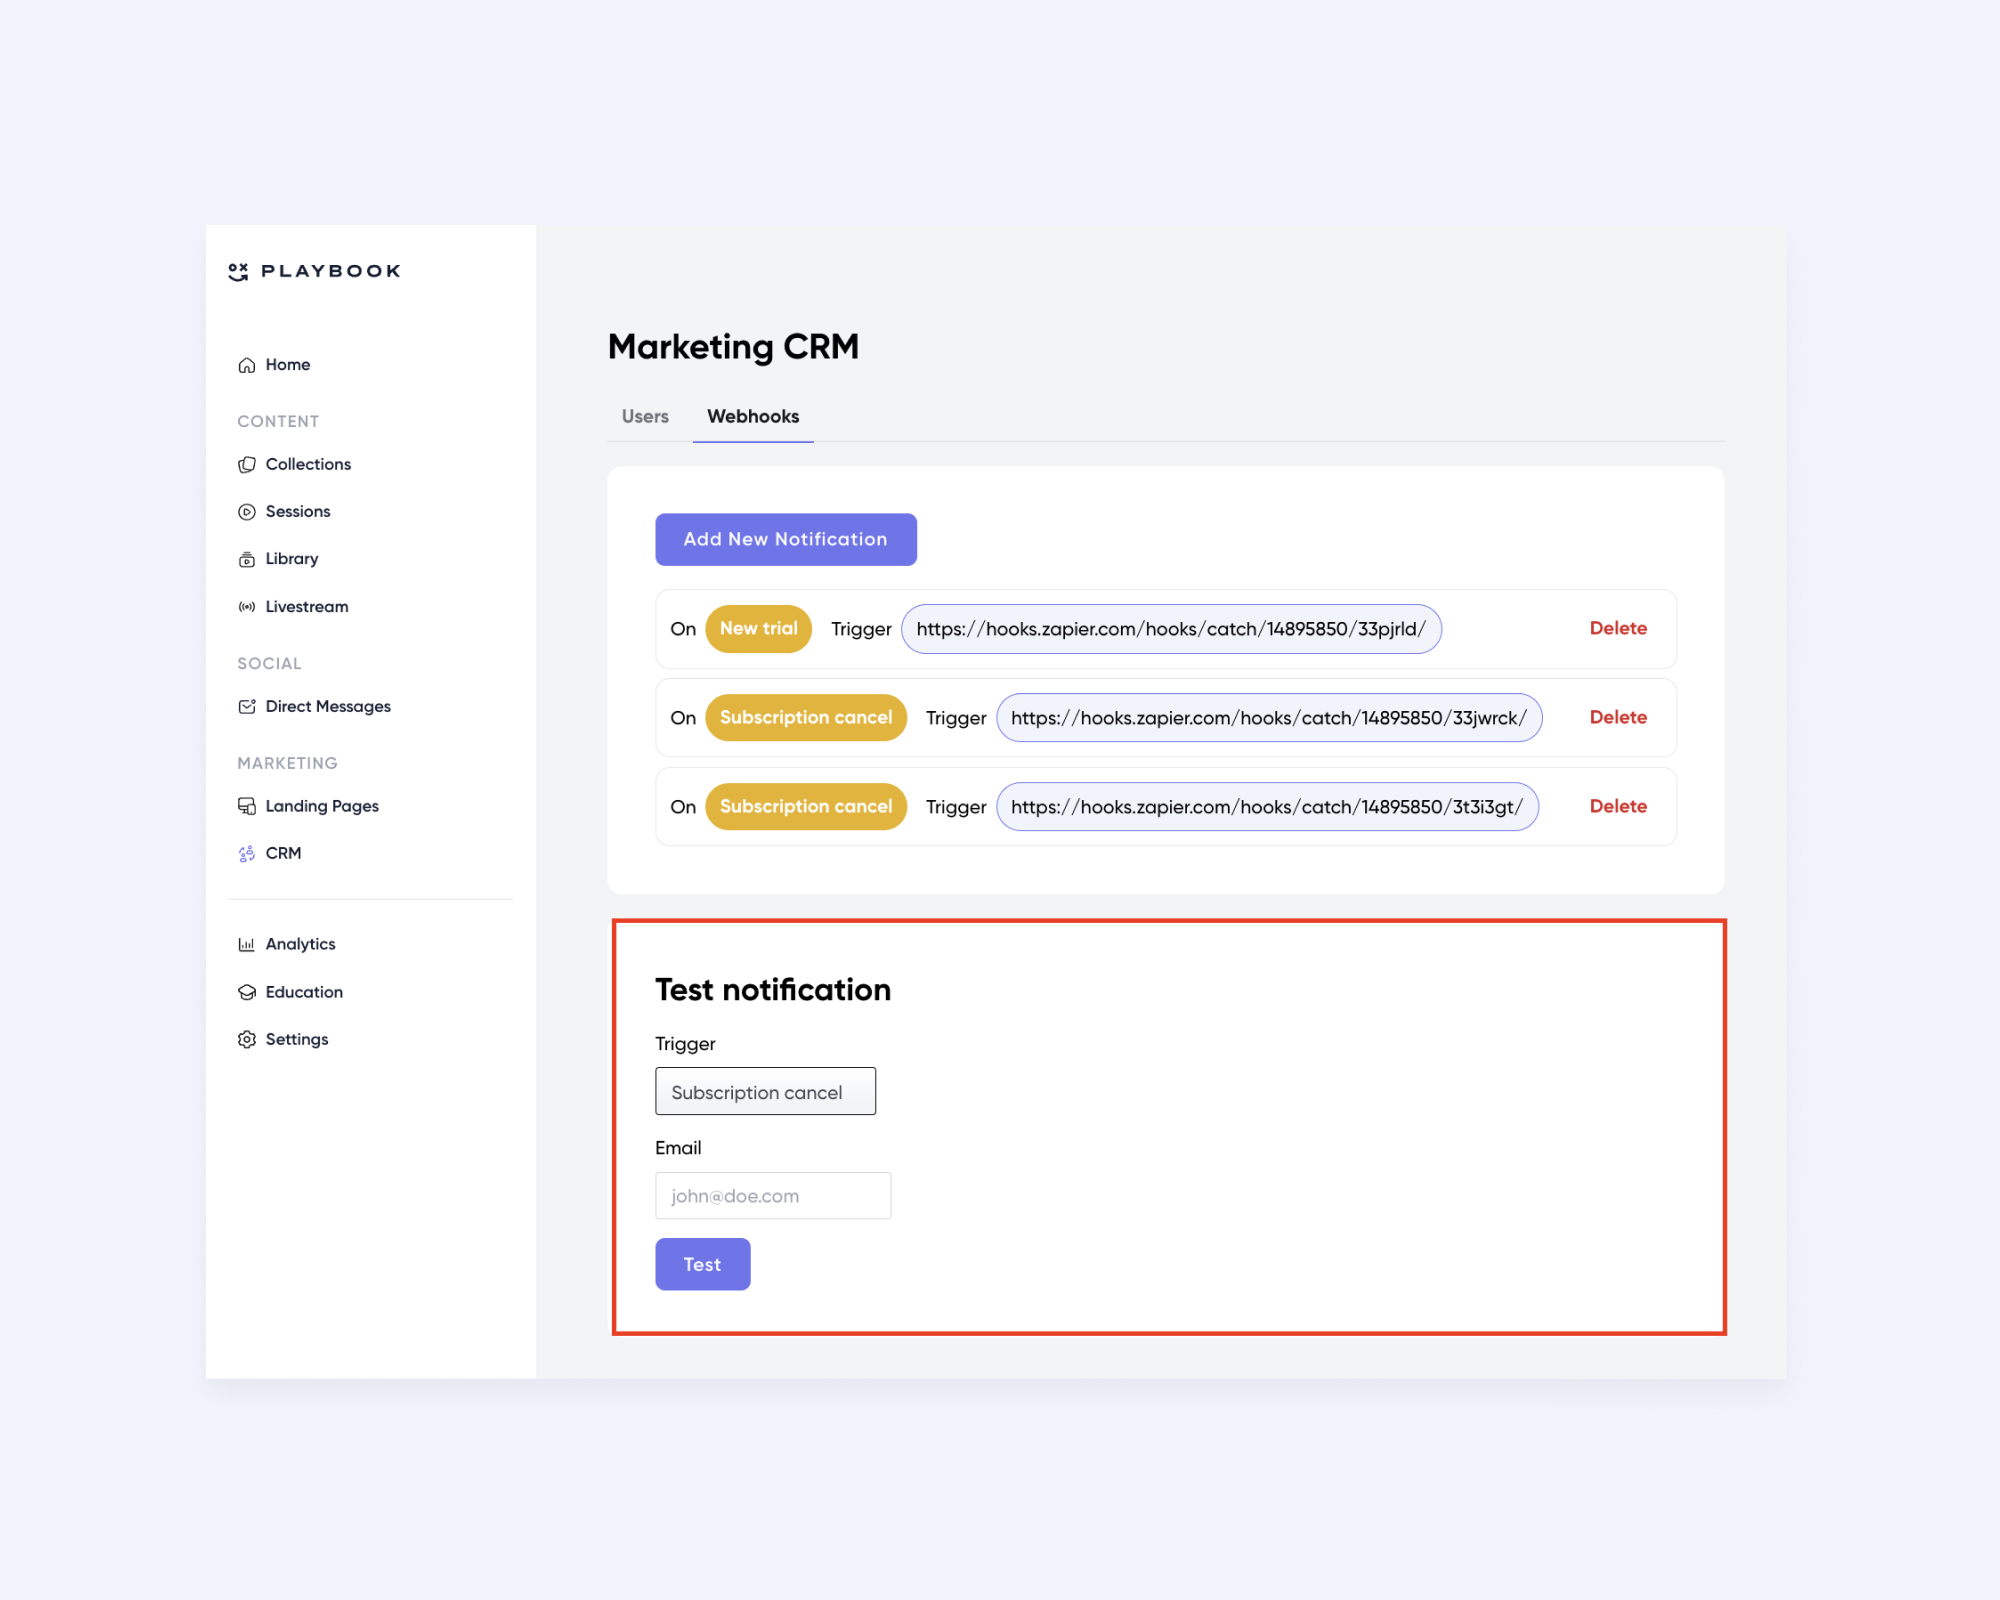
7. Next, test it to make sure it worked. Scroll down to “Test notification” section. Select the trigger and input your email address and click “Test” button.
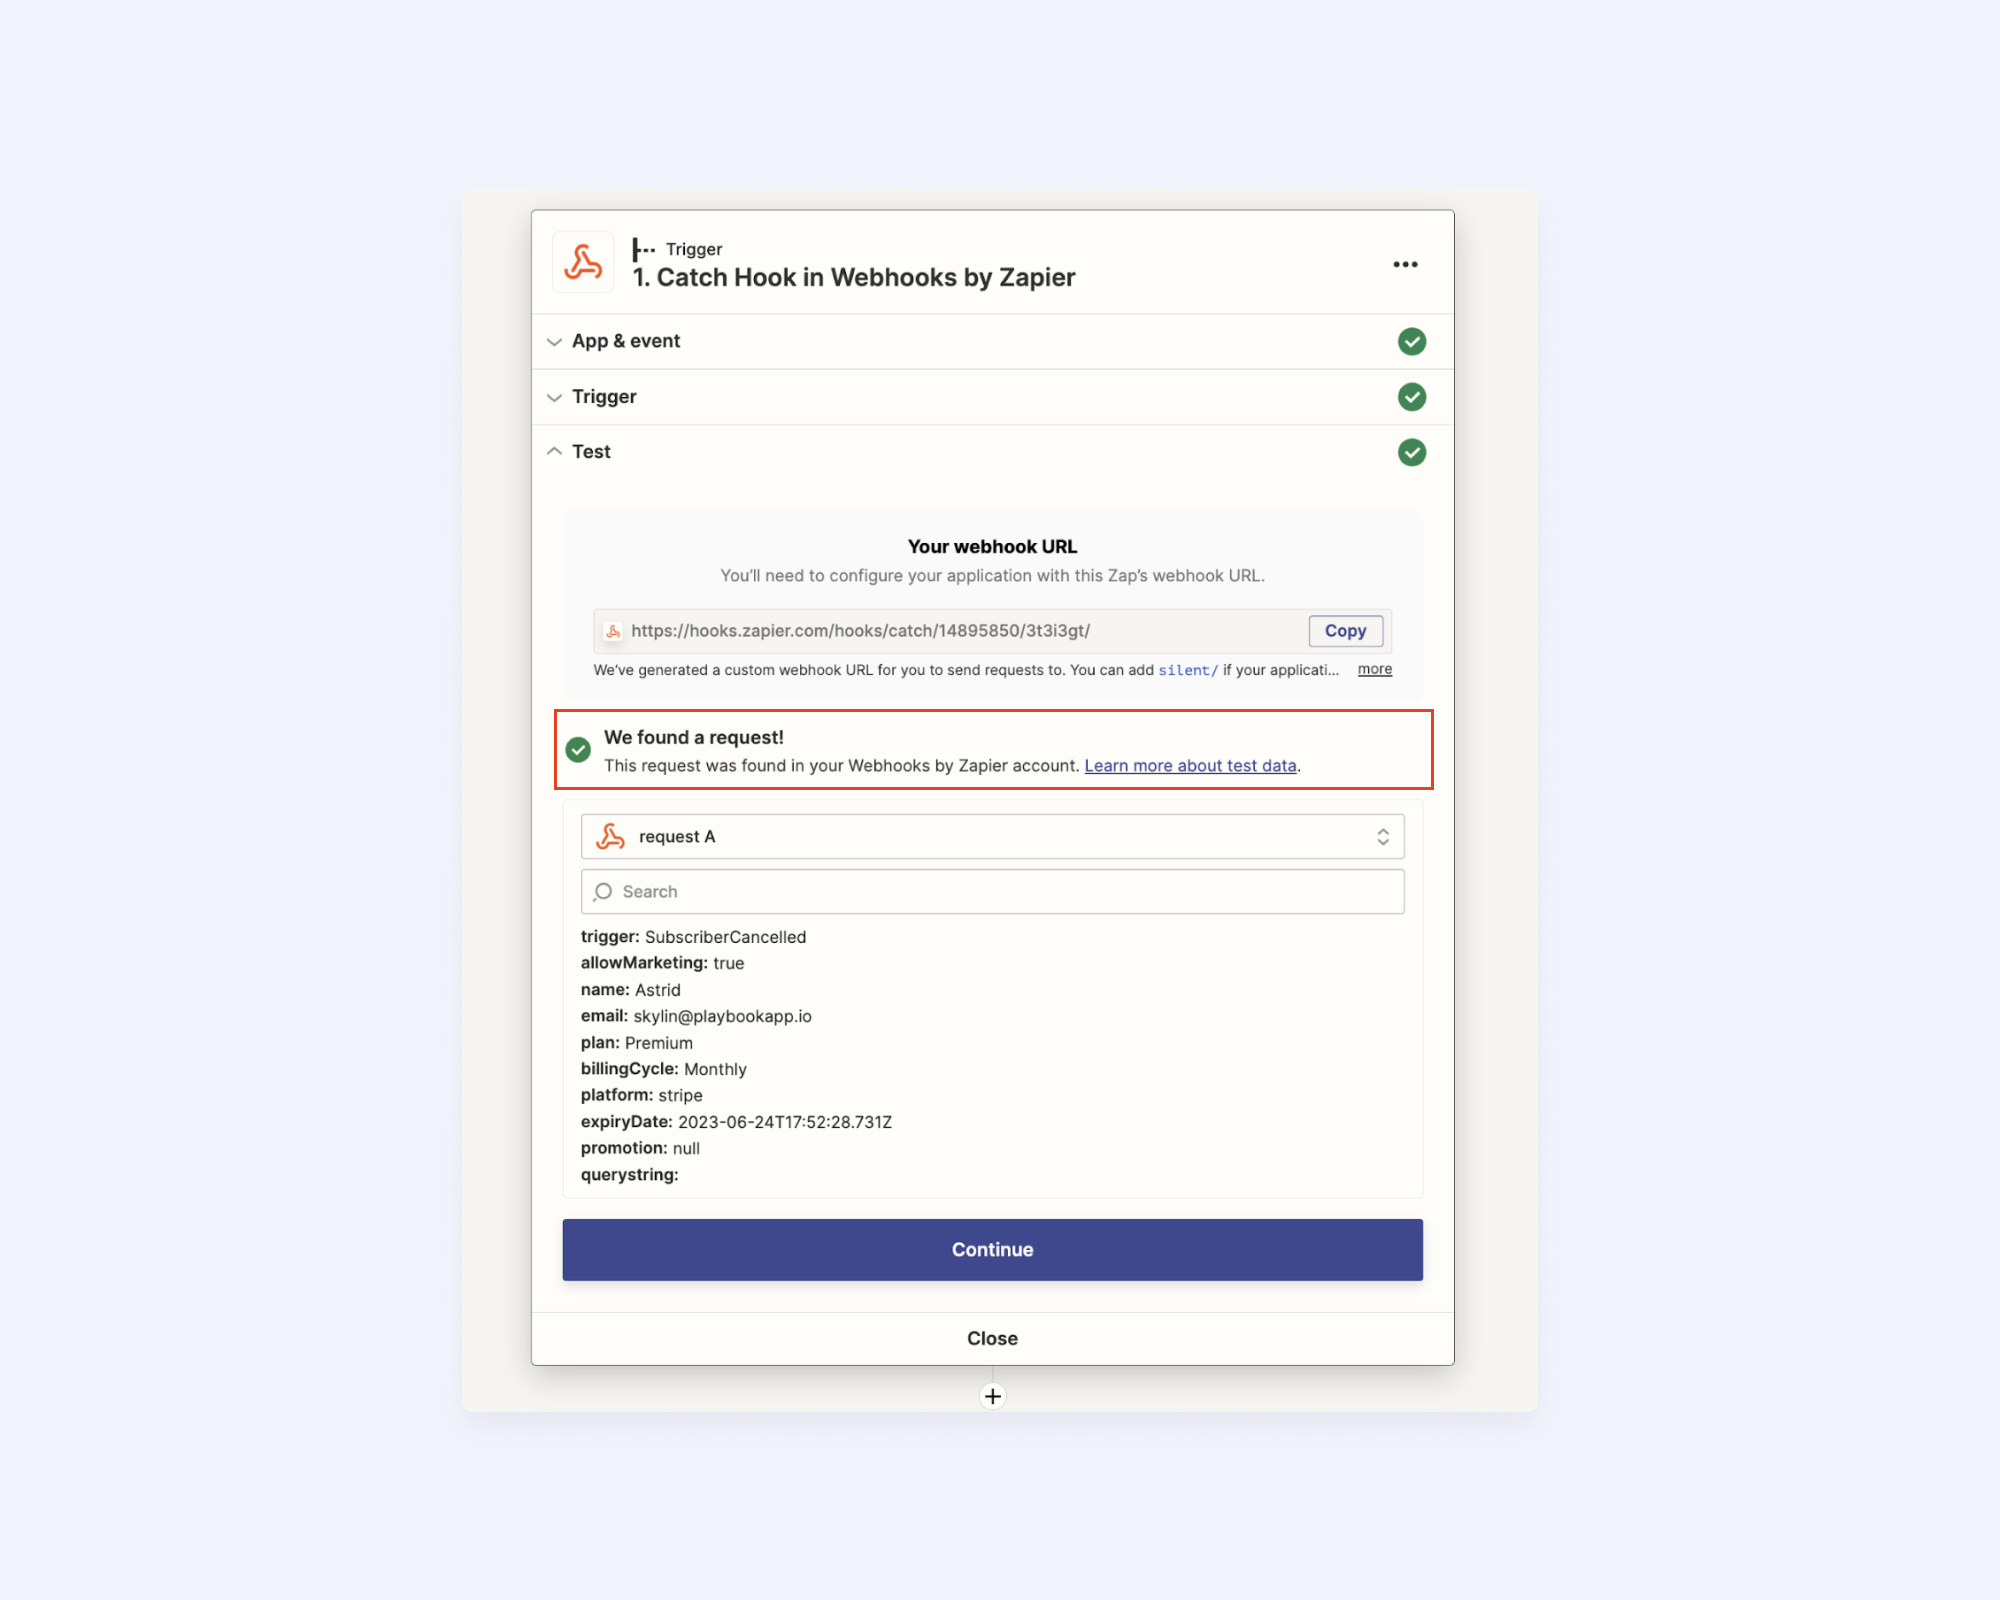
8. Go back into Zapier and select “Test trigger” button. You should see something pop up that says “We found a request!” with your email address. That means it has successfully been connected.
Step 4: Connect Zapier to Klaviyo
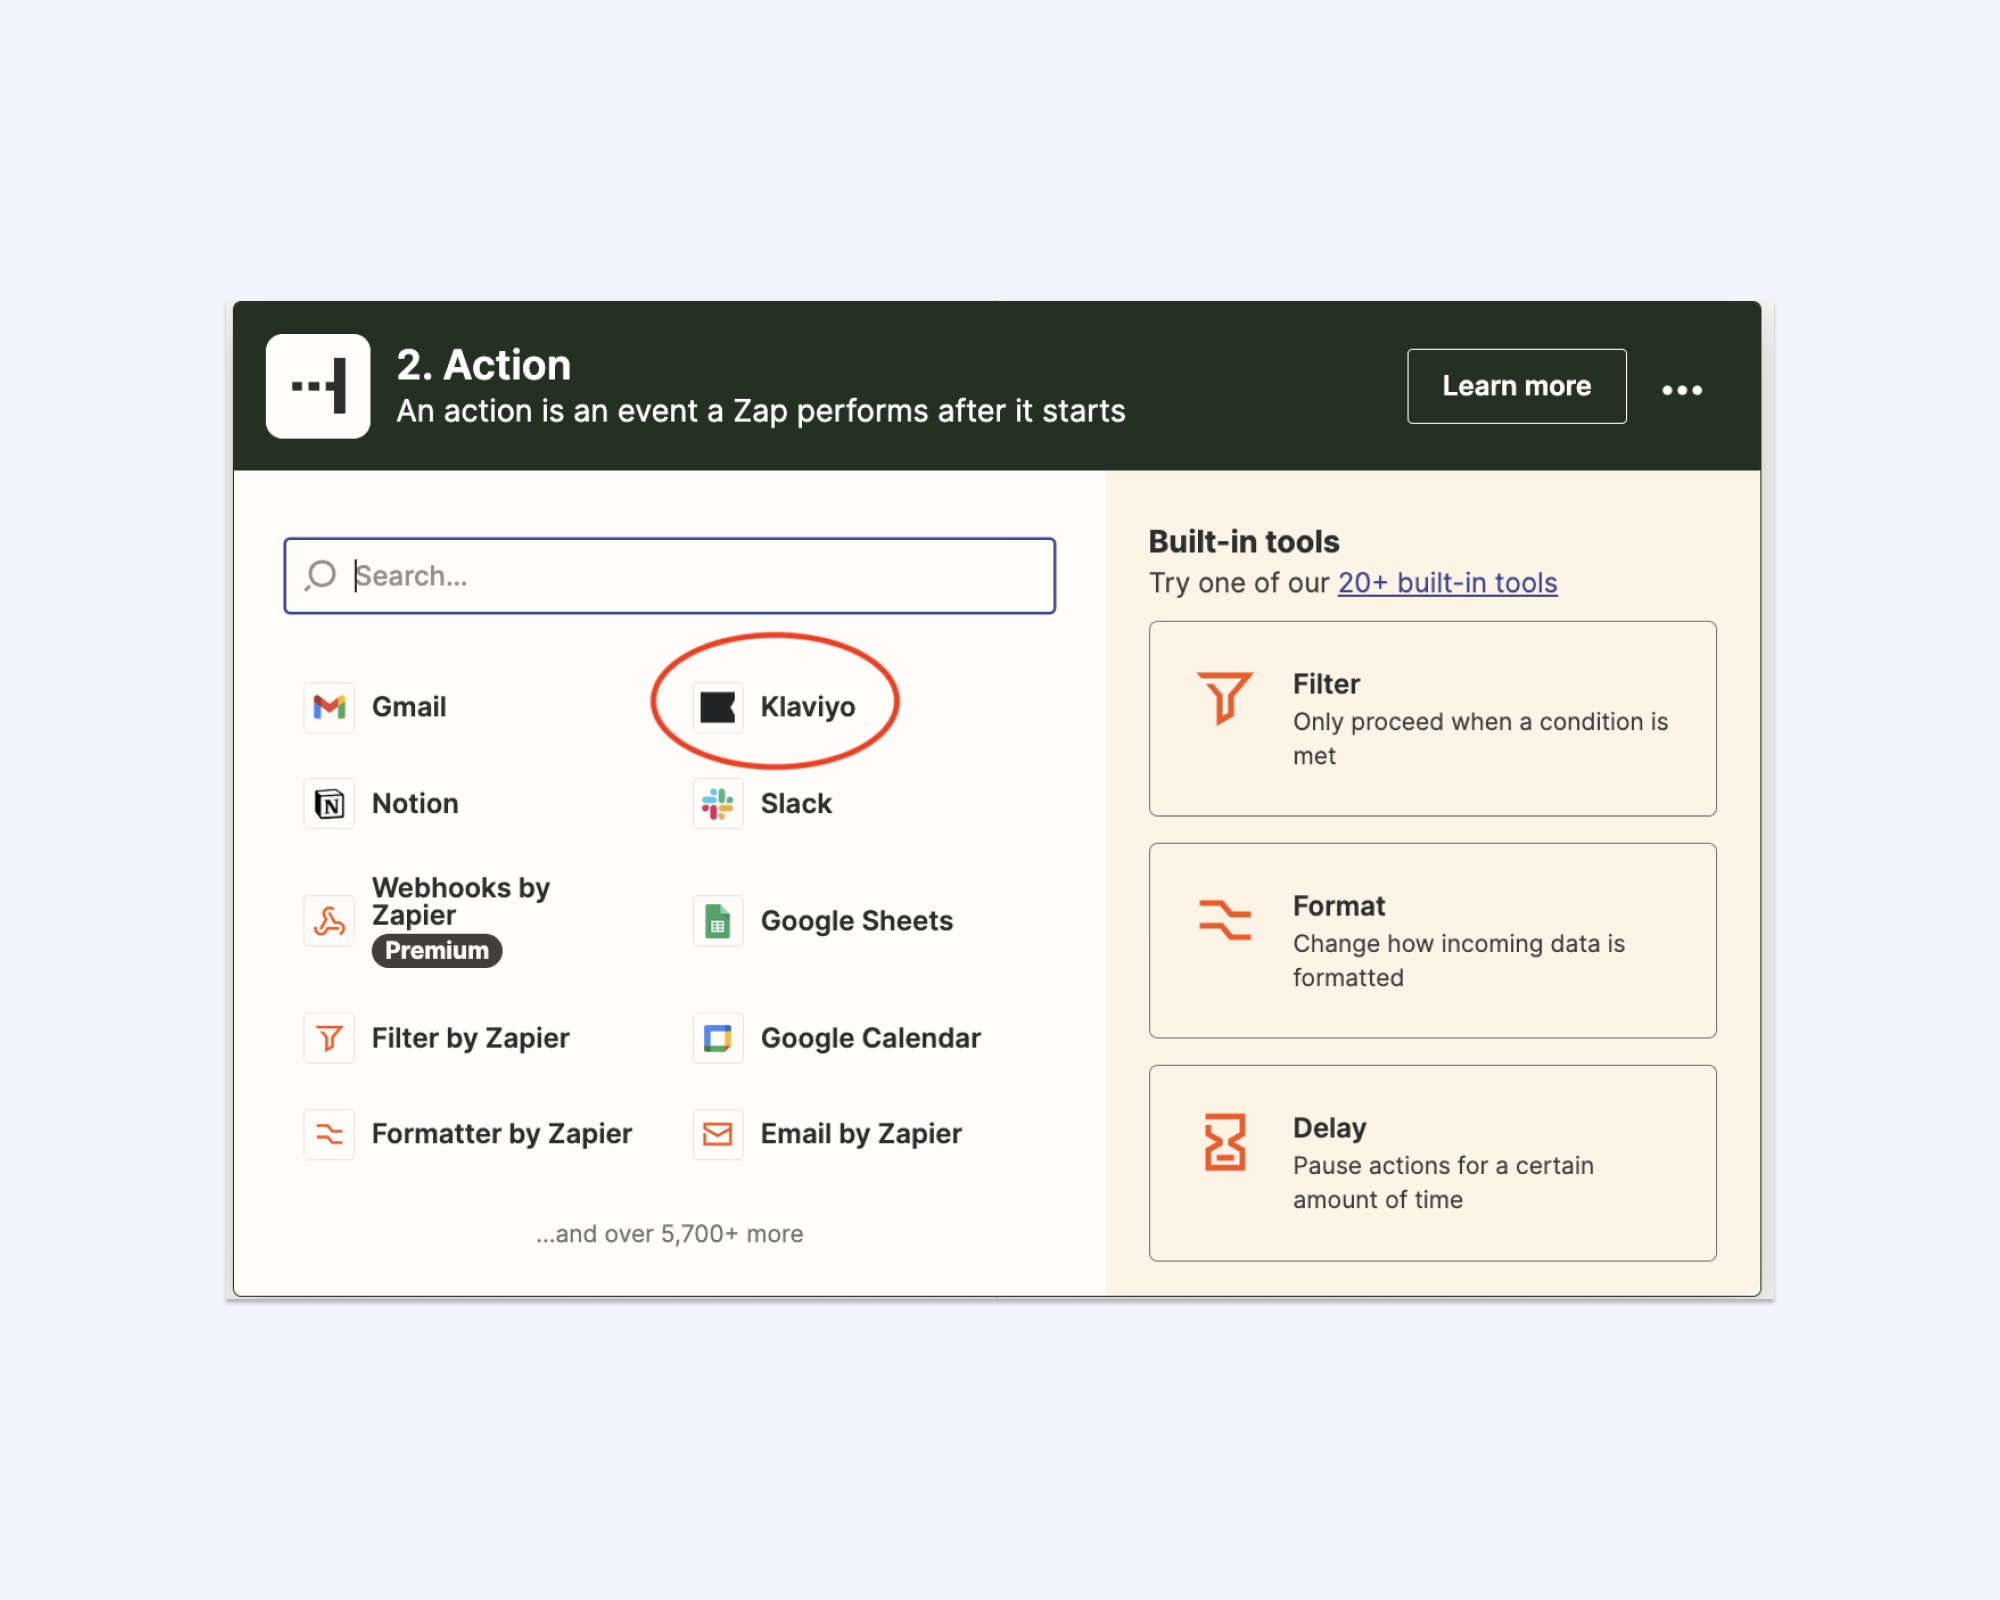
1. Click “Continue” on the Zapier screen and it will take you to step 2: action. This is where we will link Zapier to Klaviyo by selecting the Klaviyo option.
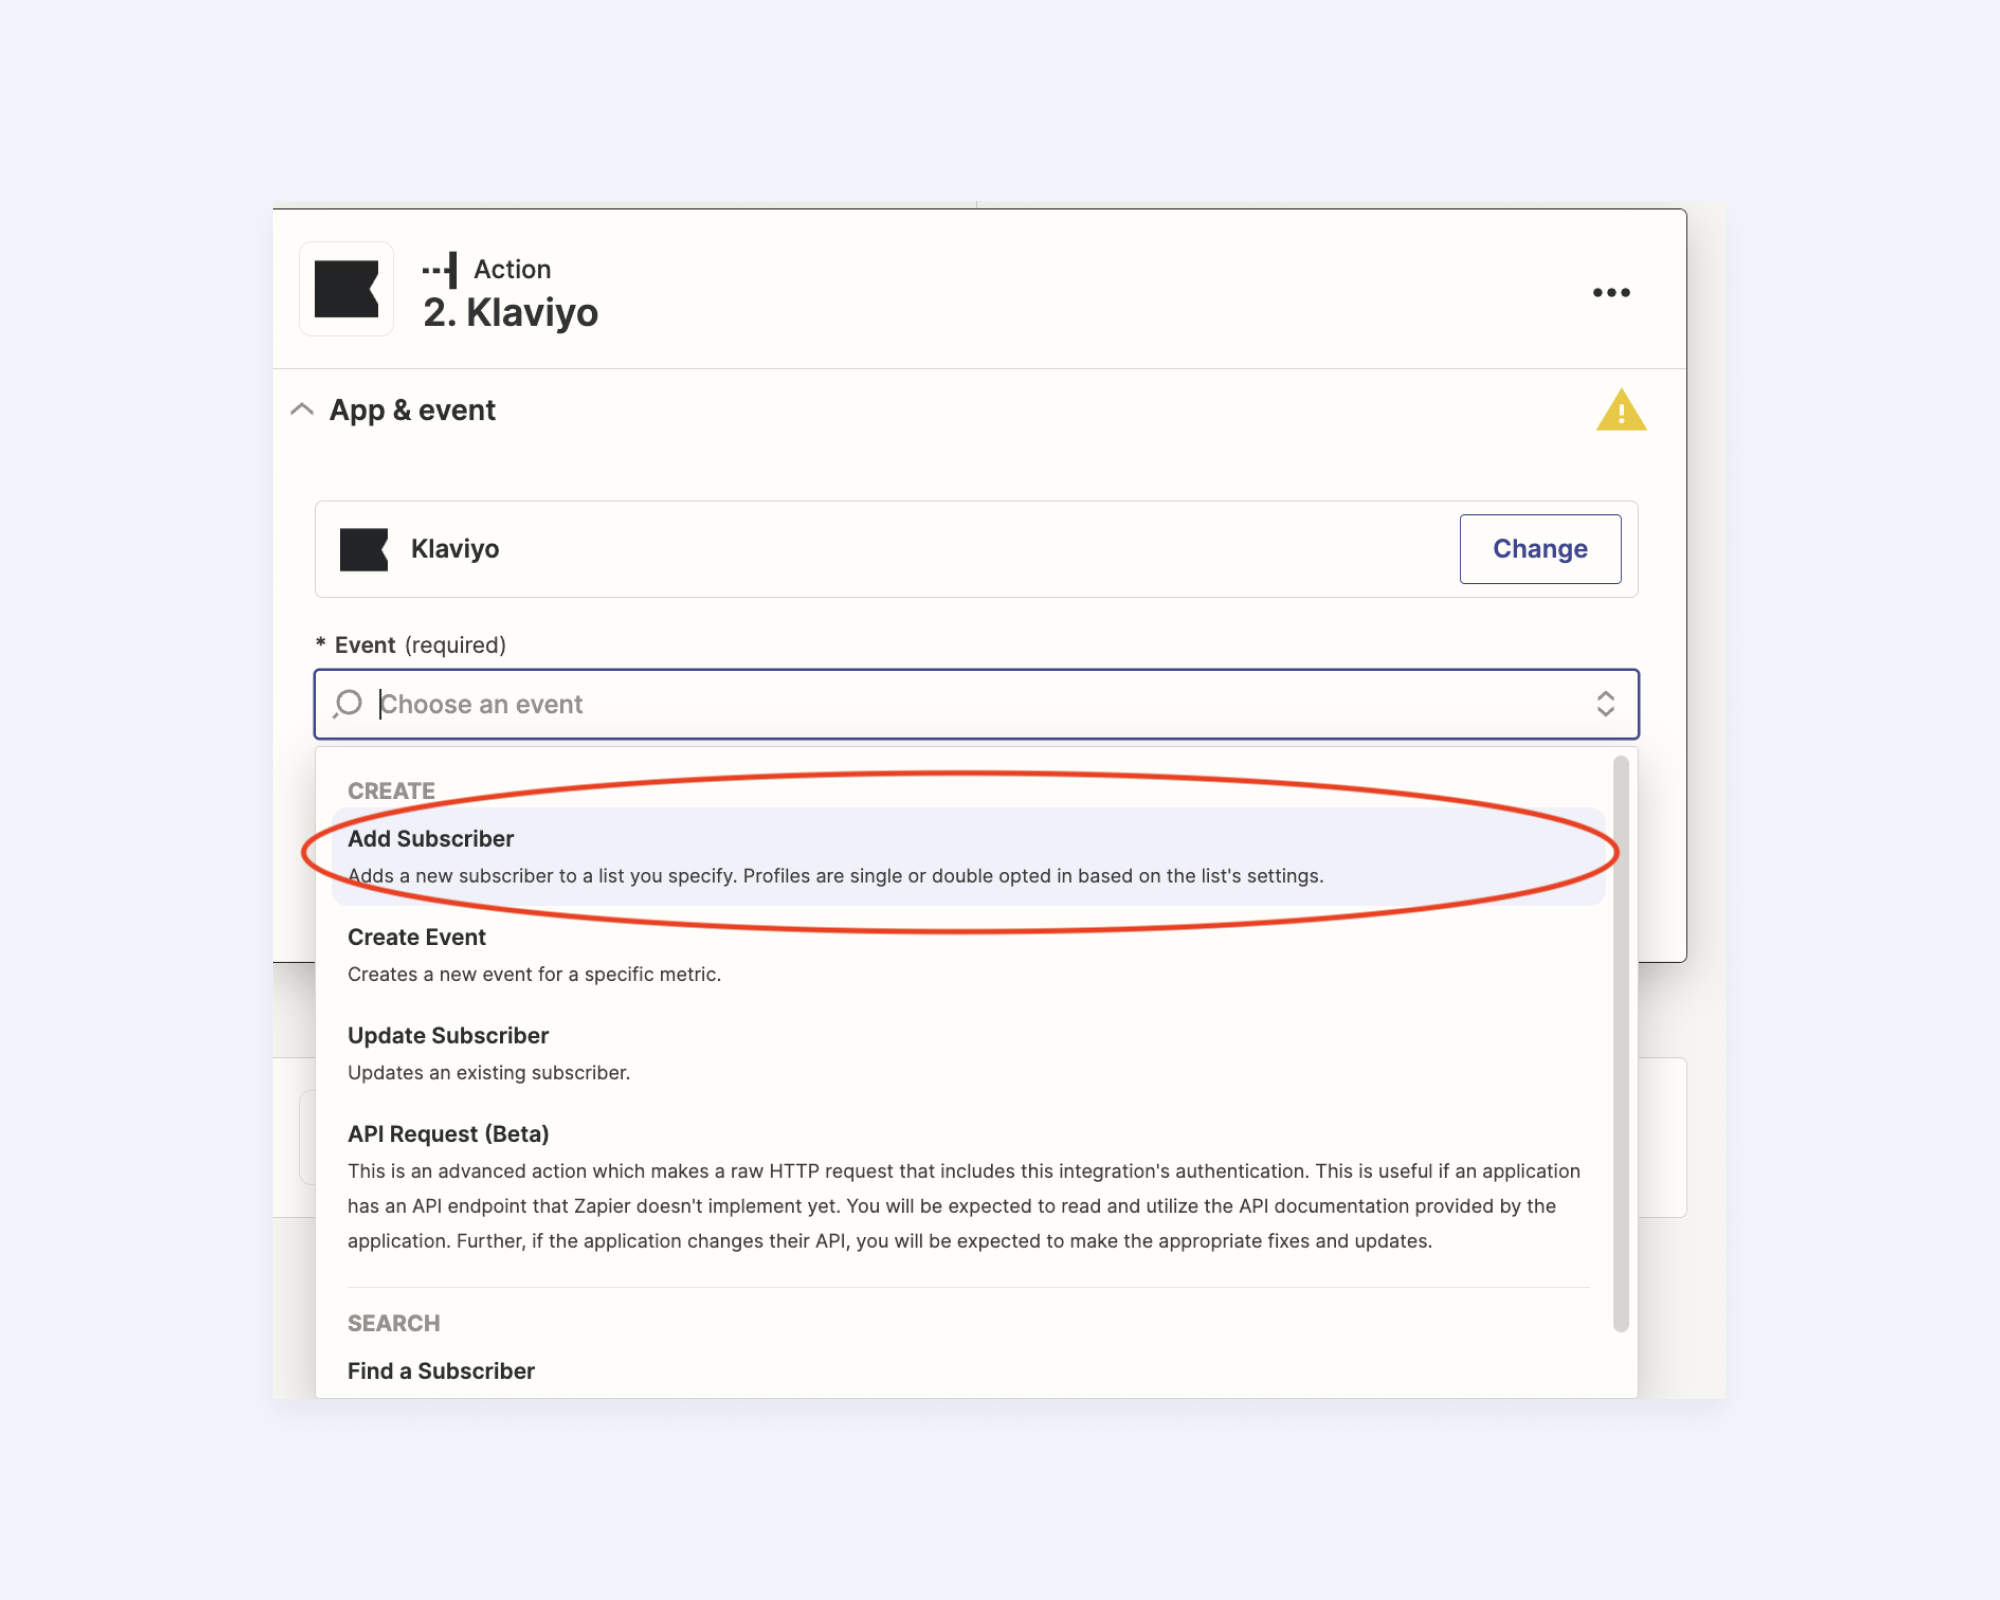
2. Choose the event “Add Subscriber” from the dropdown menu.
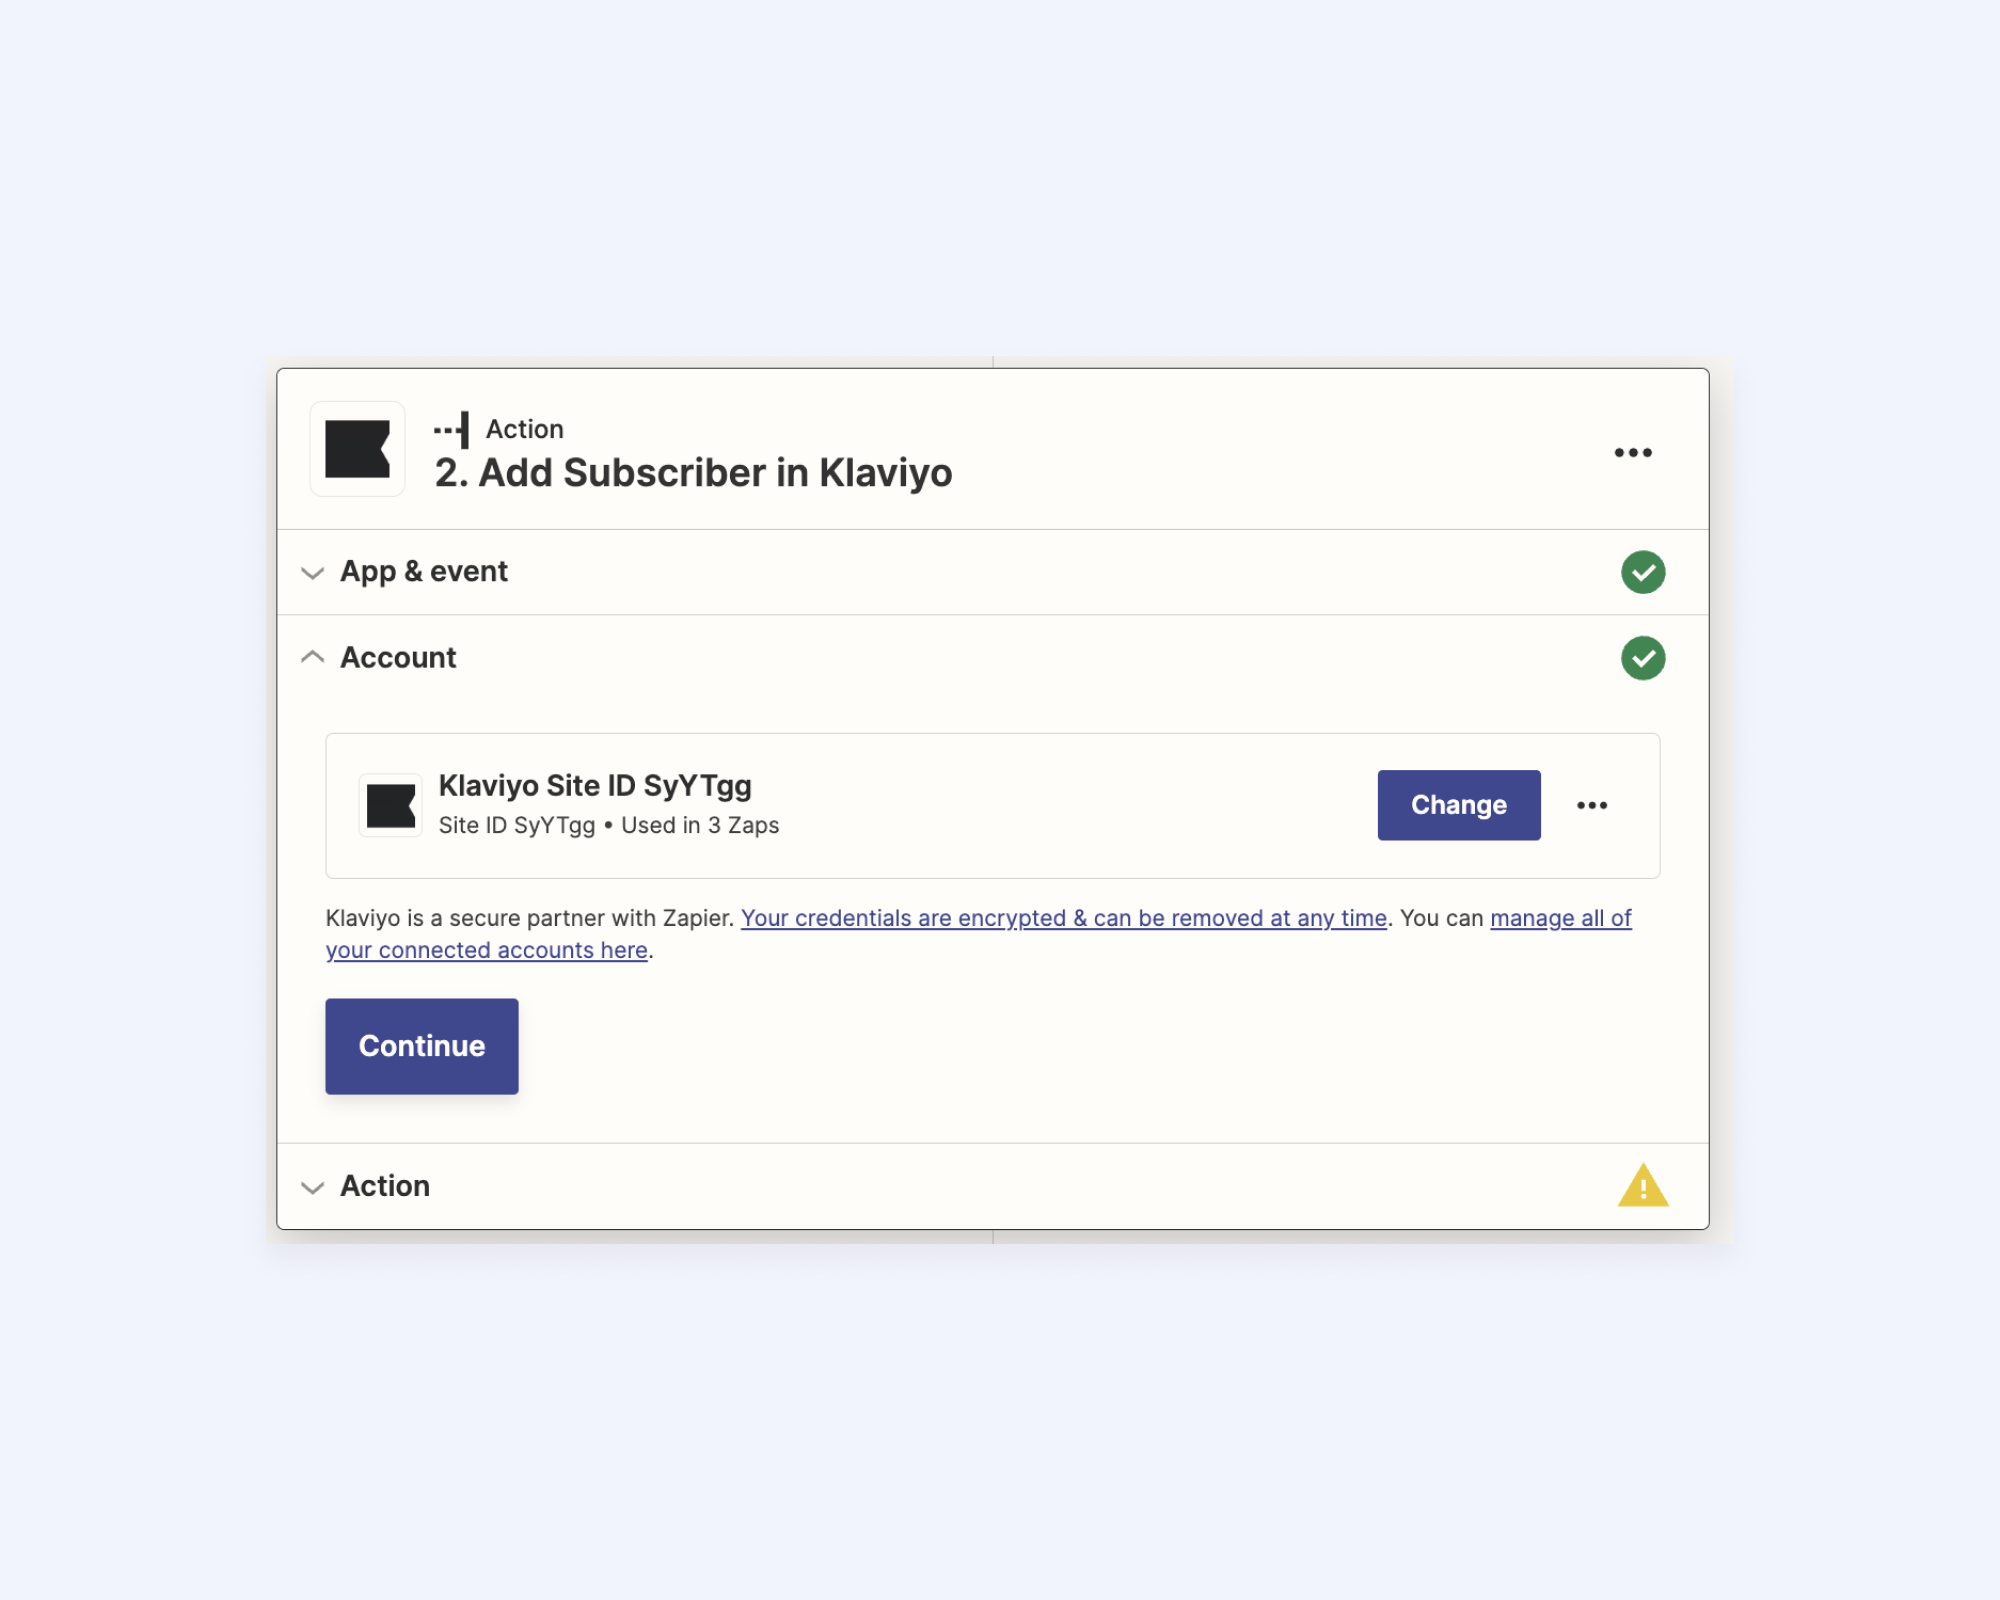
3. Connect your Klaviyo account.
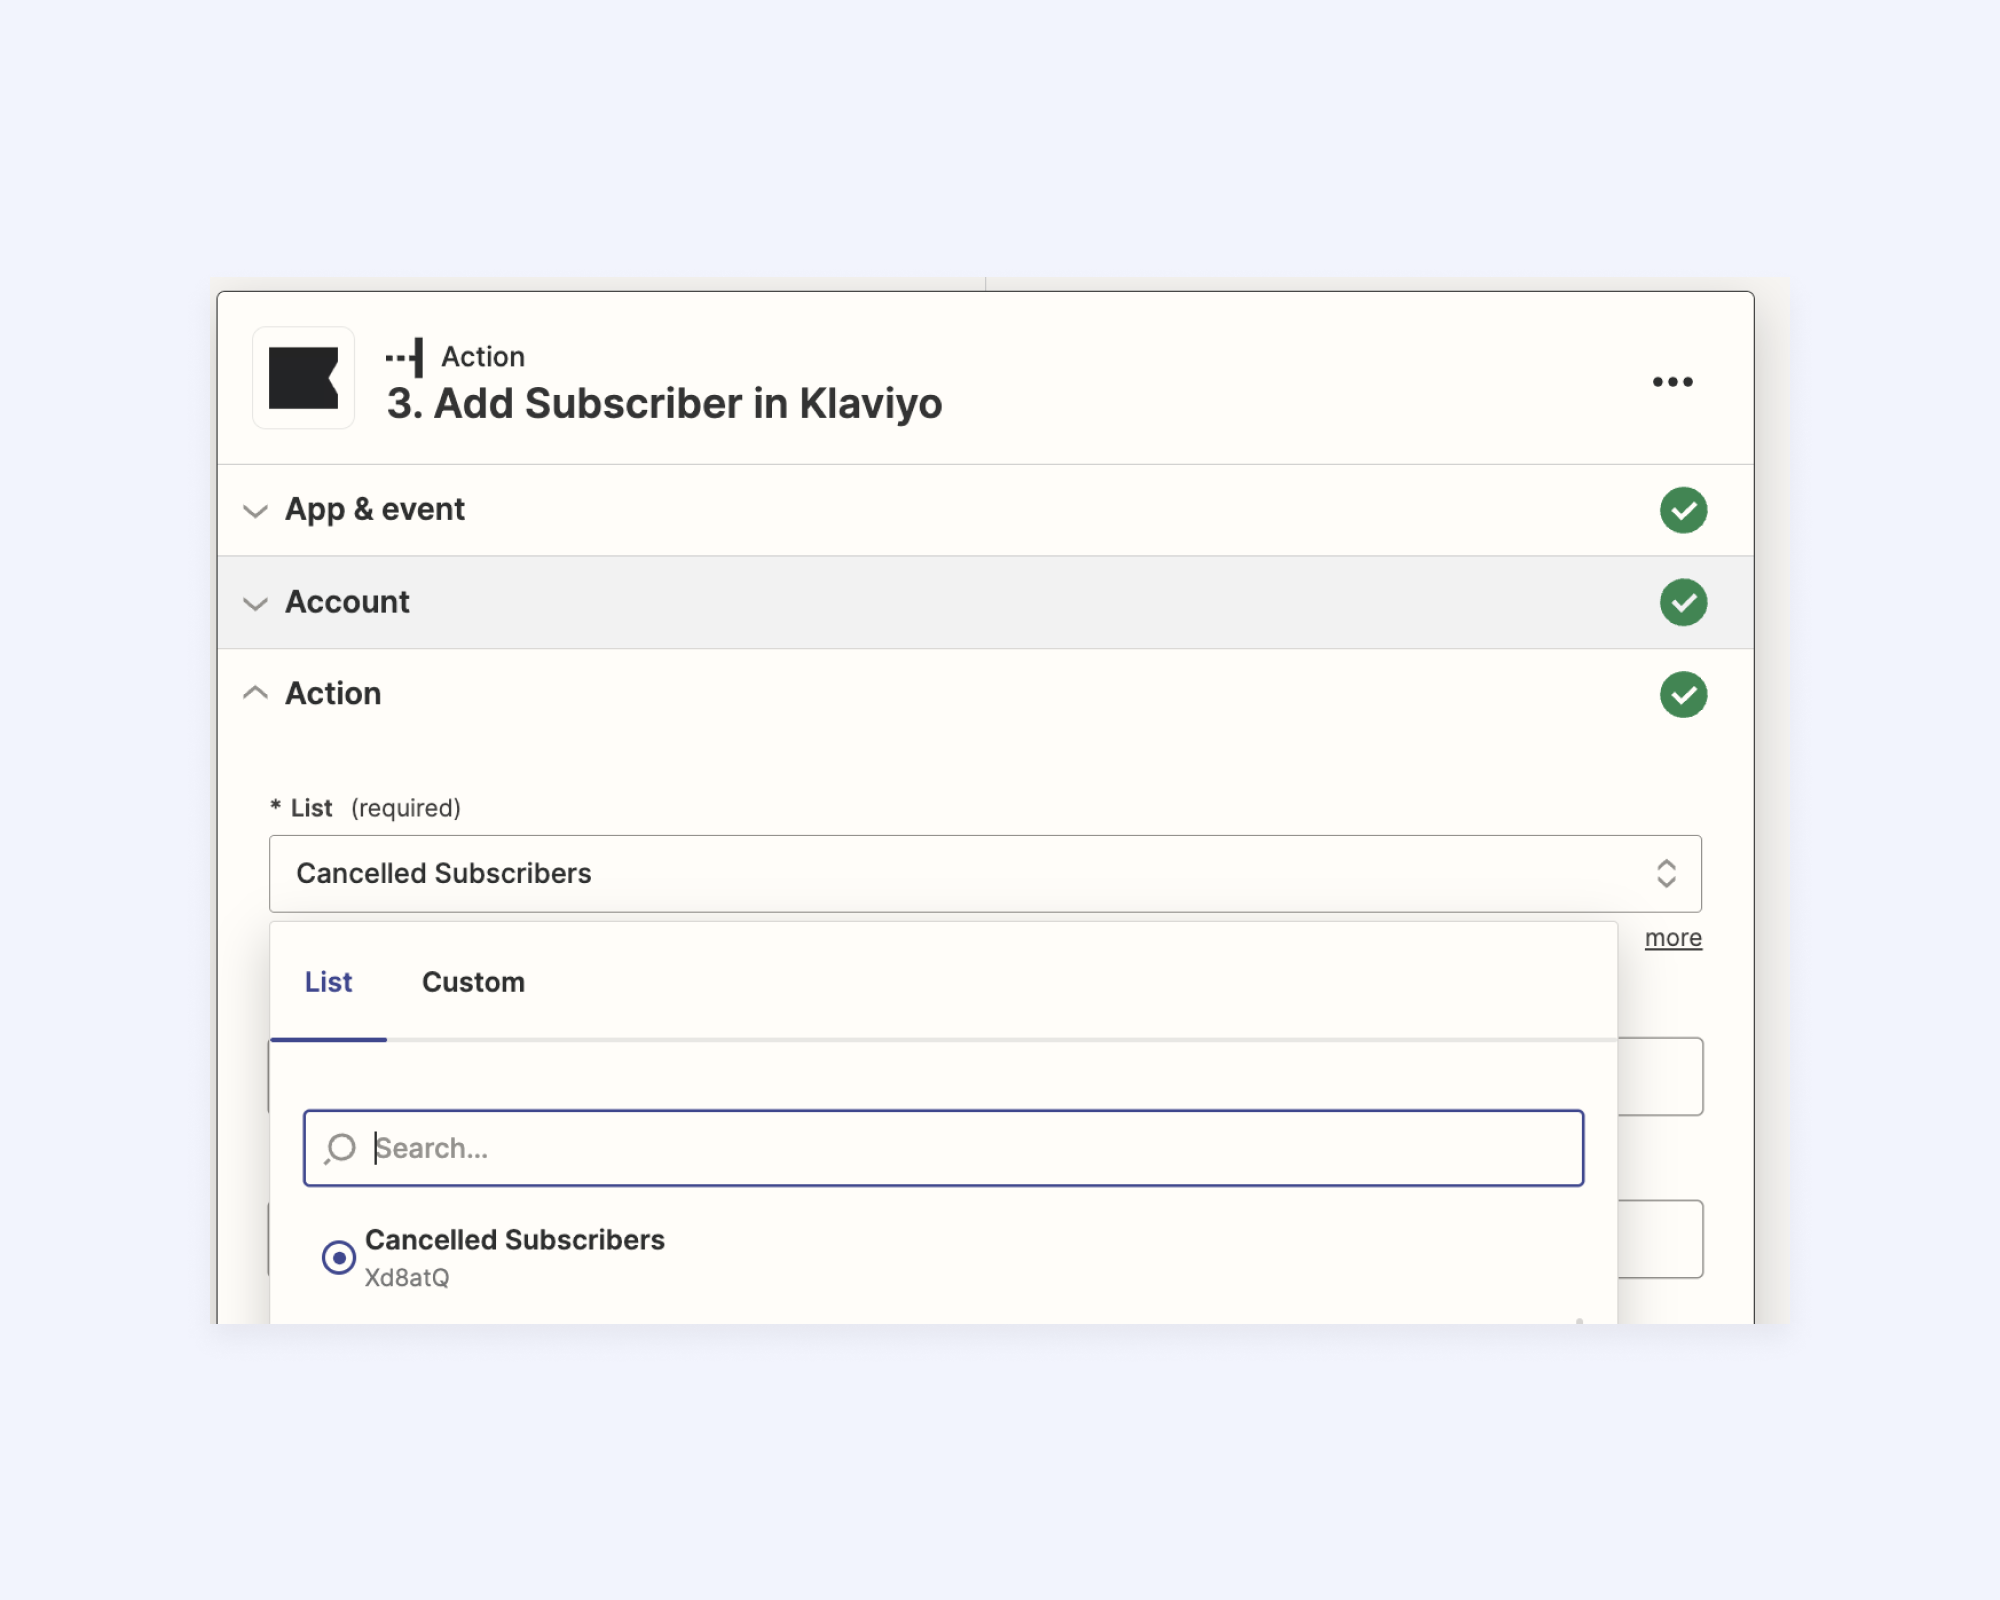
4. Under action, add the list you created in Klaviyo in Step 1 (Canceled users).
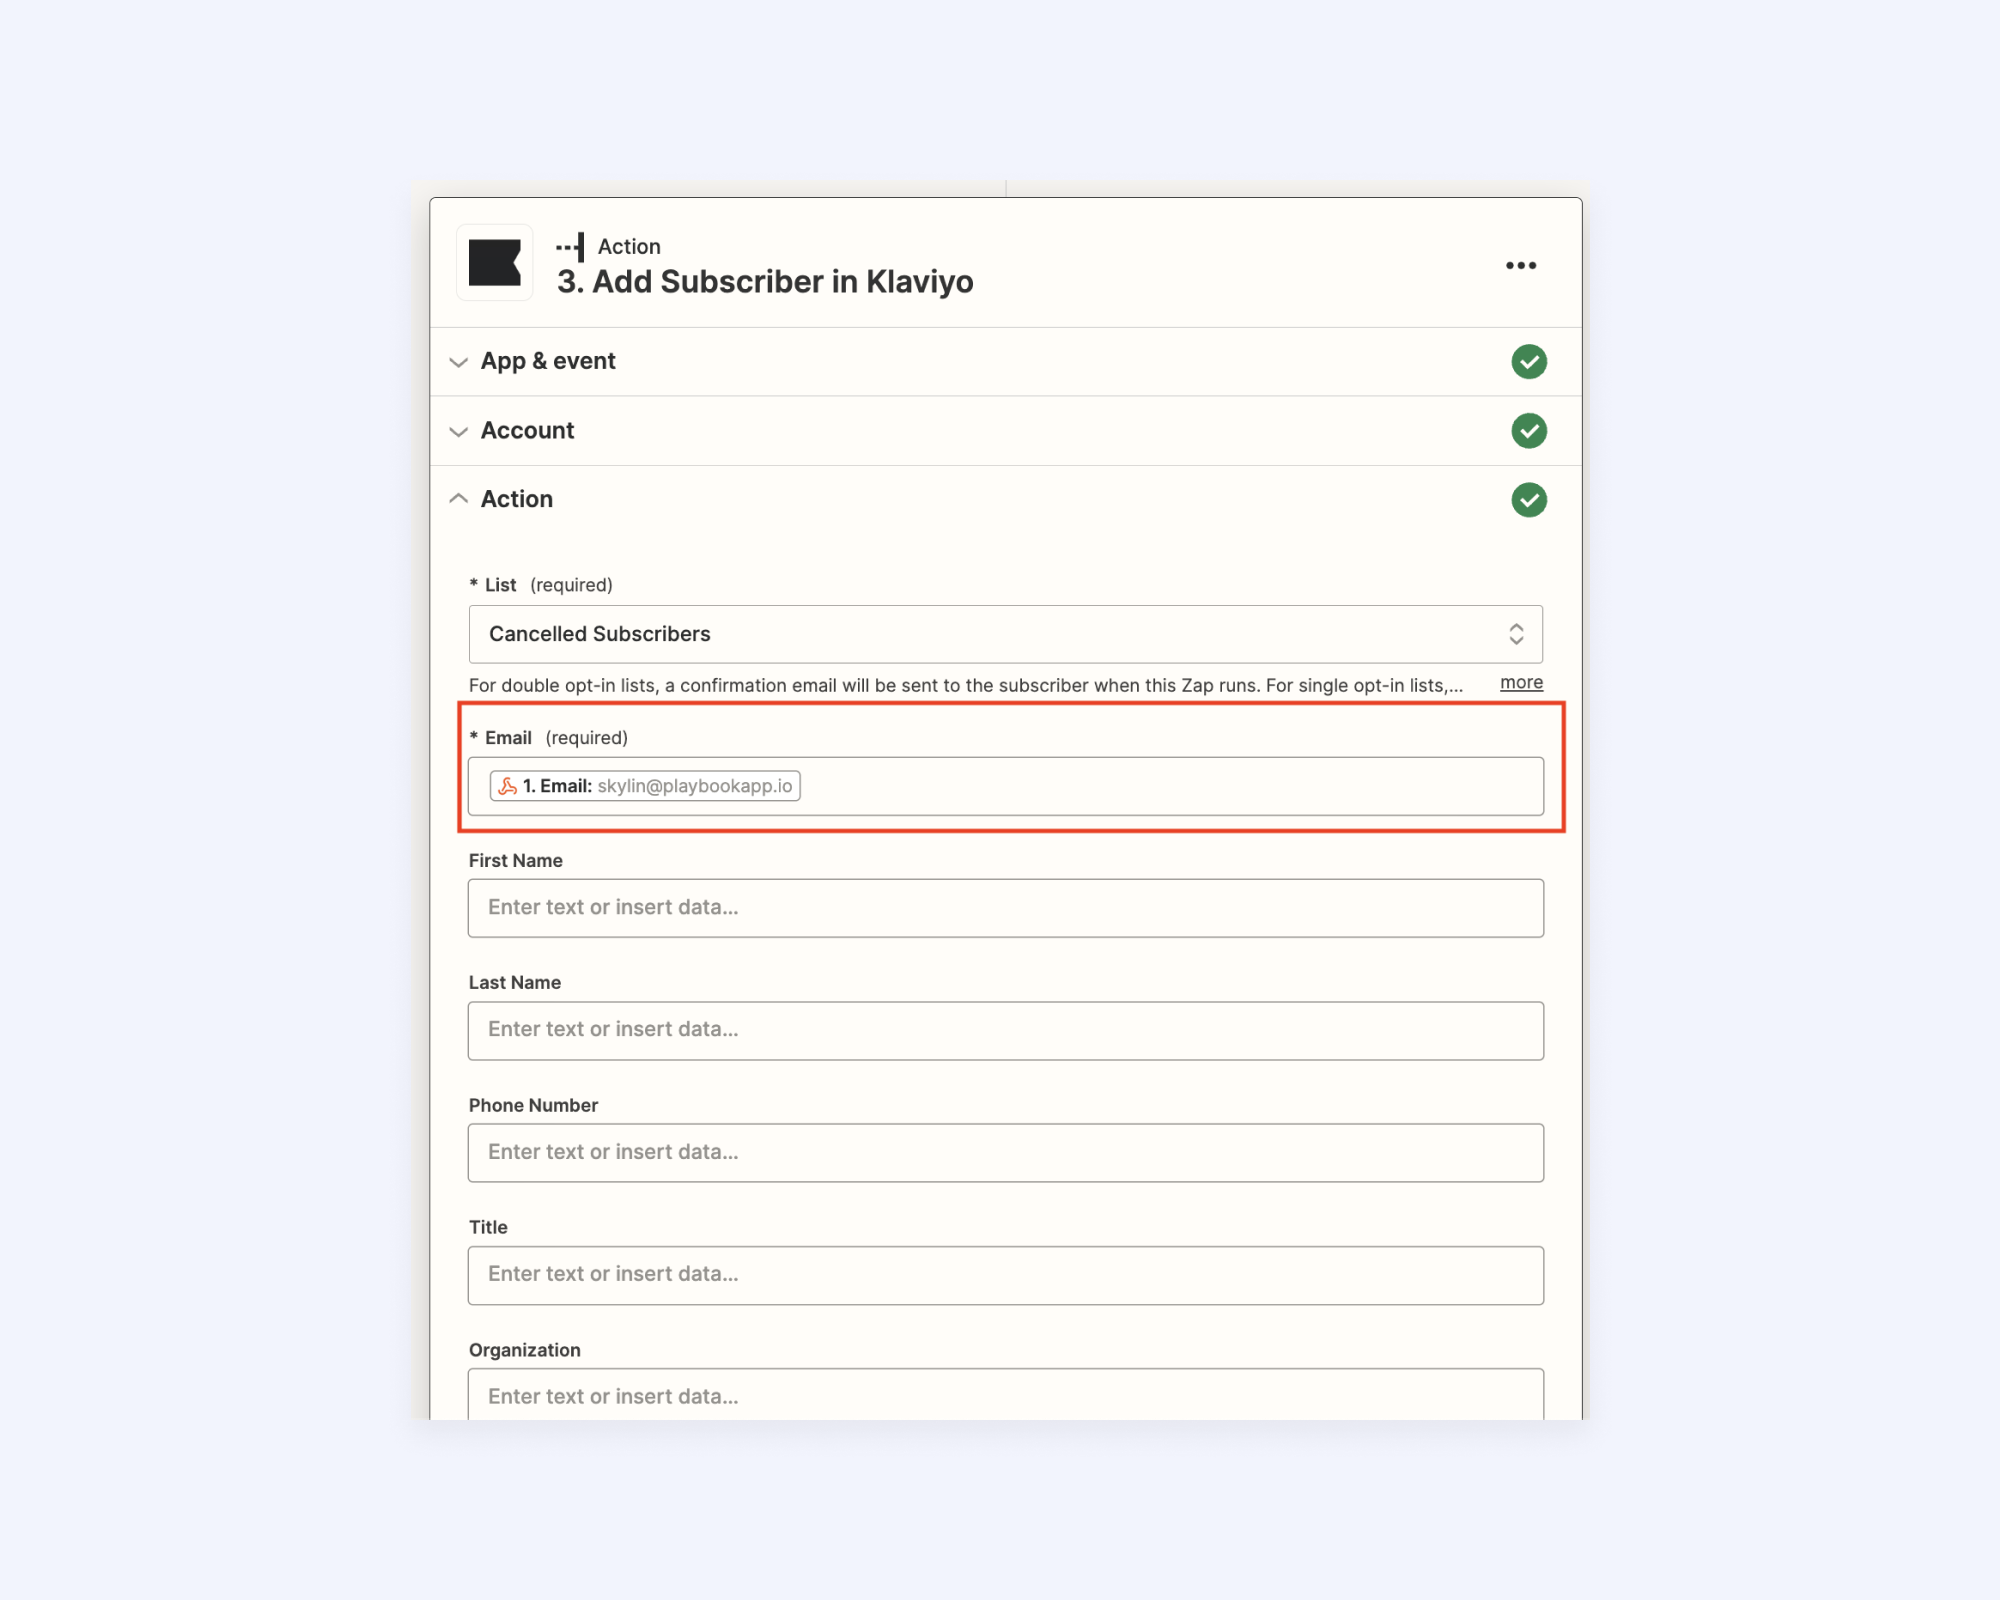
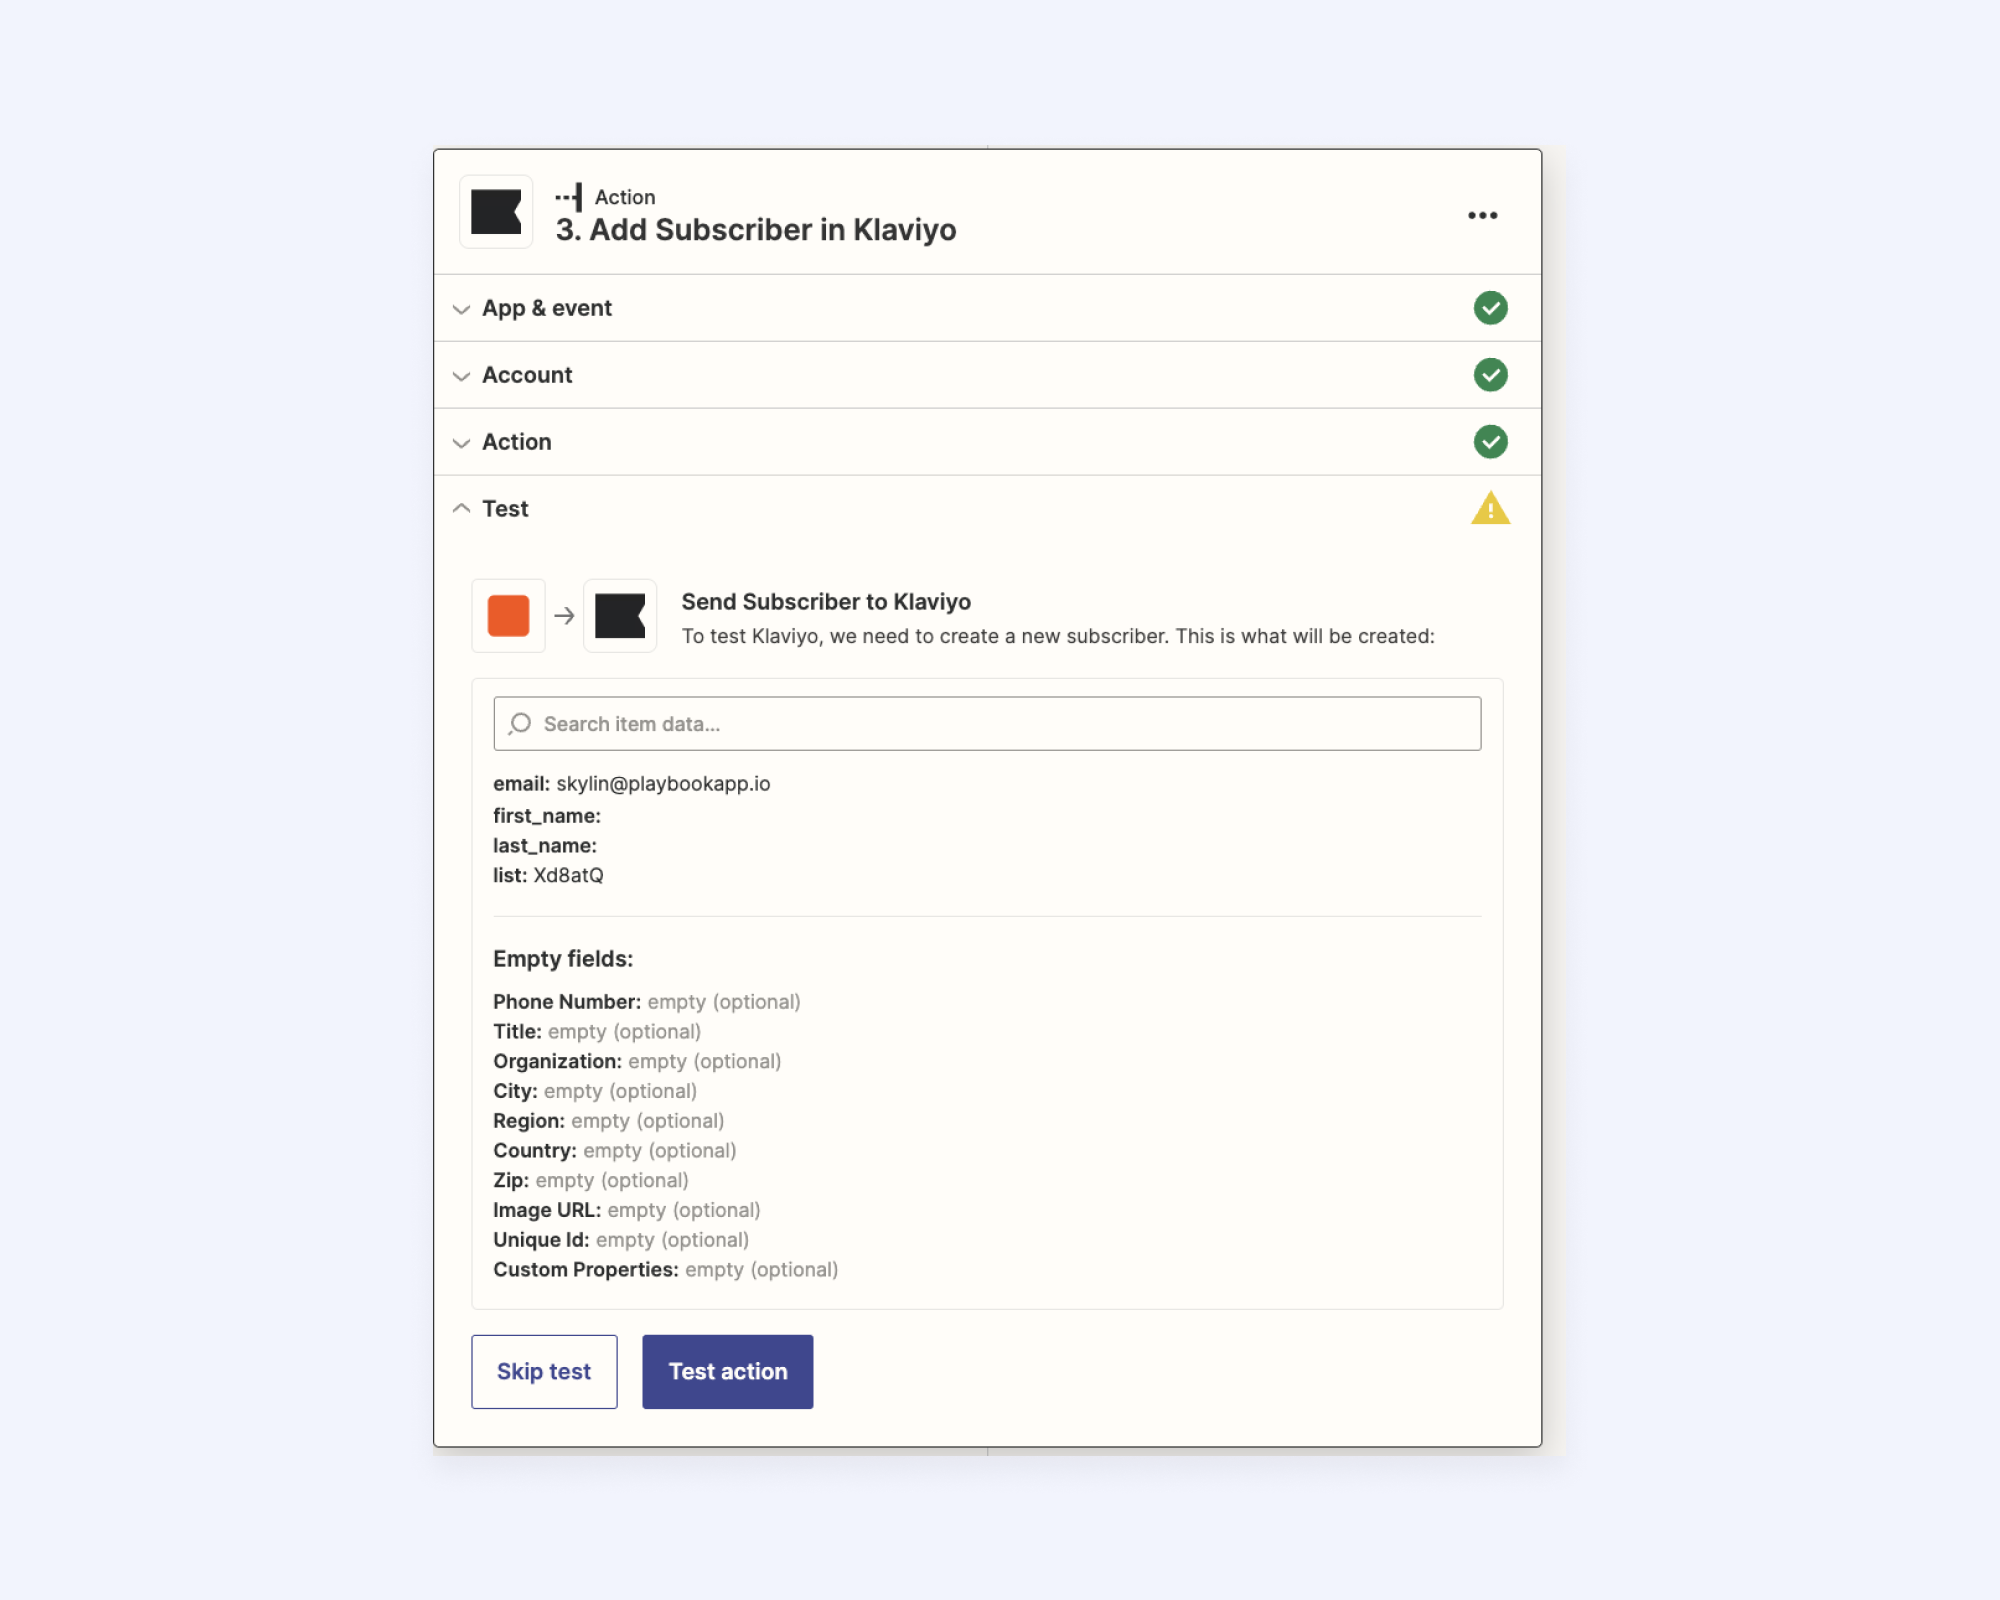
5. Add your email as a test email, then click continue. No need to fill out the rest of the info.
6. Test the action to ensure it’s working properly.
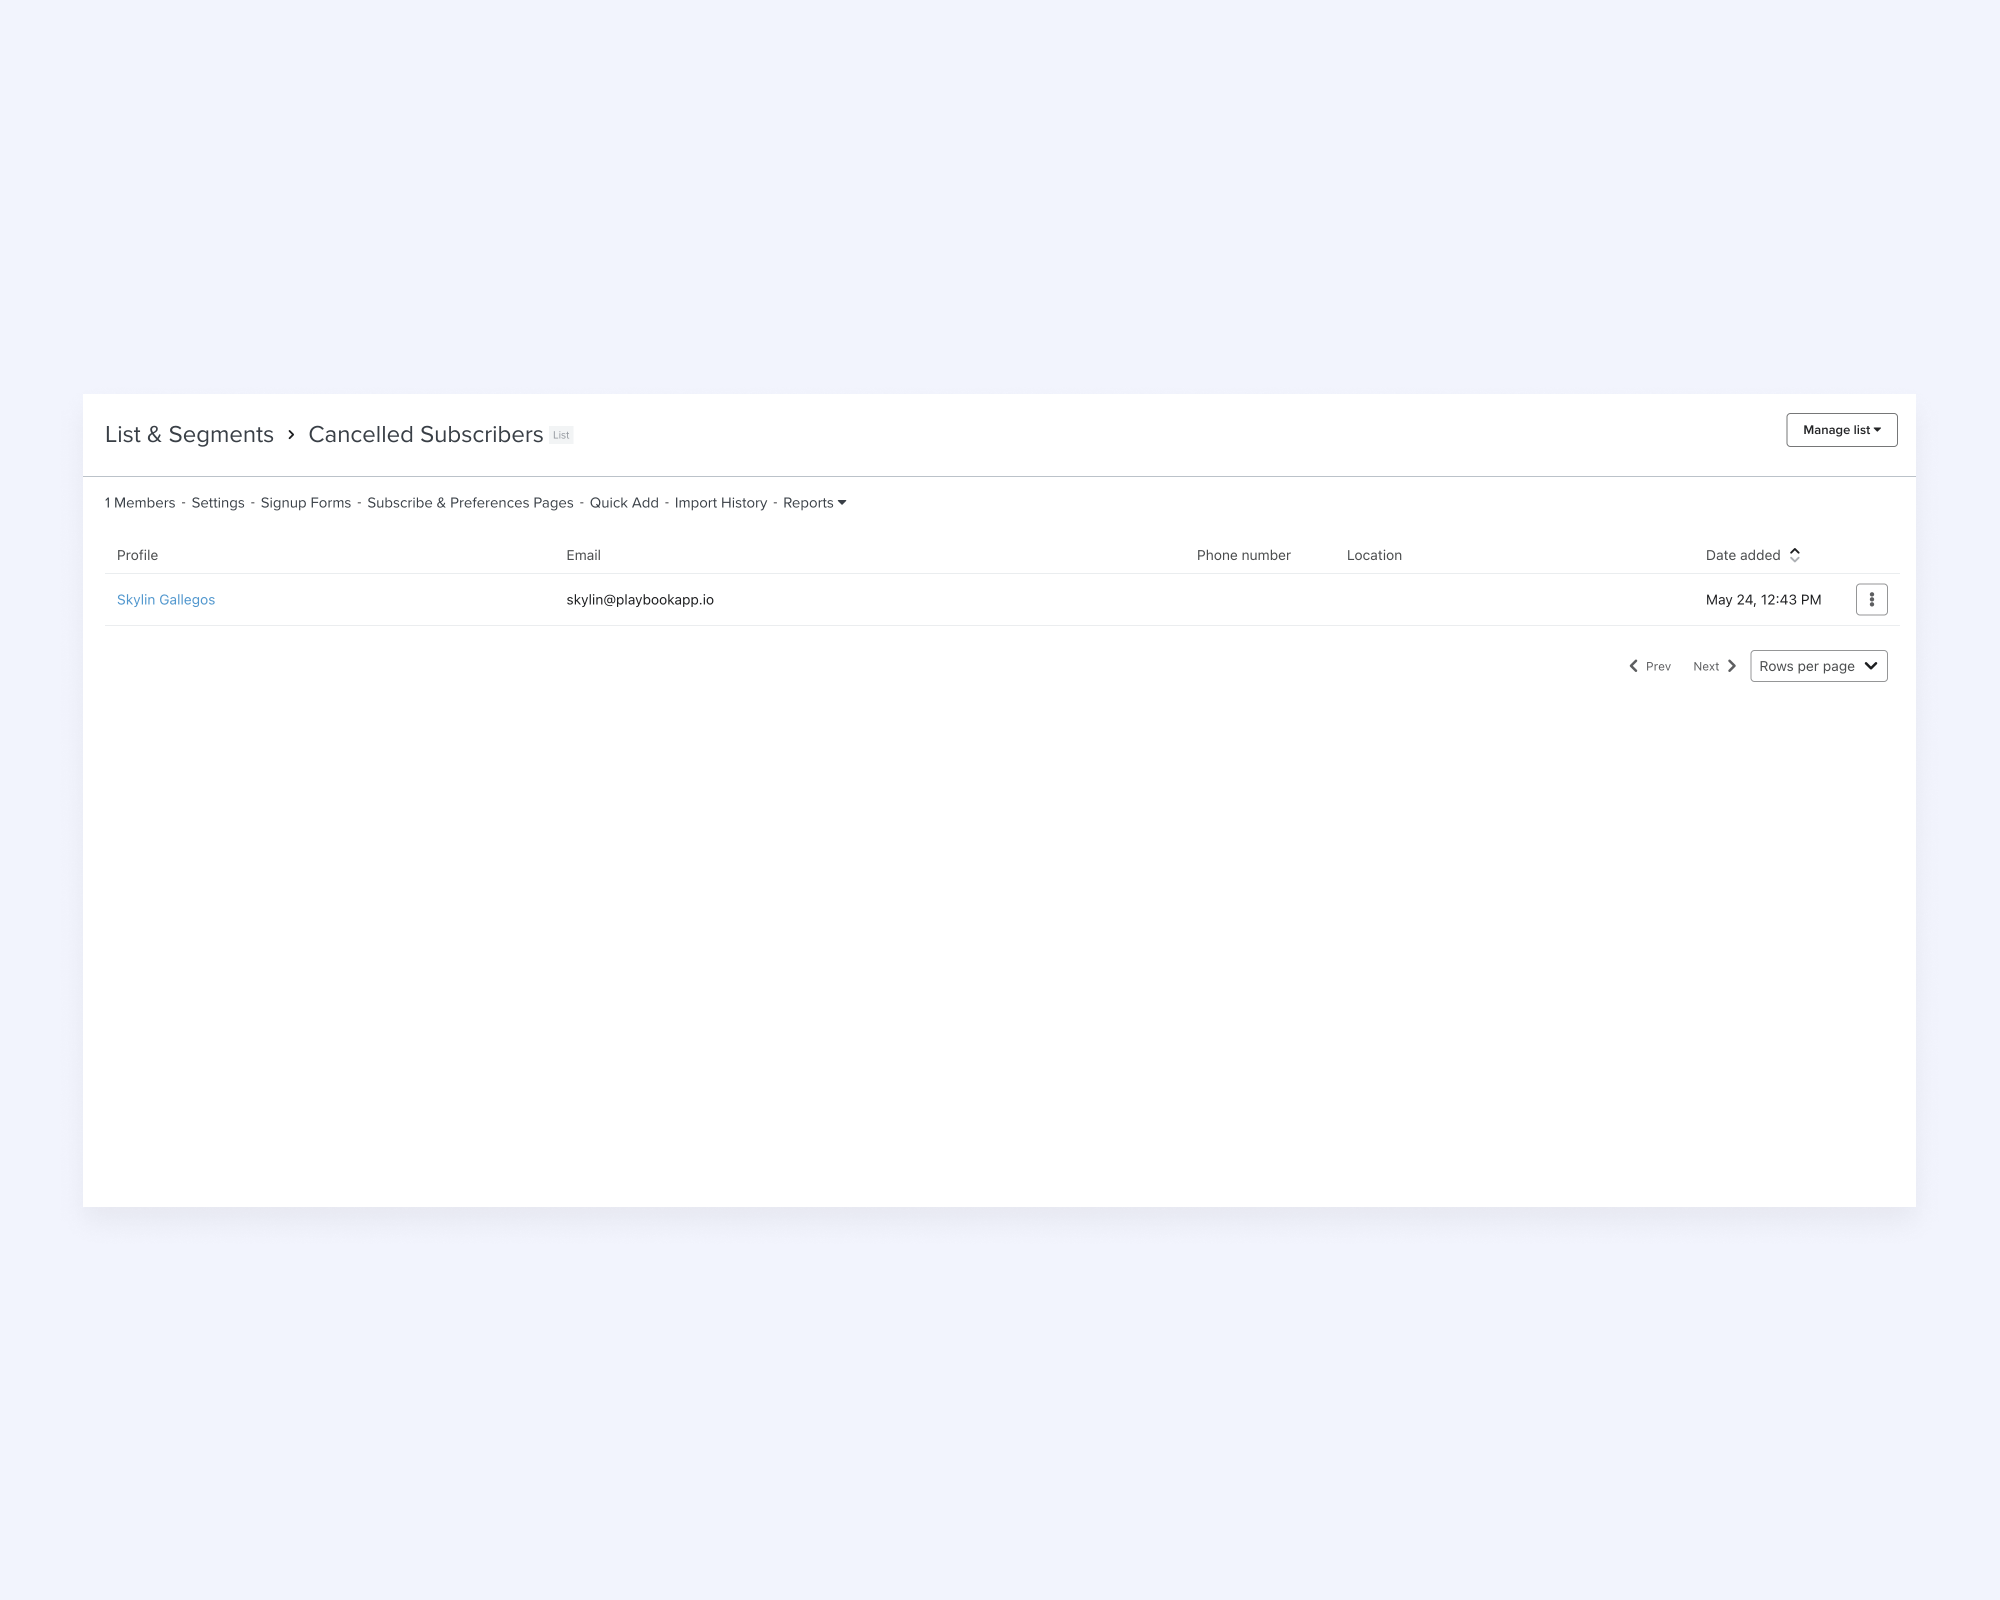
7. If set up properly, you should see your test email appear in the list you created in Klaviyo.
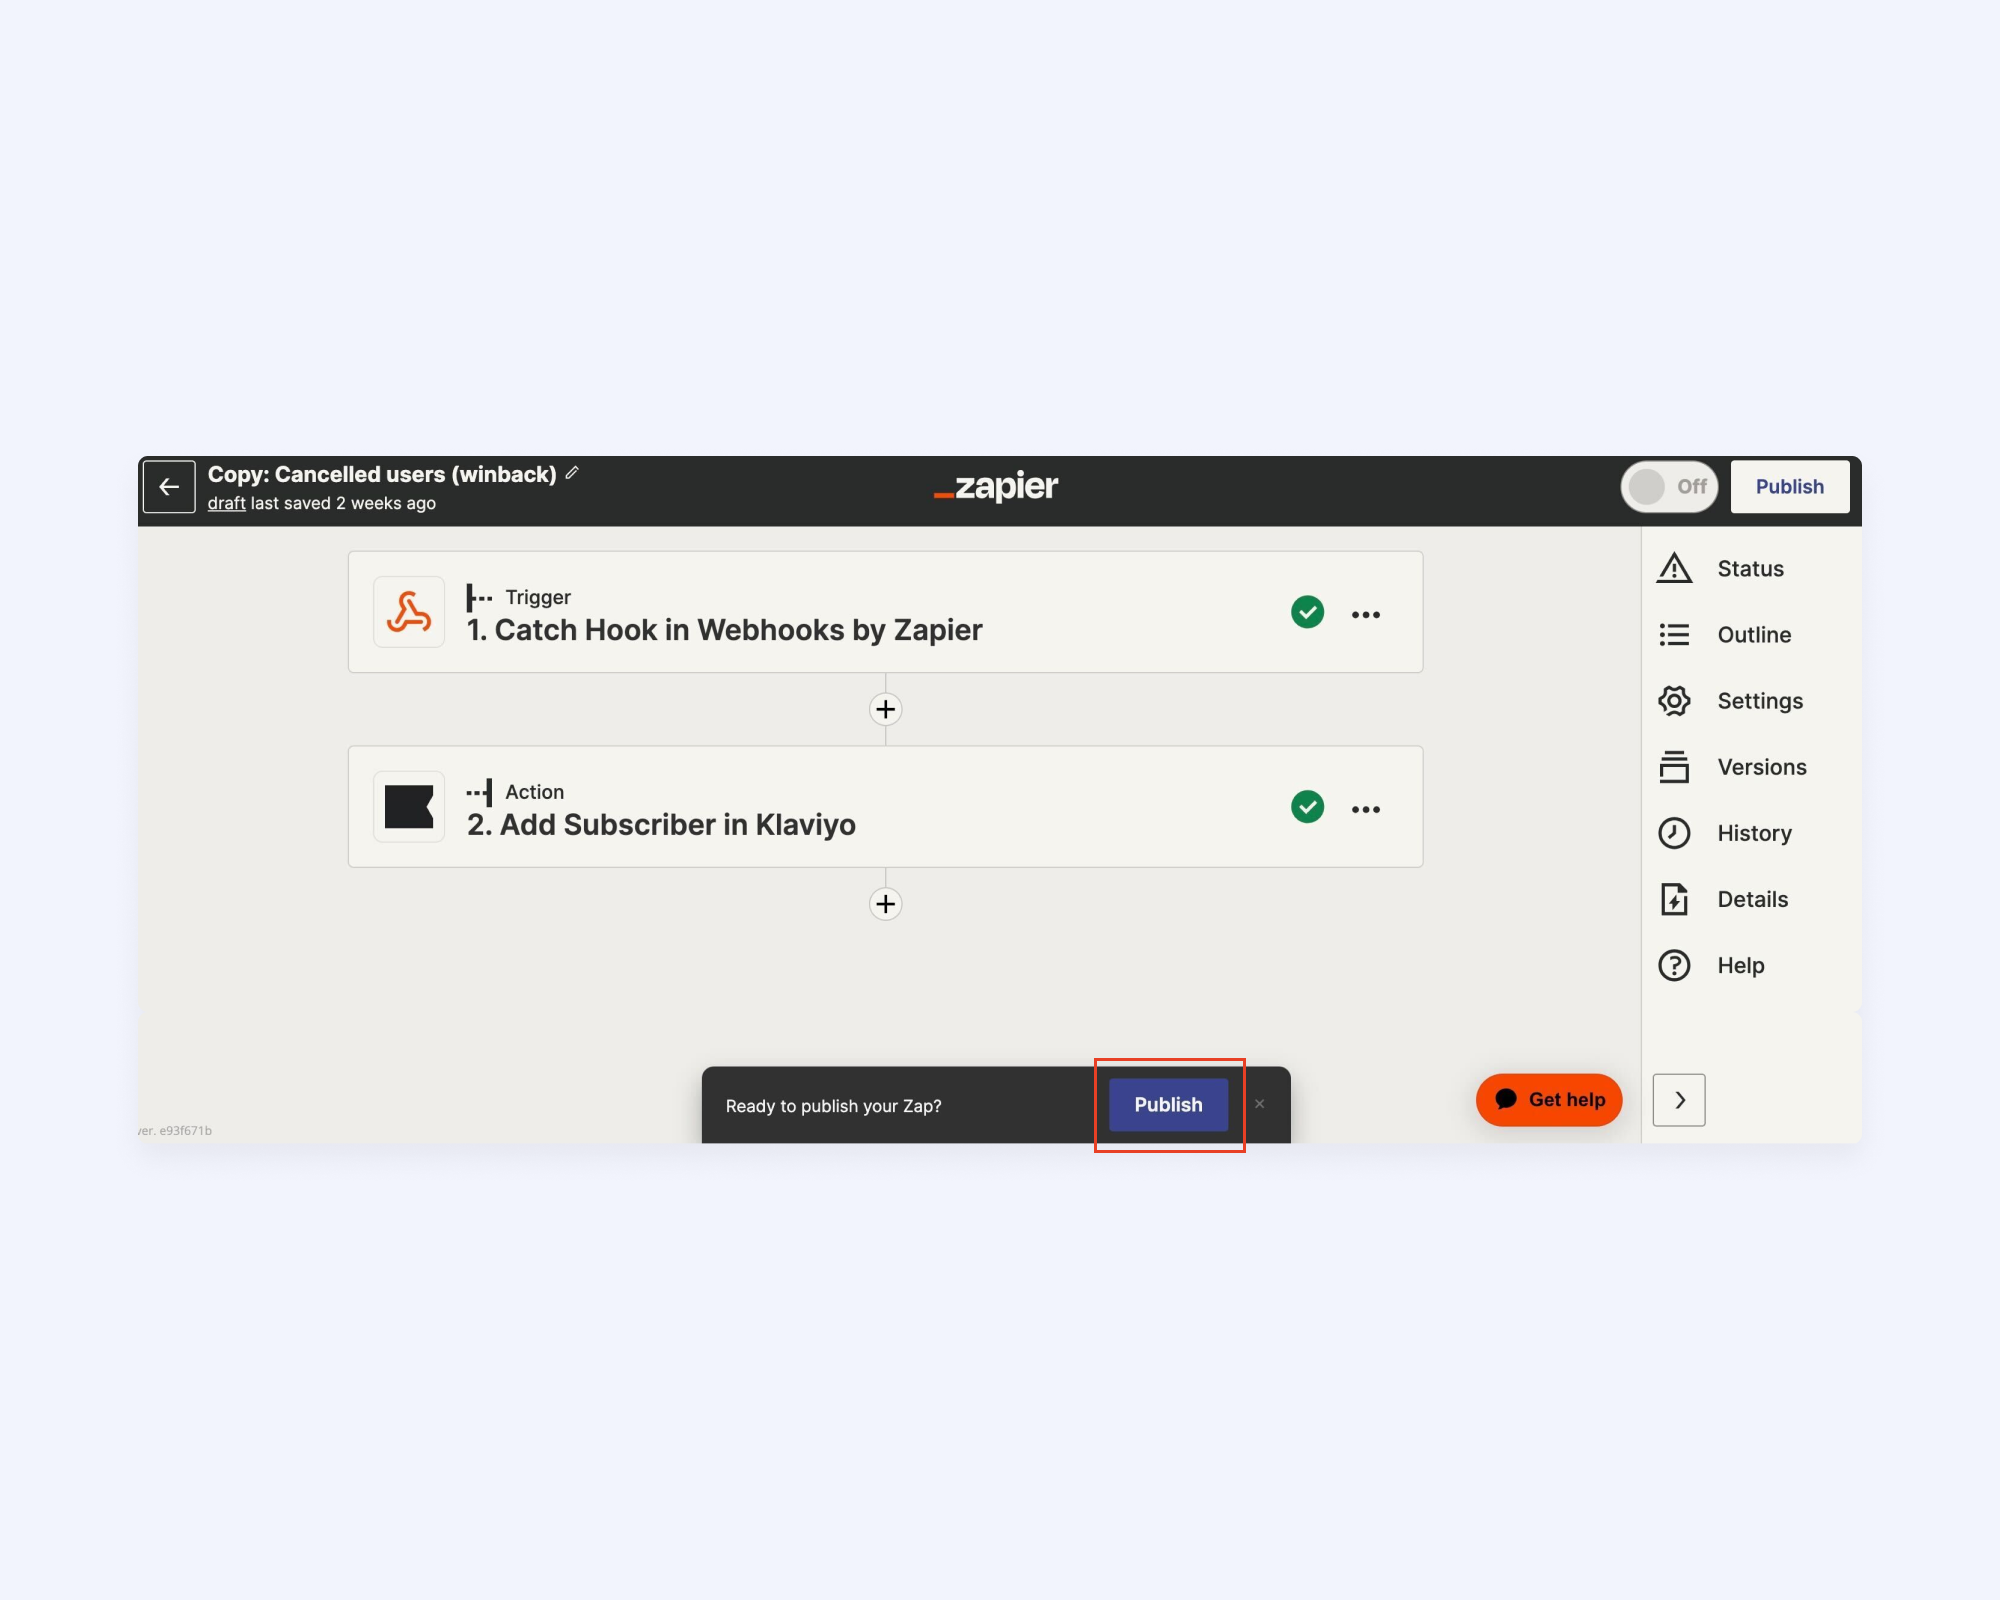
8. Once you’ve confirmed that it’s set up properly, go back to Zapier and click “Publish”.
Step 5: Set Up Automated Email Flow in Klaviyo
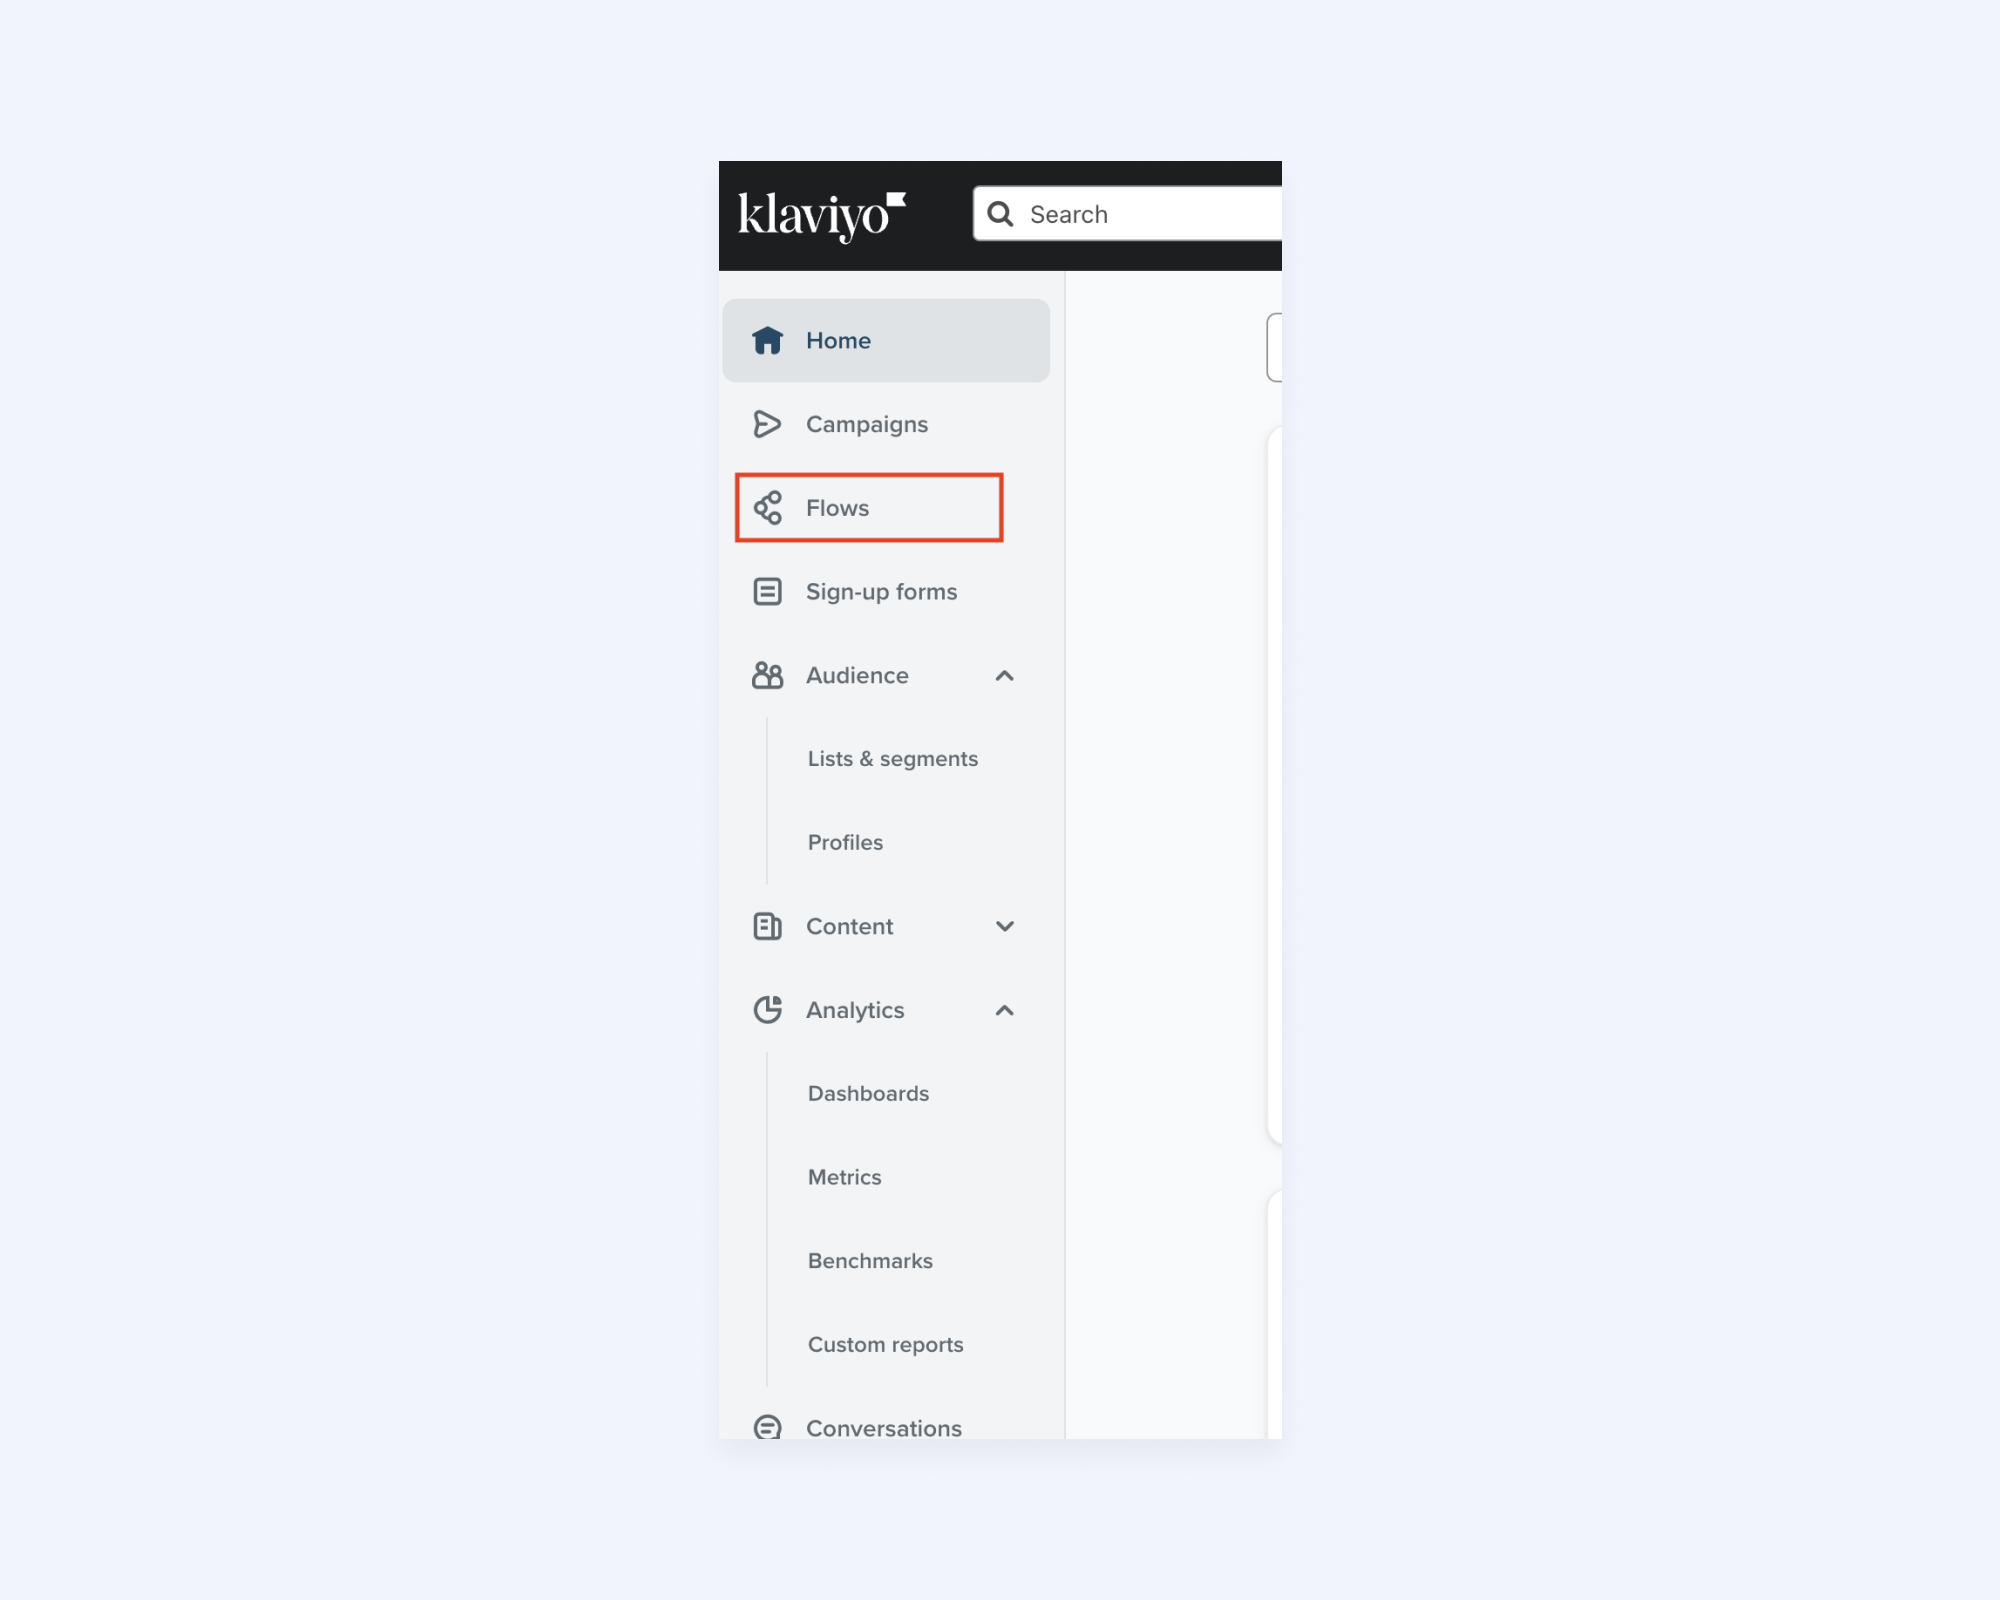
Now that Klaviyo and Zapier are connected, it’s time to head to Klaviyo and create your automated email flow.
1. Select flows.
2. Select create flow.

3. You can either select “Create From Scratch” in the upper right corner or select a Klayvio-made win-back flow. We’ll show you how to create from scratch by selecting the “Create From Scratch” button in the upper right hand corner. Name the flow and click continue.

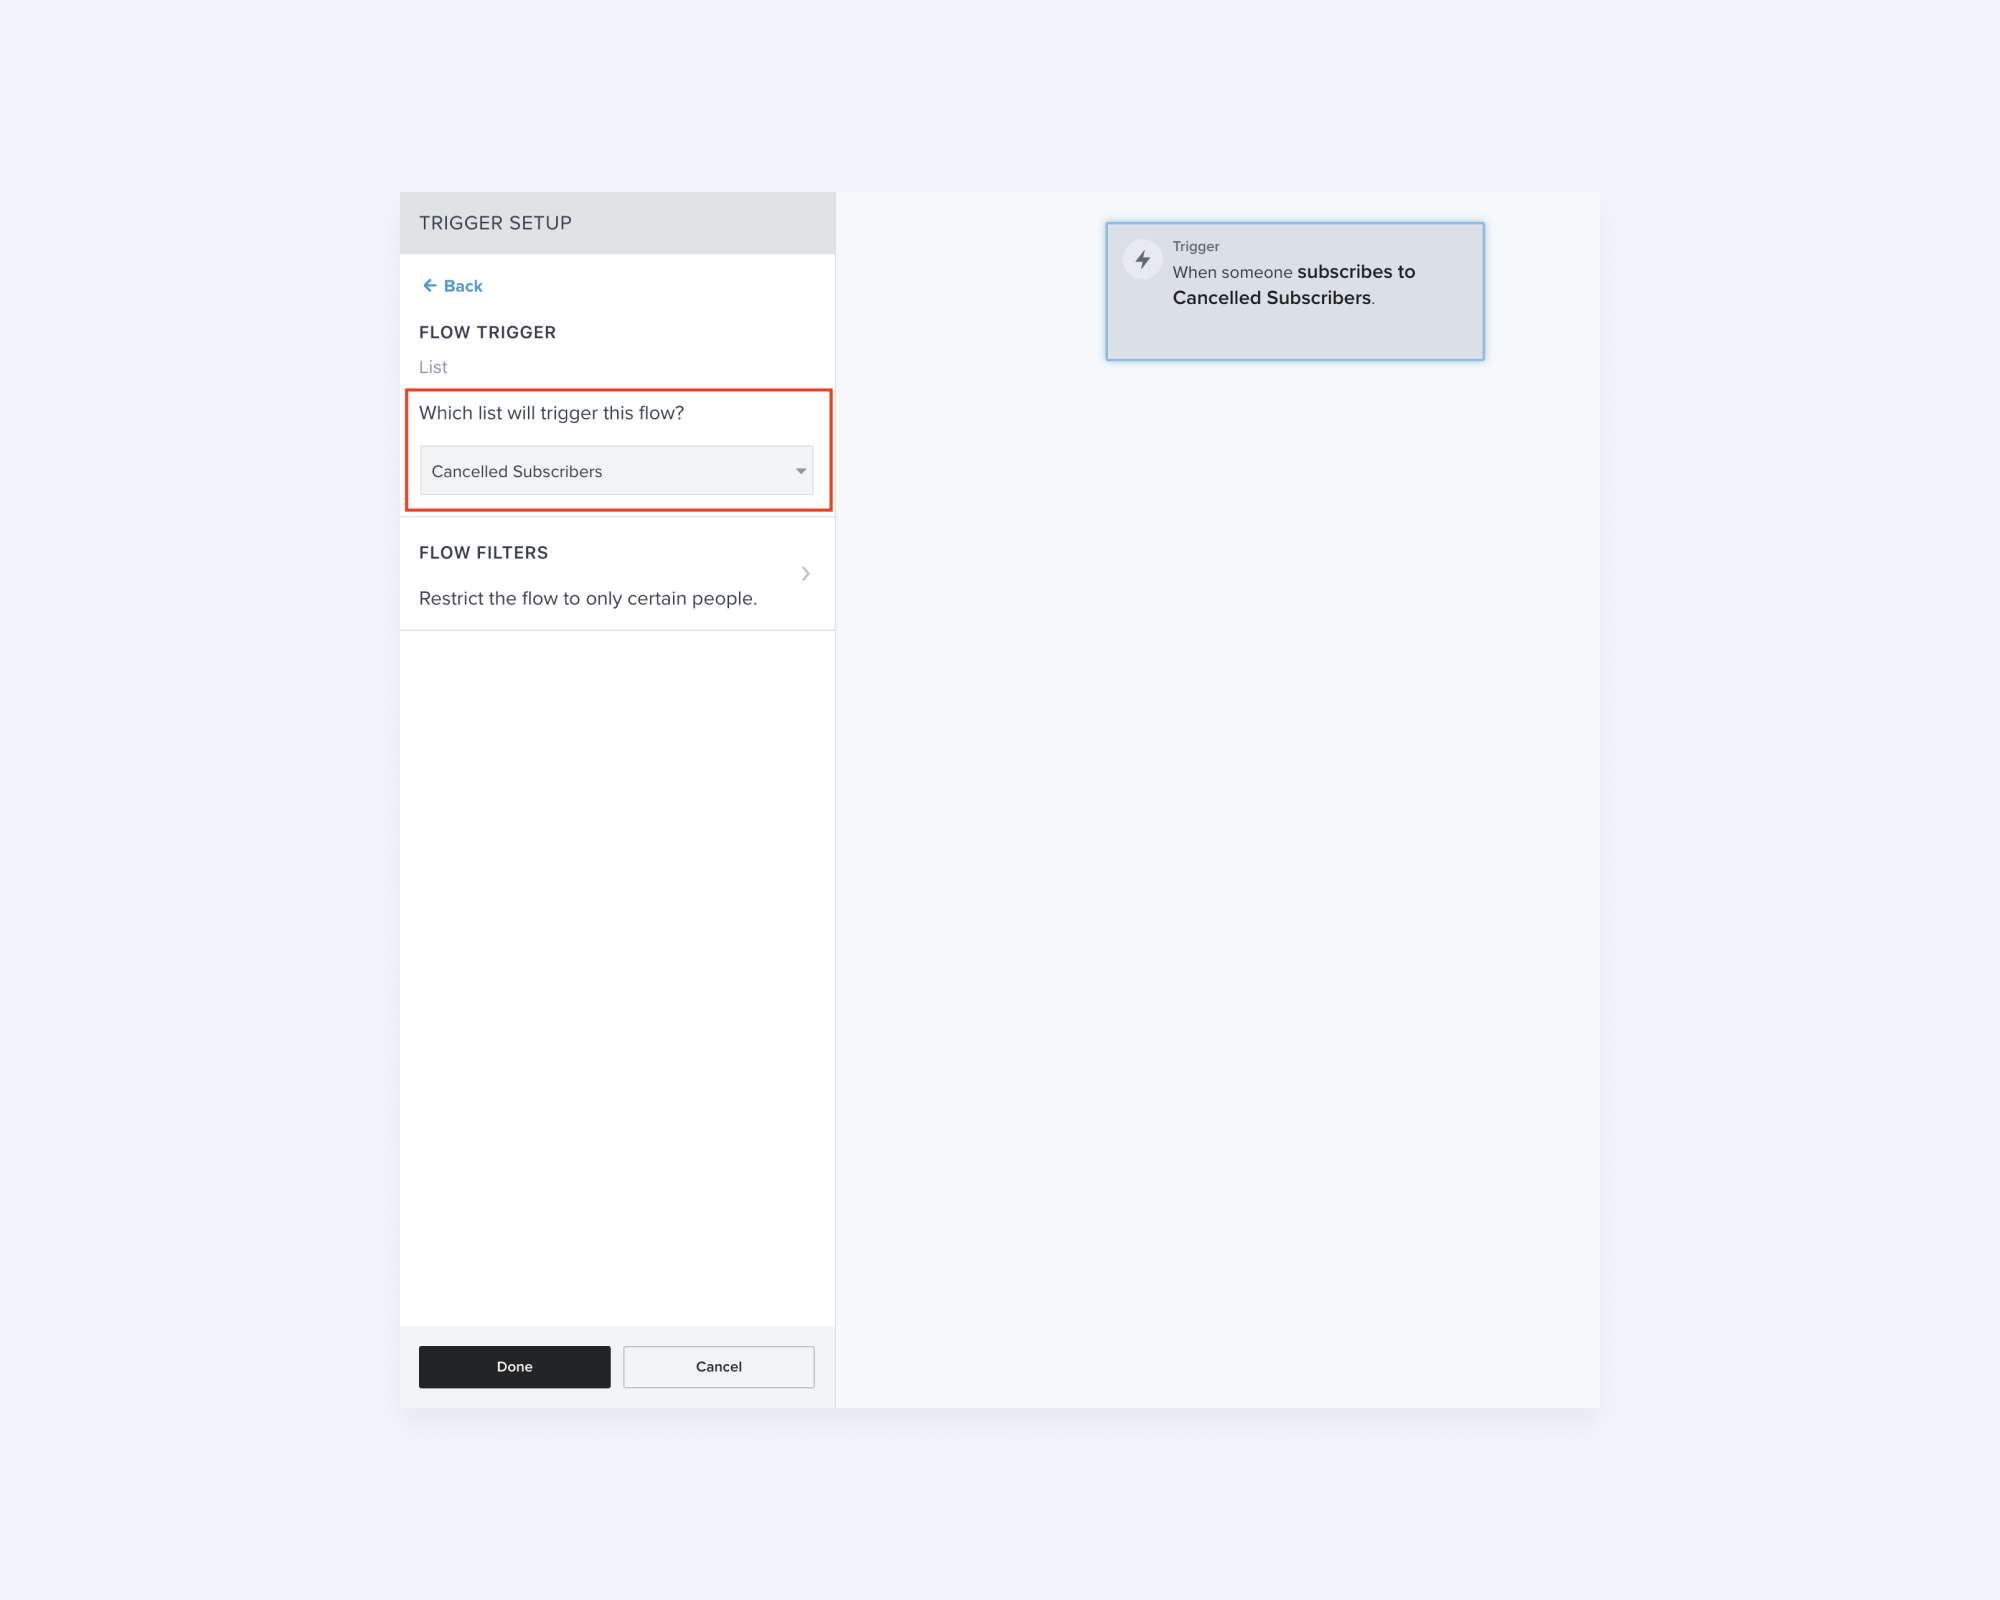
4. Start by adding the flow trigger. This is the action that indicates to Klaviyo that it needs to send an email. In this case, it’ll be when someone gets added to the “canceled subscribers” list.
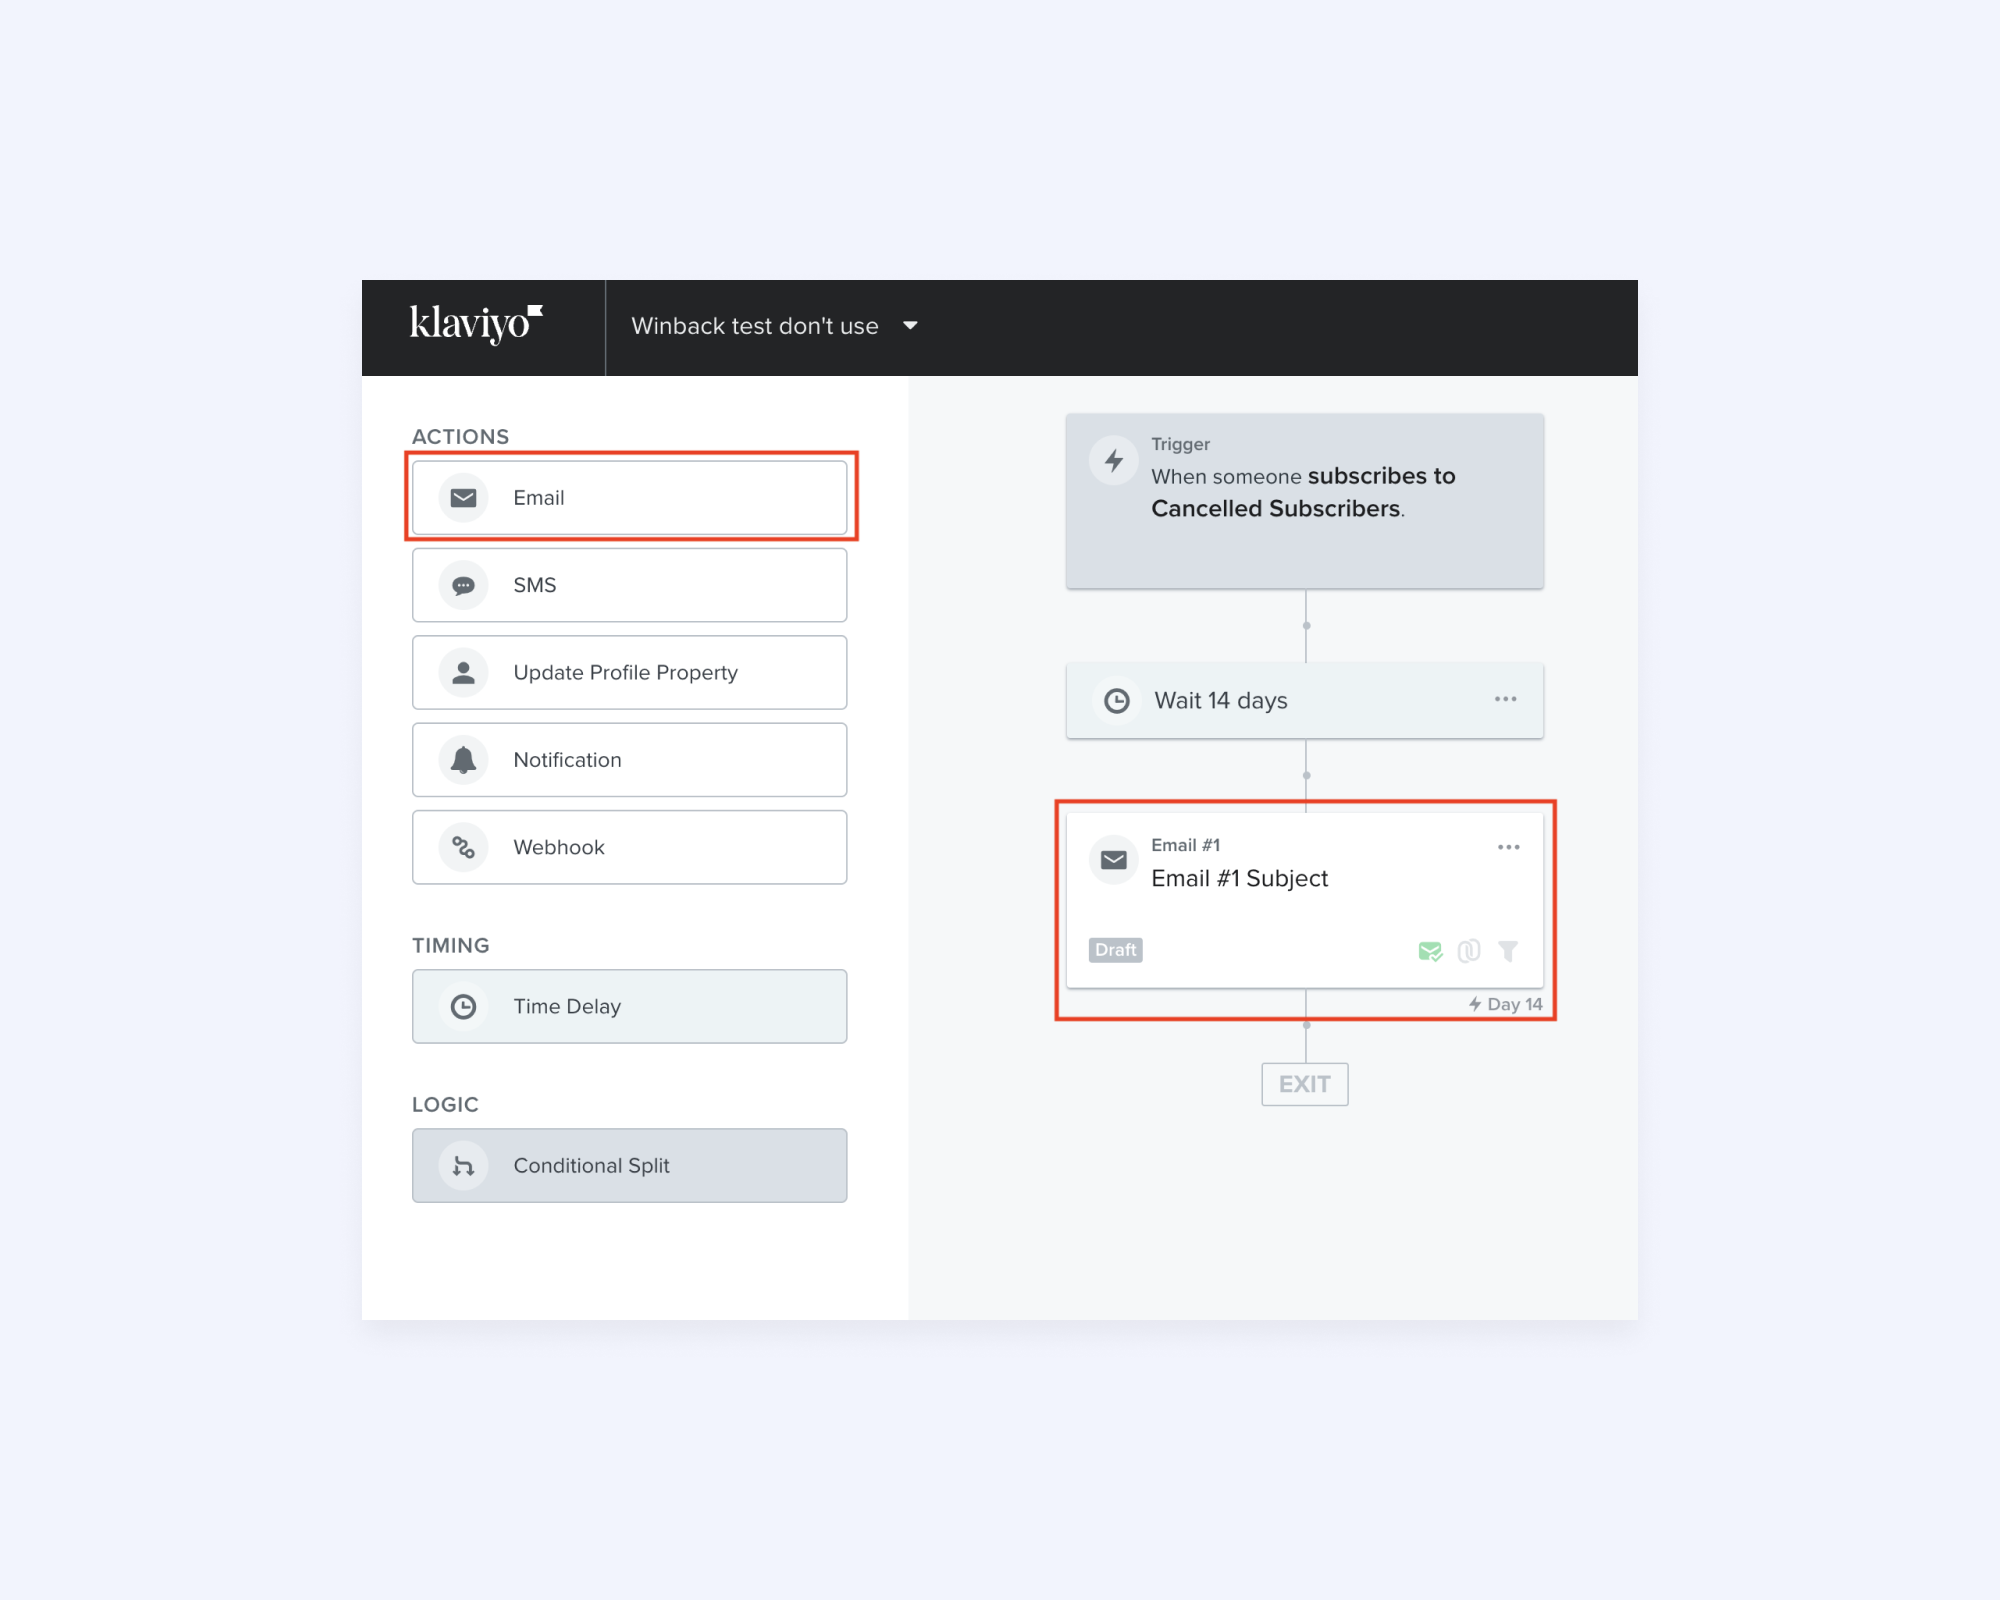
5. Next, add a time delay. This is the time between when the subscriber cancels and when the first email of the flow is sent. We recommend giving it a couple weeks so they have time away from the app and it doesn’t seem like you’re spamming them as soon as they cancel. You can also choose to have the emails sent on a certain day or a certain time.

6. Next, add the first email by dragging and dropping “Email” into the flow chart. (We’ll come back to design this.)
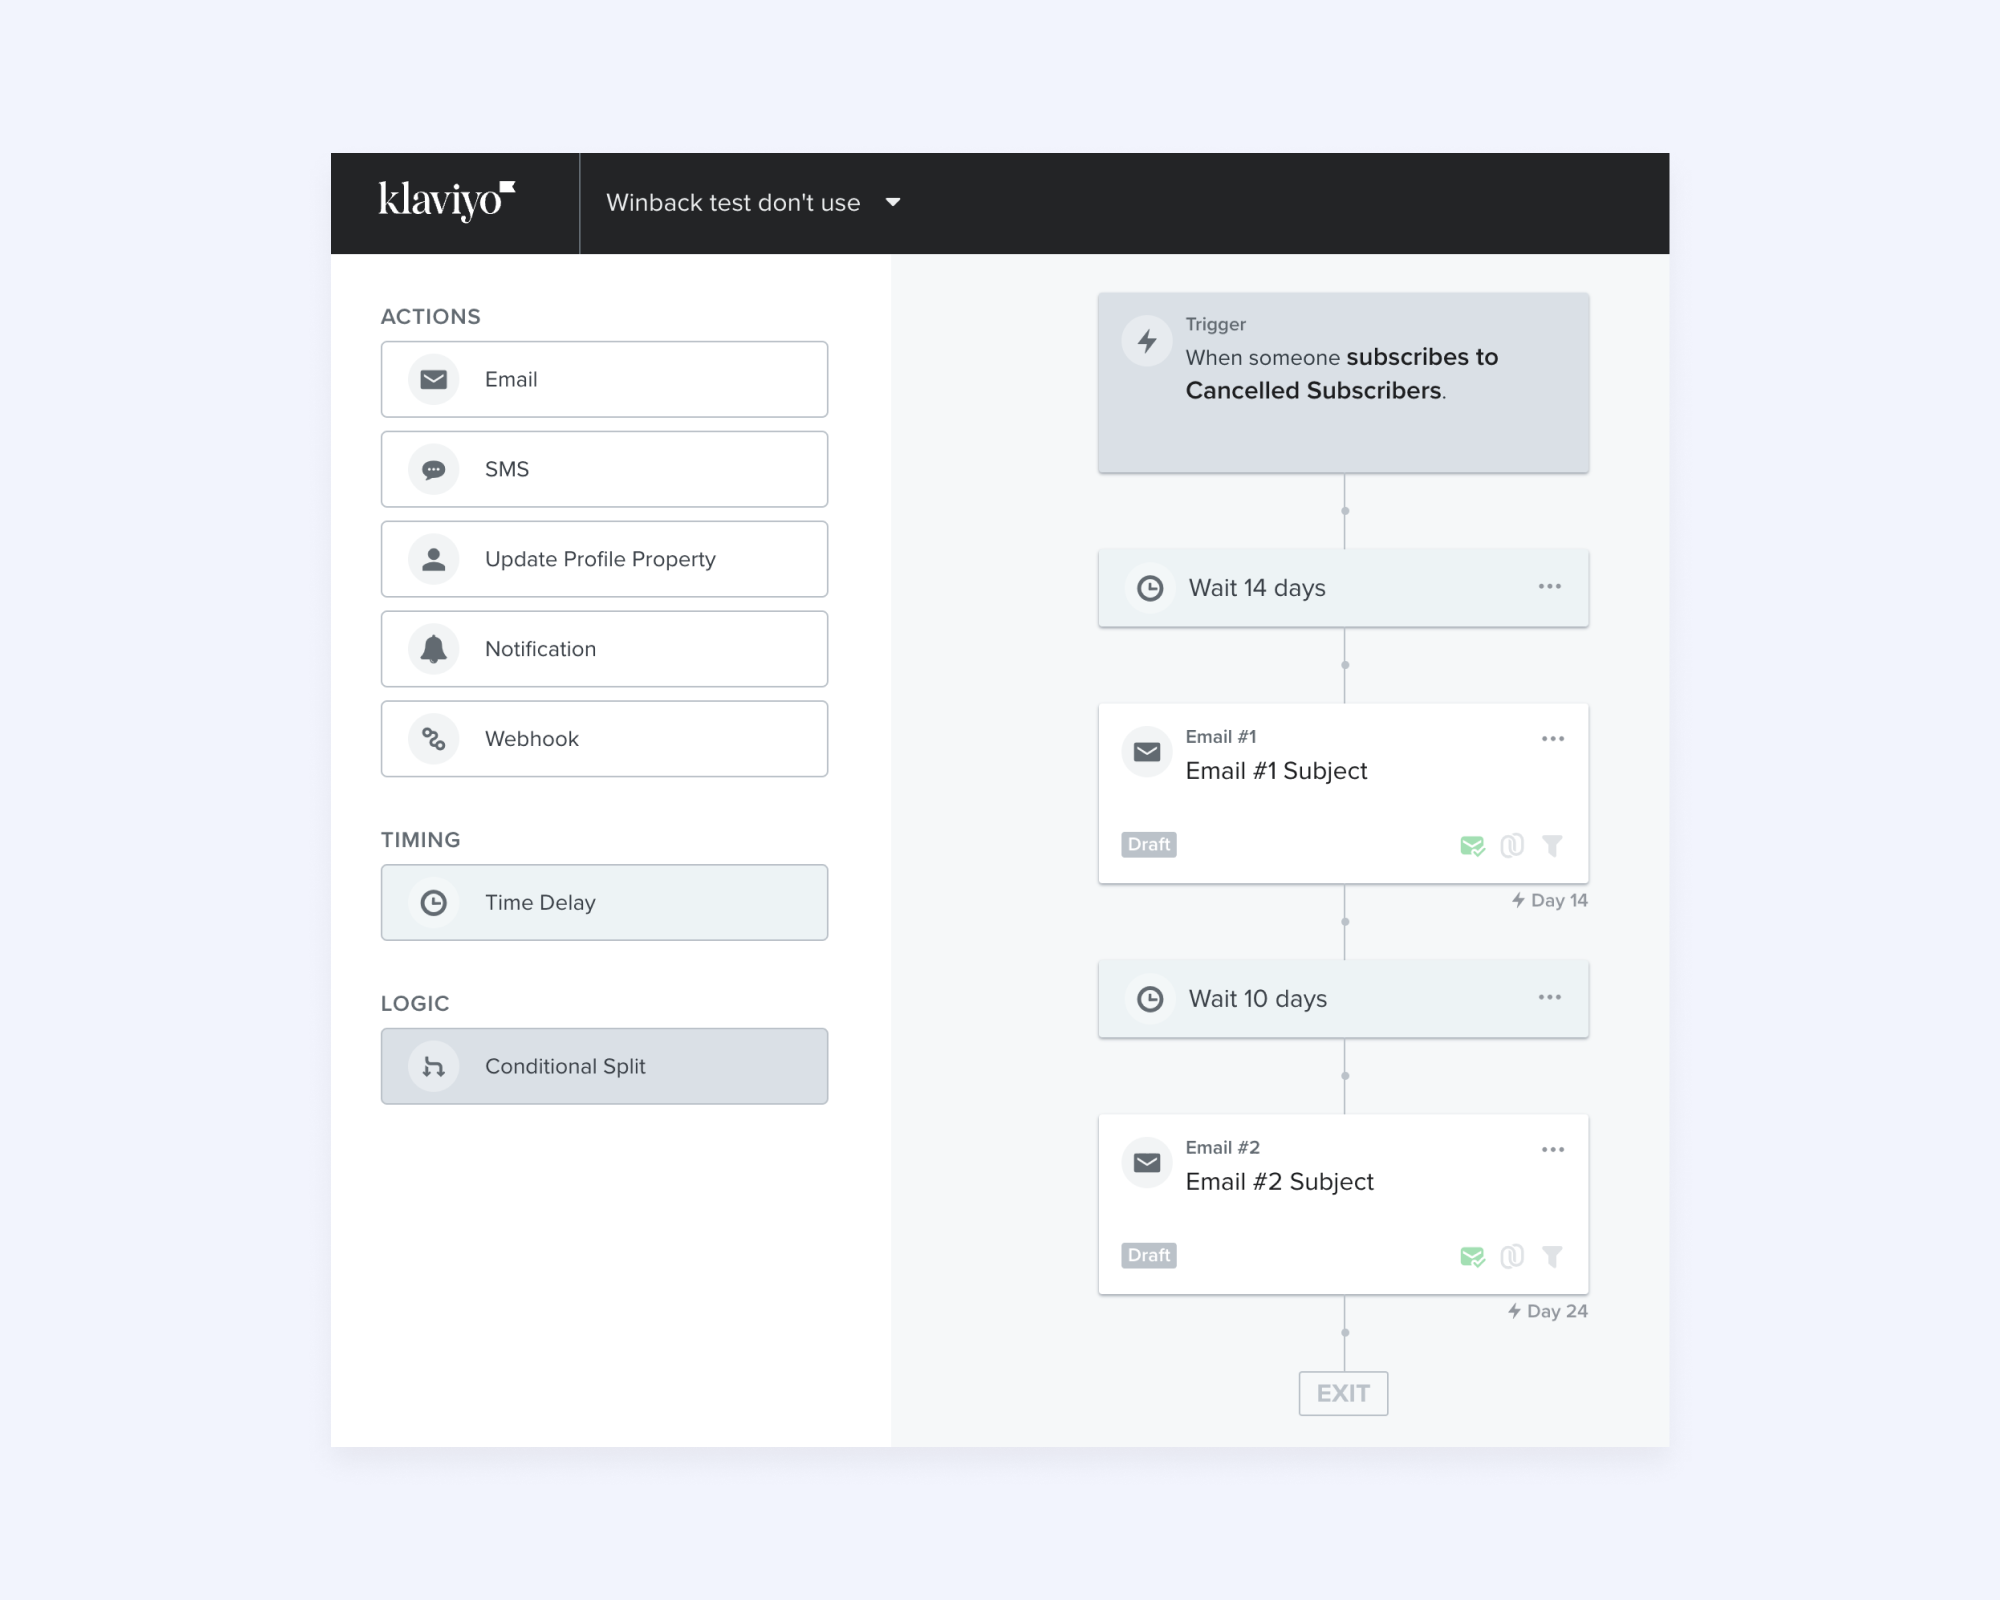
7. Depending on how many emails you want to send out in this flow, you can stop here, or continue to add another time delay and a second follow up email. Repeat steps 5 & 6 for as many emails as you’d like to send.
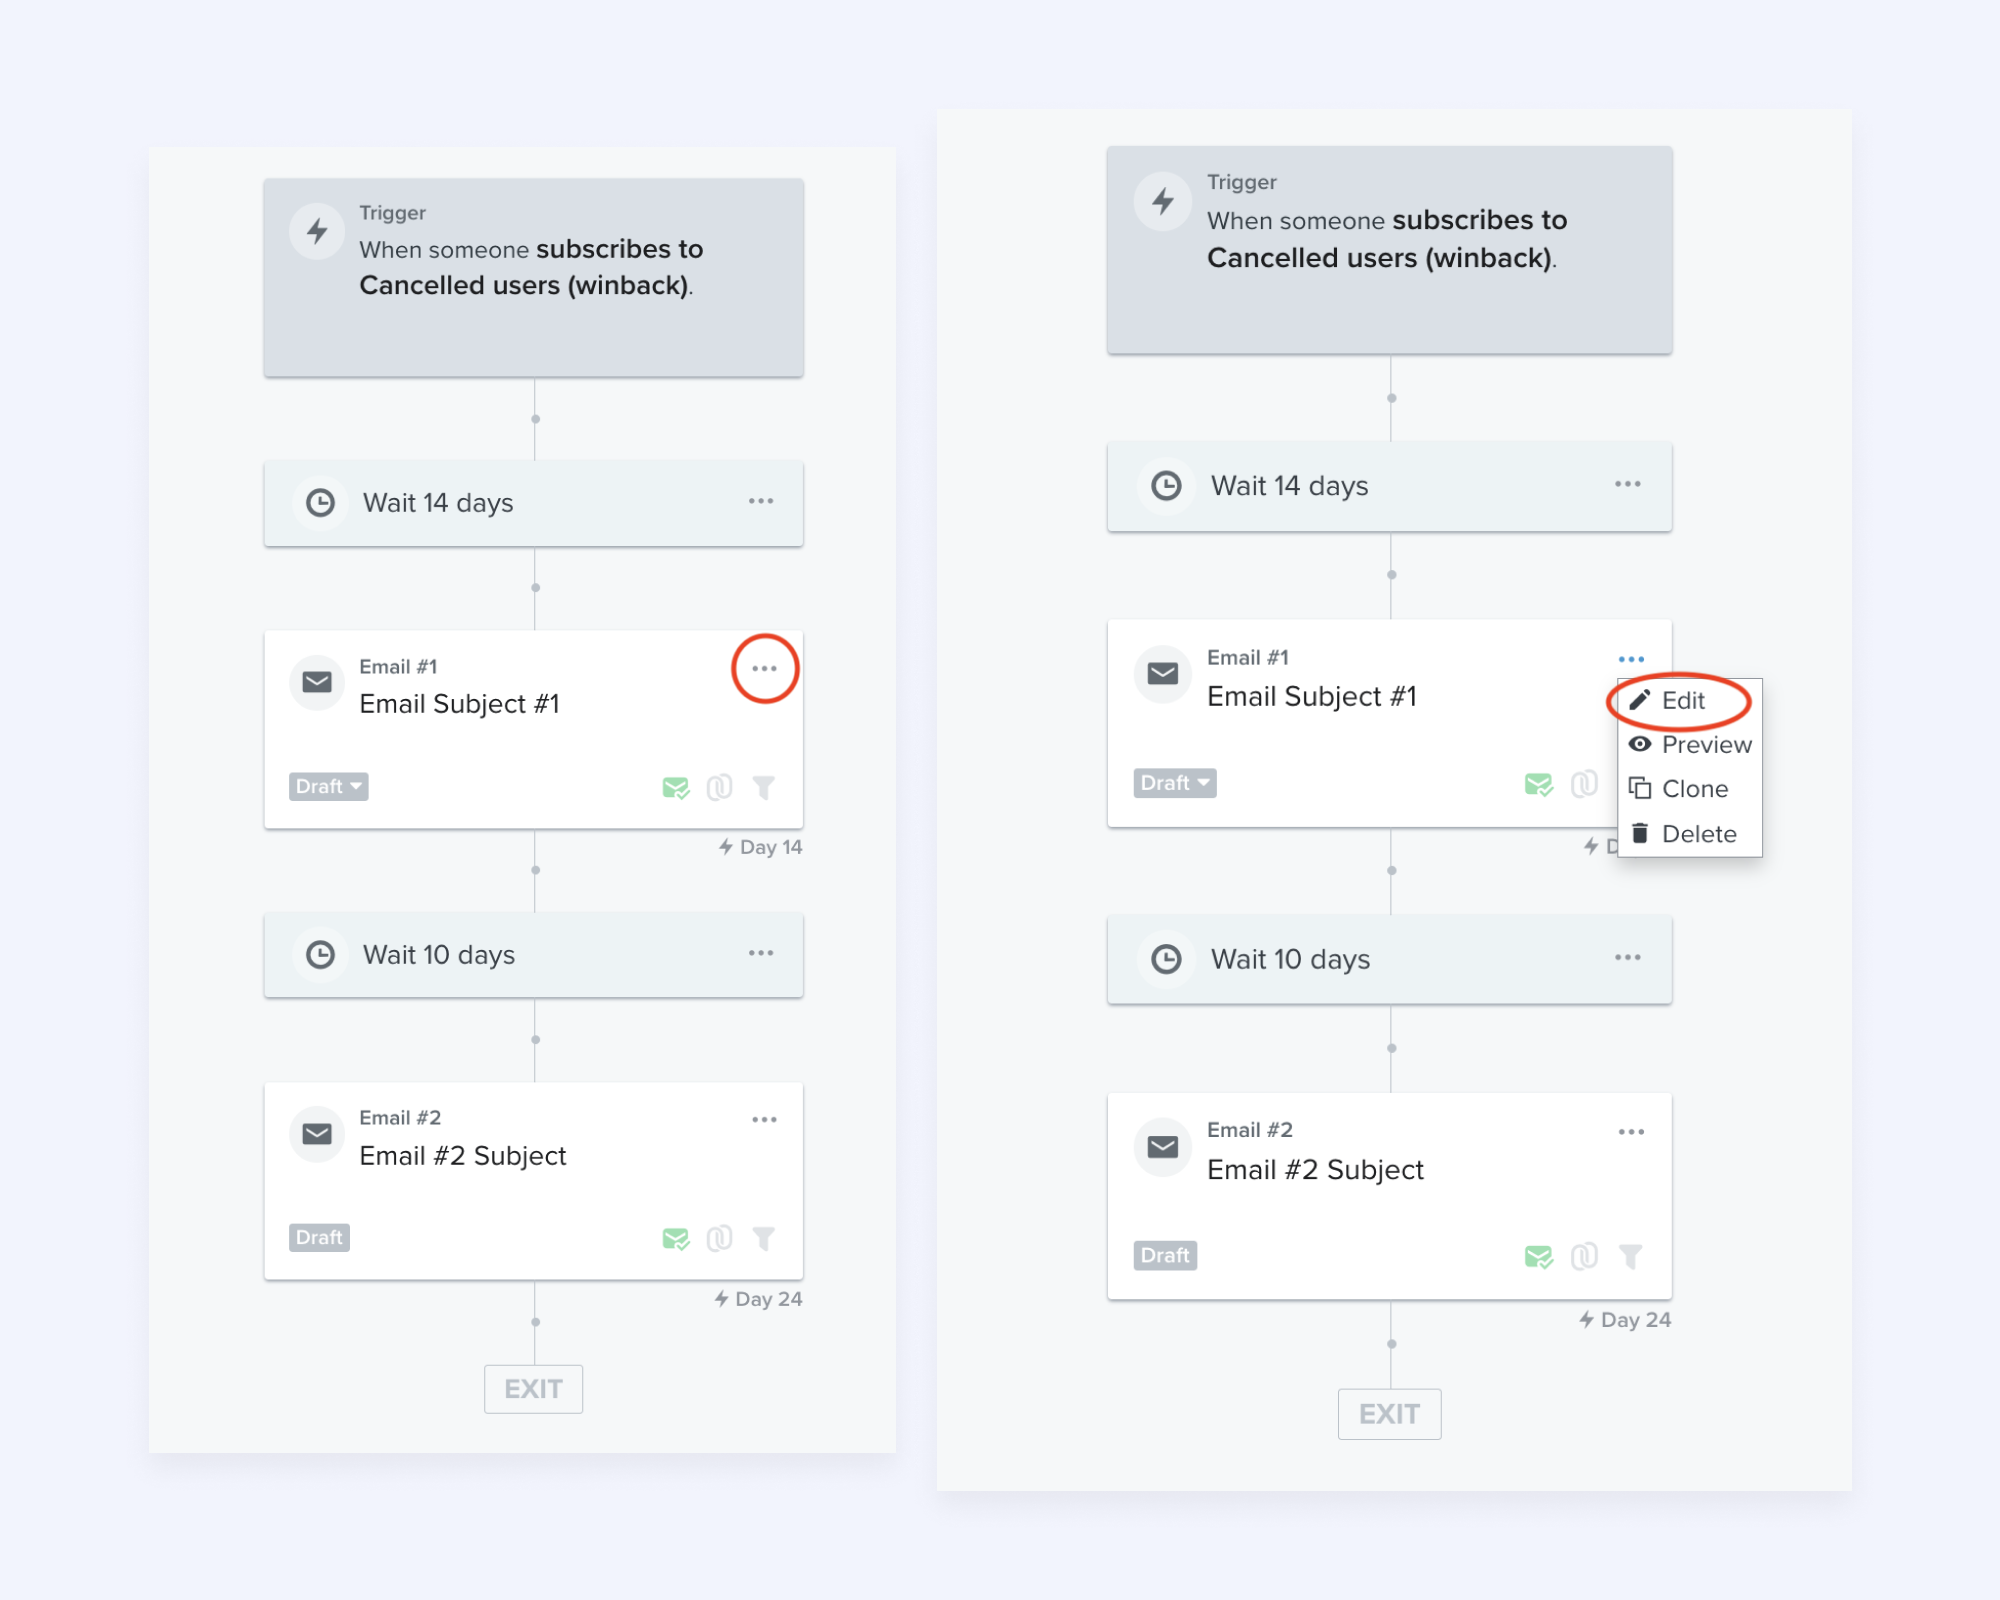
8. Now that your flow is set up, you can go in and design each win-back email. Click on the 3 dots in the corner of each email box and select “Edit”.
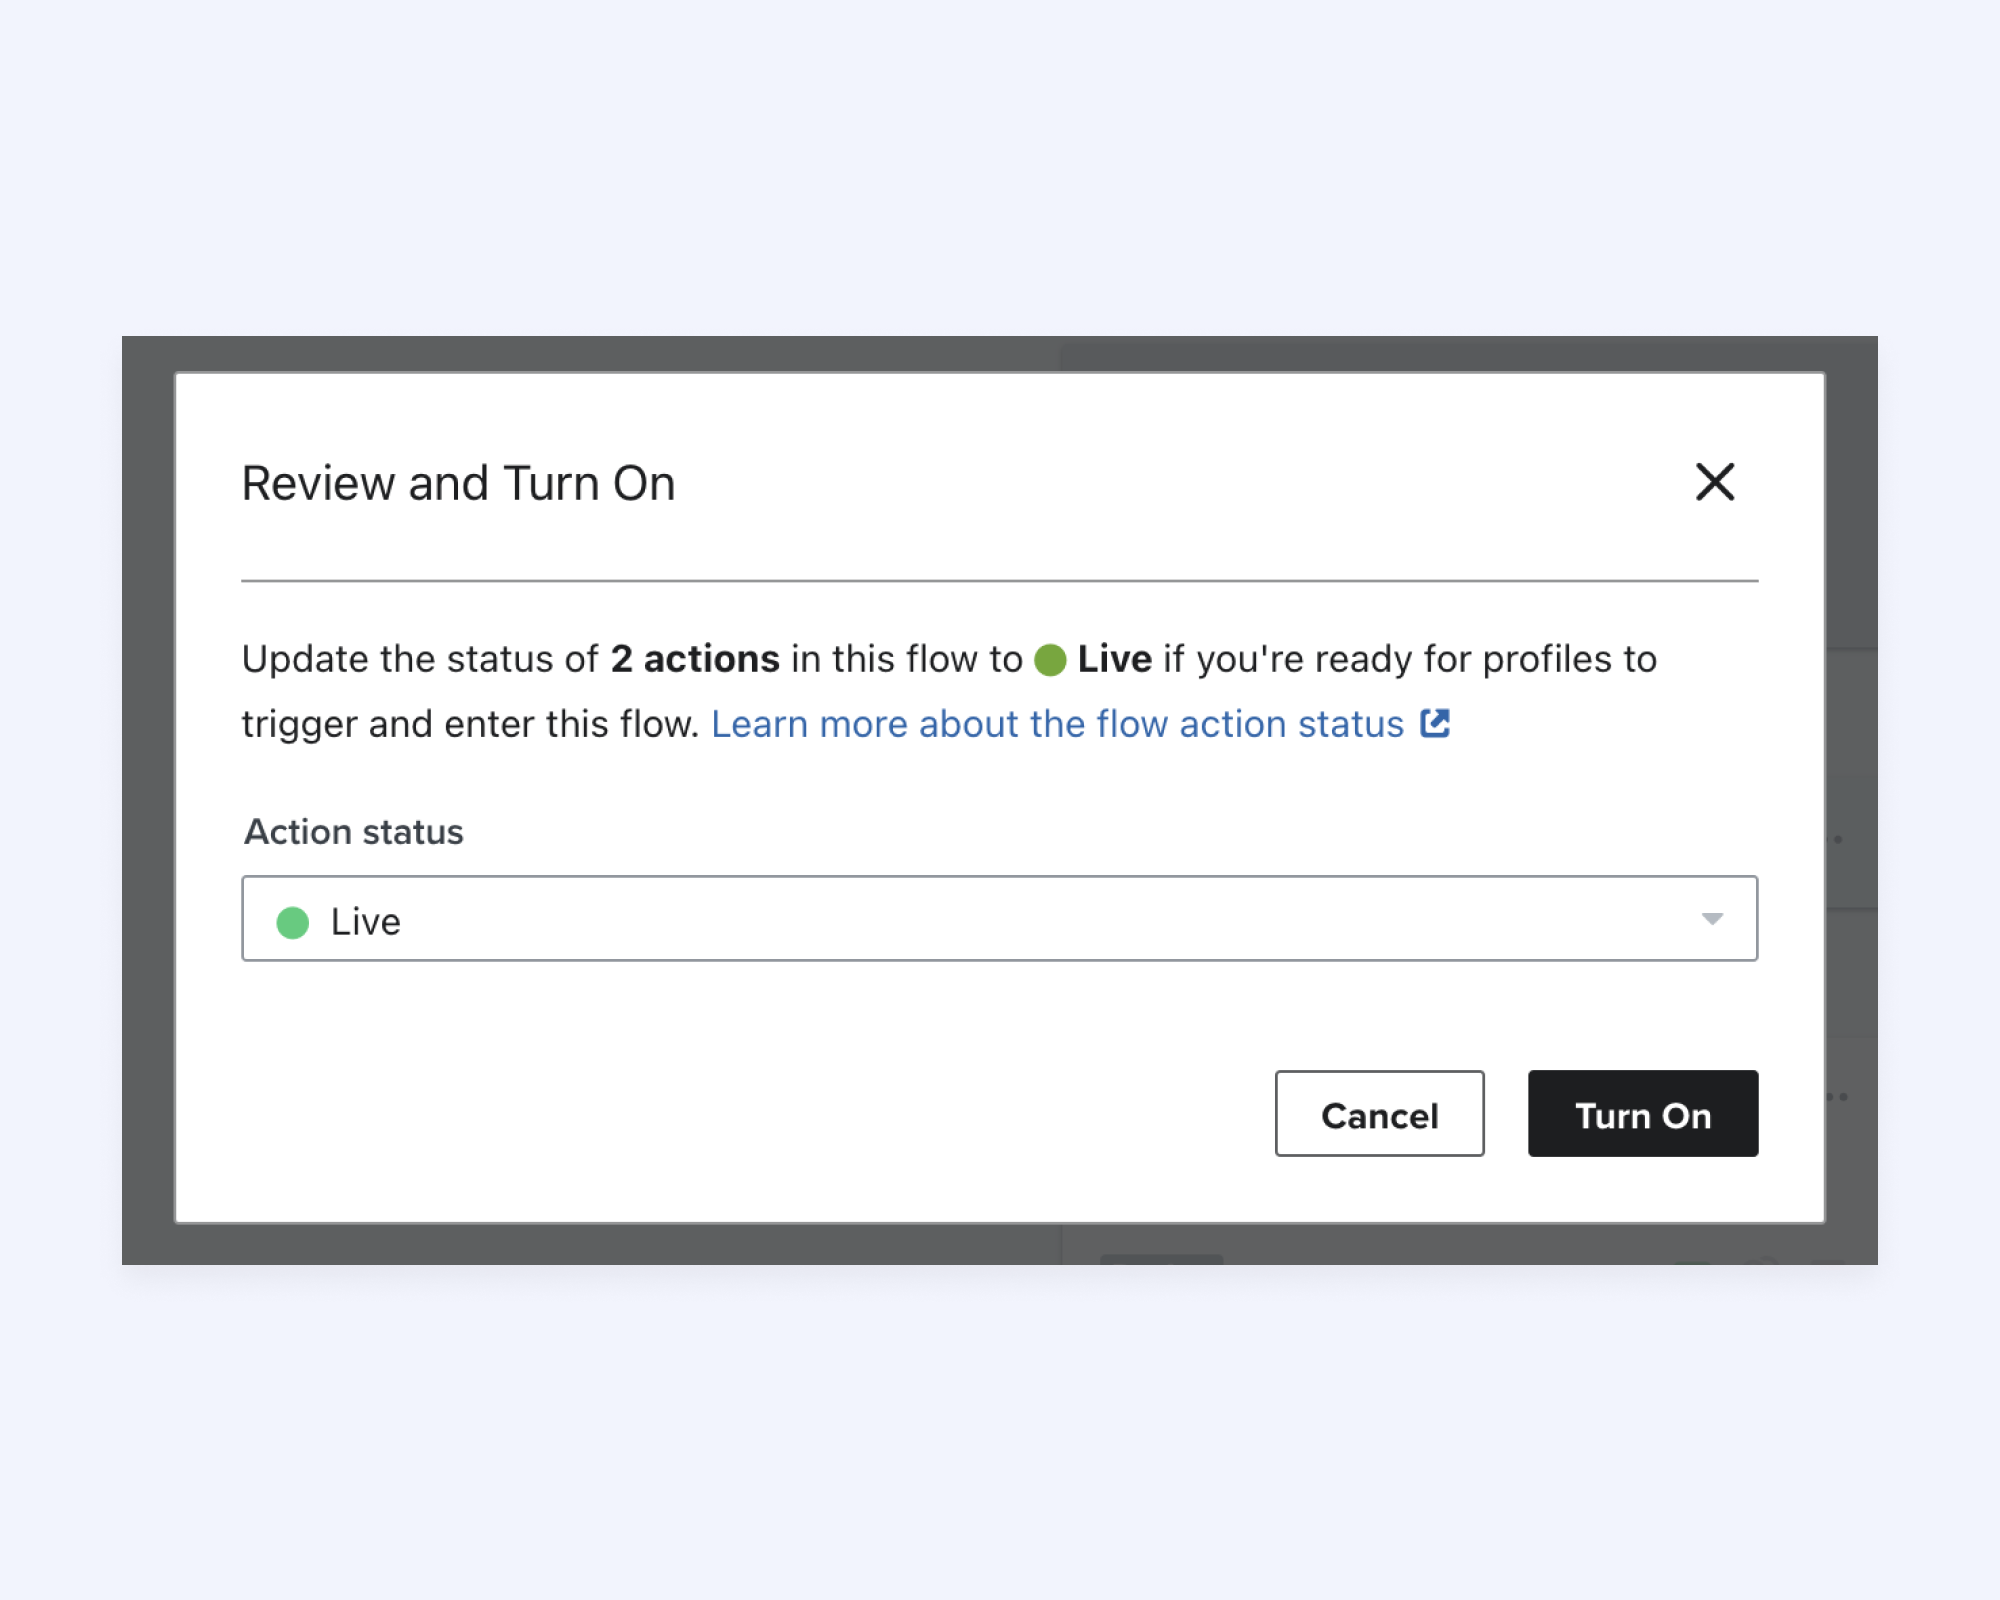
9. Once you’re done designing your emails, your automated email flow is ready! When you’re ready, turn it on by clicking “review and turn on” in the top right corner.

10. Set all action statuses to live and turn it on!
This process can be easily repeated for any automated email campaign you’d like to run. As a reminder, the available webhooks/campaigns you can run are:
New subscriber (welcome campaign)
New trial (welcome campaign)
Subscription renewal (notification of renewal)
Subscription cancel (notification of cancellation + win-back campaign)
Subscription upgrade (thank/acknowledge monthly to annual upgrade)
Subscription resumed (welcome back)